21060 26M N AA | X SER I E S
G5
| 119
a. View the scrolling parameters on the LCD. Verify that the Lithium Backup parameter
displays Yes. If it displays No, enable the Lithium backup.
b. Verify that the LL battery alarm does not display on the LCD. Or, measure the lithium
battery to verify that it registers more than 3.0 V. If the lithium battery is low, replace
the lithium battery first according to section 10.7.2 Replace the lithium battery.
Open the enclosure door.
Disconnect power source as described in section 10.5.1 Remove power from the electronic
board.
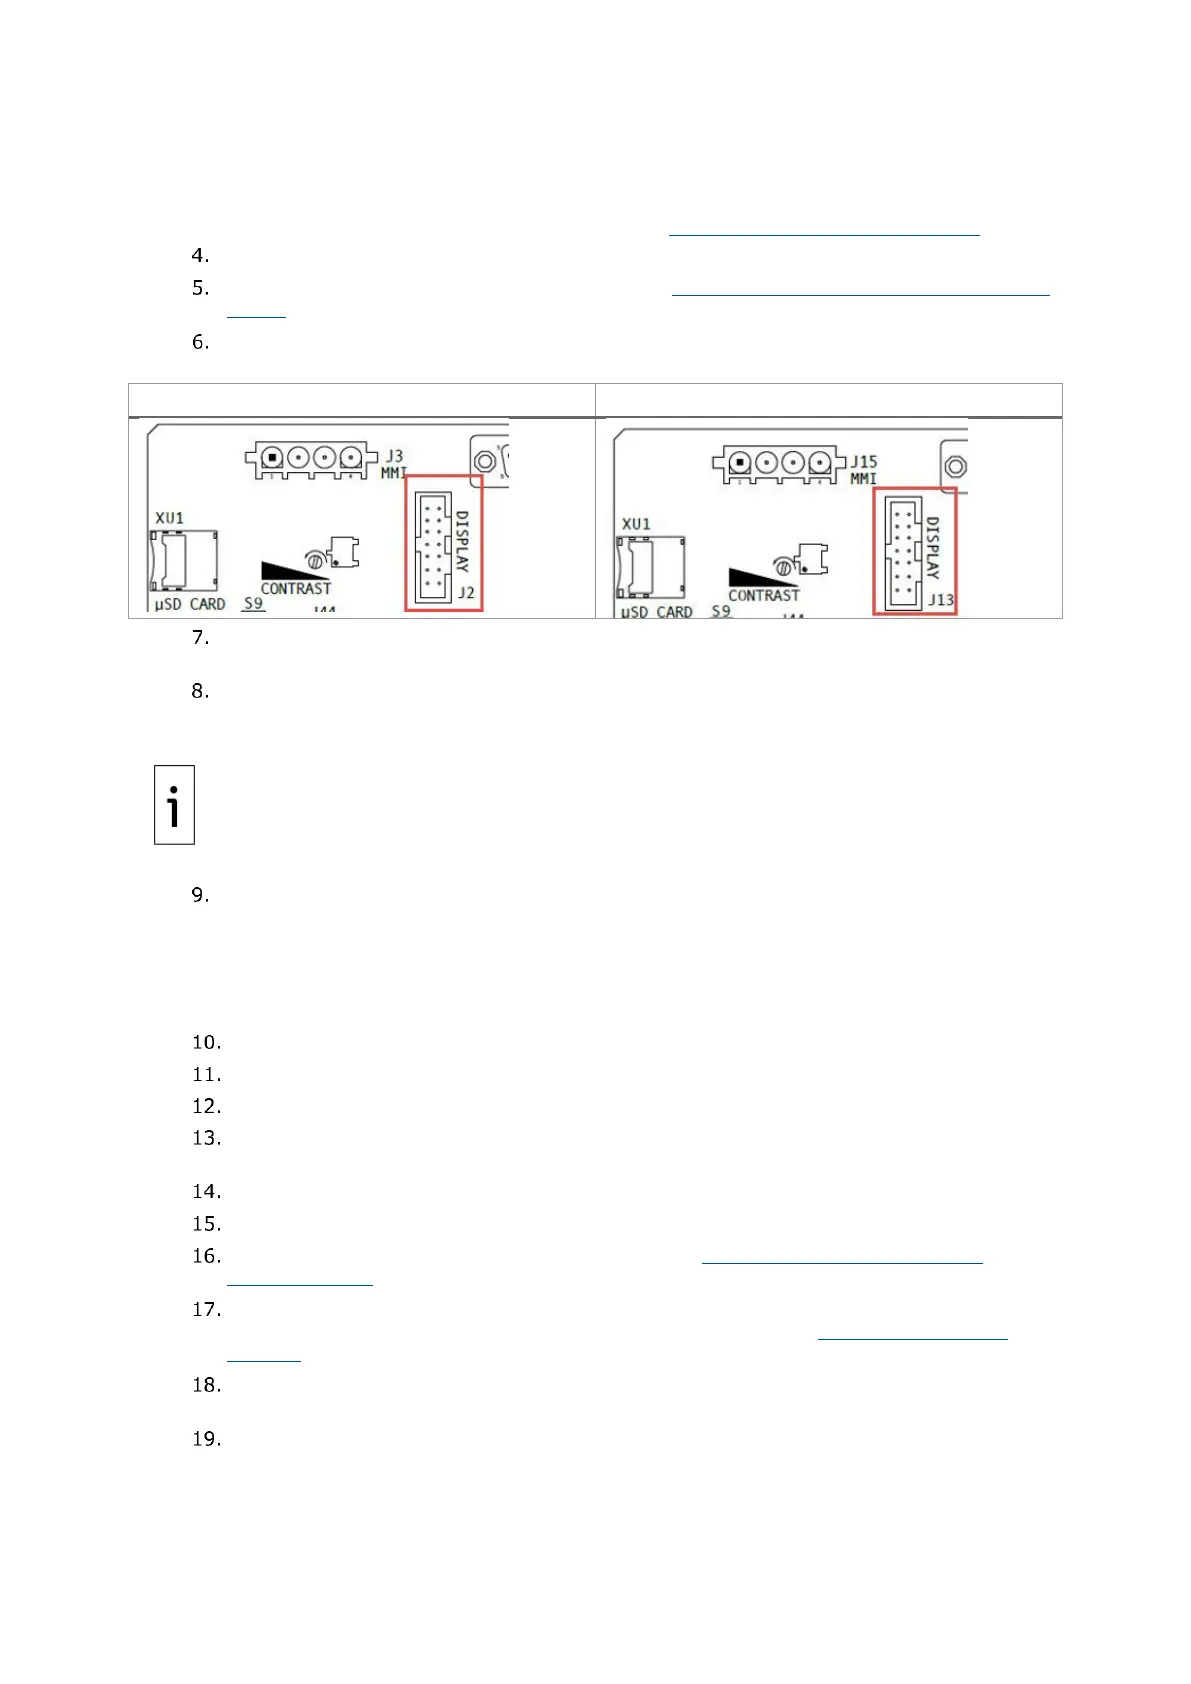
Locate the DISPLAY connector (J2 on the XFC
G5
and J13 on the XRC
G5
) on the top of the
electronic board. The LCD attaches to the connector with a multi-color ribbon cable.
Remove the LCD ribbon-cable connector from the DISPLAY connector. Gently rotate the
connector securing latches to the left and pull cable away.
If there is enough slack in connection cables those connections may be left intact as board
is pulled away from door. If required remove other connections from the board.
Remove the electronic board, being careful not to drop the mounting screws and washers:
a. Remove the mounting screw holding the ground wire at the bottom right corner of the
board. Then remove the hex standoff that held the screw.
b. Remove the three remaining screws from the three remaining corners and remove the
board.
c. Place the board on a safe, clean, non-metal surface.
Remove the four LCD hexagon mounting standoffs, using a 3/16" nut driver.
Lift the LCD from the door-mounted standoffs.
Install the replacement LCD and secure with standoffs.
Reinstall the electronic board. Do not tighten the screws until you have had time to verify
that the new LCD works properly.
Reinsert all removed connectors.
Connect the LCD ribbon cable and connector to the DISPLAY connector on the board.
Reconnect the power source as described in section 10.5.2 Reconnect power to the
electronic board.
Ensure that the LCD displays the startup sequence and the devices restarts. If unable to
see parameters displayed, adjust the LCD contrast. (See section 10.6, Adjust the LCD
contrast.)
If the LCD does not display parameters after contrast adjustment and checking that the
ribbon connector is firmly attached to the electronic board, call ABB technical support.
If the LCD had displayed the startup sequence properly and begins to scroll parameters as
programmed, tighten electronic board screws and close the enclosure door.

 Loading...