Chapter 6. Accounts Payable
Steps 30-33: PRINT INVOICE REGISTER
30 From the ACCOUNTS PAYABLE MENU, select 3 for Reports.
31 Select 7 for
Invoice Register.
32 Without changing the input parameters, print a hard copy of this report and file
with the other reports generated so far.
33 Return to the
ACCOUNTS PAYABLE MENU.
OPTIONAL: If you wish to add year-to-date balances for the vendors on the Dimensions system,
follow Steps 34-43 below.
34 From the ACCOUNTS PAYABLE MENU, select 2 for File Maintenance. Then select 2 for
Change Vendors.
35 Select 2 for
Change Selected Fields AM1.D.
36 Choose the method of adjustment:
1=Manually Select Each The computer asks you to select each vendor to be
Vendor changed, one at a time.
2=Automatically Select Next Select the first vendor to be changed and then the
Vendor in Number Order computer automatically selects the next vendor to
change, in numerical order one at a time.
3=Automatically Select Next Same as option 2 except uses vendor name order.
Vendor in Name Order
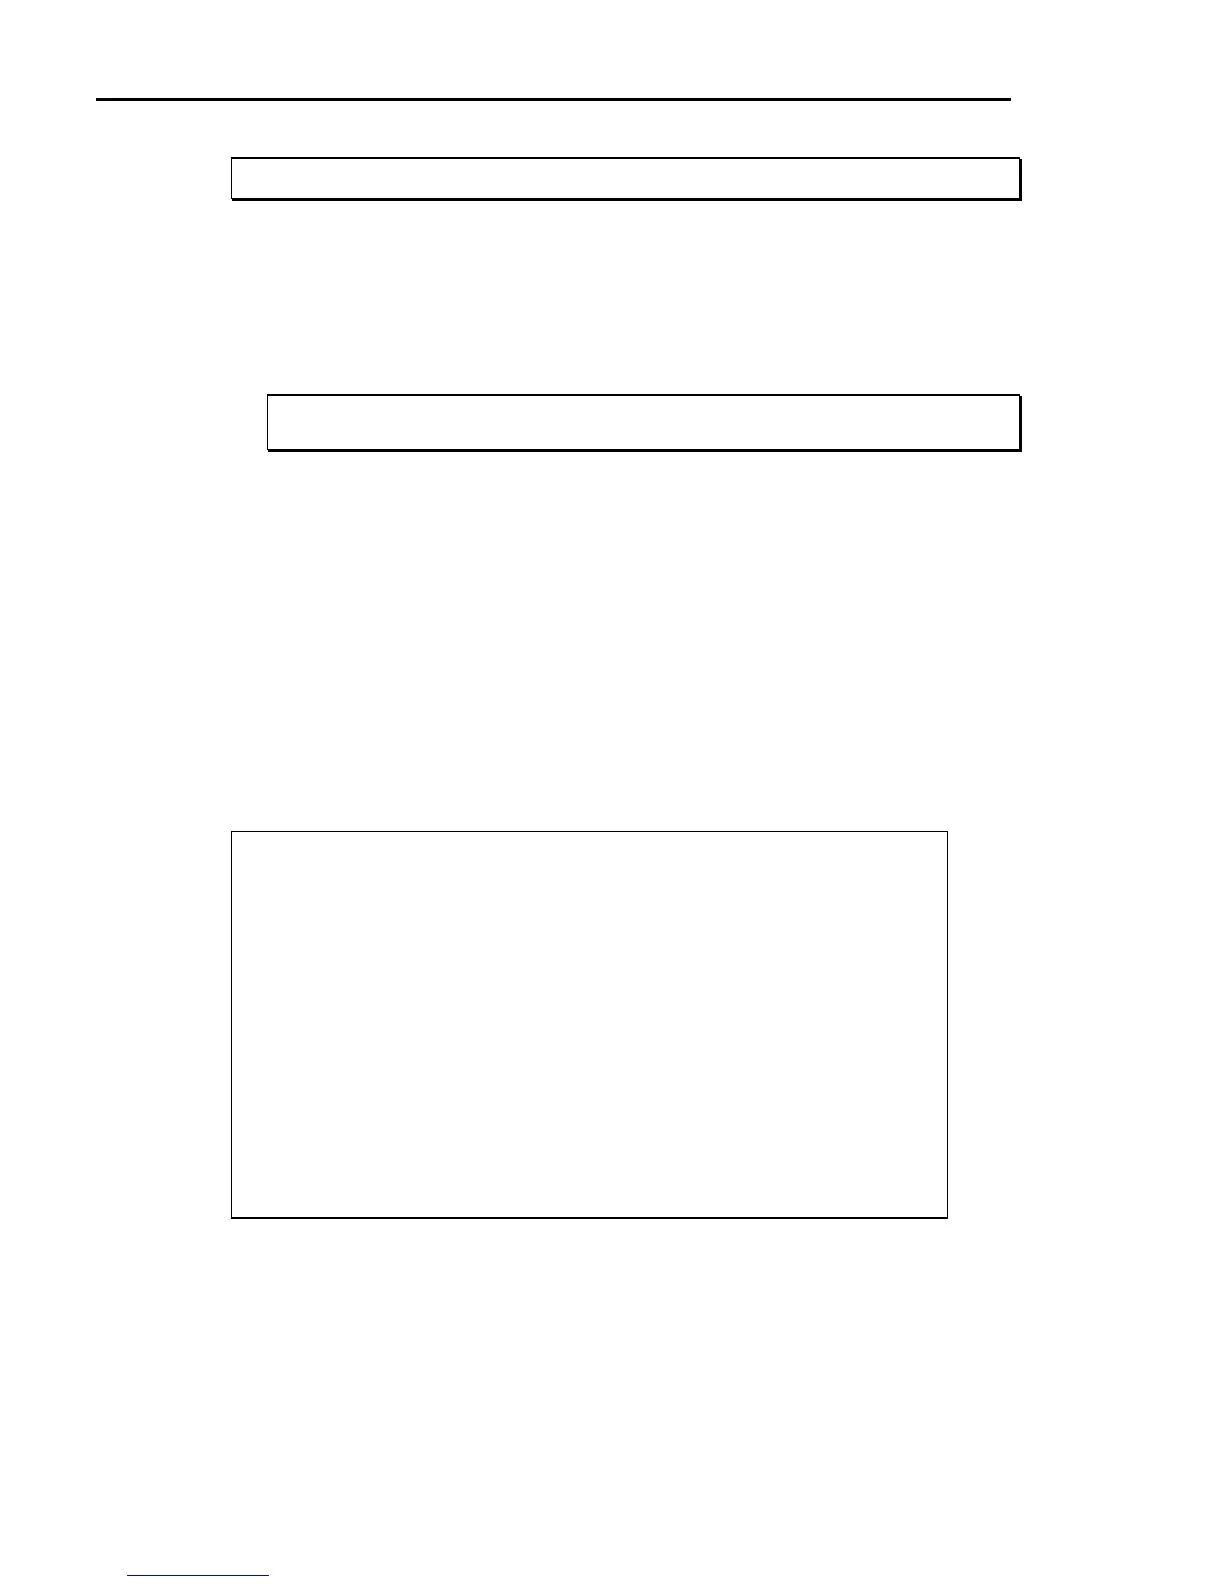
37 Then the computer displays:
DS05502 Change Select AM1 Fields DIM11 DATA Date mm/dd/yy
Rev11.0.1 Port 41
[ ] 3. Address 1 [ ] 4. Address 2 [ ] 5. Address 3
[ ] 6. Freight Terms [ ] 7. Terms Desc [ ] 8. Phone
[ ] 9. Contact [ ] 10. Send 1099 (Y/N) [ ] 11. 1099 ID
[ ] 12. Separate Chk P/Inv[ ] 13. Status (A,H,P,N) [ ] 14. Disc Terms (1,2)
[ ] 15. Discount Days [ ] 16. Discount Percent [ ] 17. YTD Purchases
[ ] 18. Discounts Taken [ ] 19. Discounts Lost [ ] 20. Last Check Date
[ ] 21. Last Invoice Date [ ] 22. Amount Paid [ ] 23. Balance Oweing
[ ] 24. Pay To Vendor [ ] 25. P.O. Address 1 [ ] 26. P.O. Address 2
[ ] 27. P.O. Address 3 [ ] 28. G/L Debit Account [ ] 29. Vendor Type
[ ] 30. Minimum Order [ ] 31. Lead Time(Months) [ ] 32. Cutoff Date
[ ] 33. Auto Add OM4 [ ] 34. Catalog Default [ ] 35. Cost Default
[ ] 36. Fax Number
Put an 'X' in the fields you wish to change.
Press <UpA> if you are finished selecting fields.
Enter an X in the following fields:
17. YTD Purchases
18. Discounts Taken
22. Amount Paid
To skip a field, press Enter. To go back a field, press Esc. When you are done
selecting fields, press up arrow (
).
260 Dimensions 14