Chapter 2: Setup
17
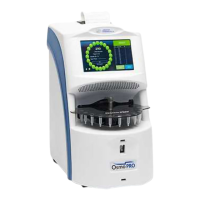
OsmoTECH PRO Multi-Sample Micro-Osmometer Service Guide
2.3 Setting up the instrument
Refer to the Installation and setup chapter in the
OsmoTECH PRO User’s Guide (p/n 222005UG) for
instructions on removing the ship stop and installing the
turntable.
2.4 Connecting to a network (optional)
To connect the OsmoTECH PRO to a network, plug an
Ethernet cable connected to the network into the
Ethernet port on the back of the OsmoTECH PRO (see
Rear view).
2.5 Powering up the instrument
NOTE: See Rear view for the location of the power
connector and power switch.
1. Connect the power cord to the back of the
instrument and insert the plug into the power outlet.
2. Power on the instrument using the switch on the
back.
When the unit powers up, the splash screen appears.
3. If one of the following messages appears after
starting up, follow the associated instructions:
• Preventive Maintenance Required - Have an
Advanced Instruments trained service engineer
perform any scheduled maintenance and record it
on the DIAGNOSTICS > MAINTENANCE screen (see
Logging preventative maintenance).
• Installation date not set. Refer to the User Guide -
Follow the instructions in the next section (Setting
the installation date).
Setting the installation date (Administrators only)
If the installation date of the instrument has not been
entered into the system, a Installation date not set. Refer
to the User Guide message appears the first time an
instrument powers up. If the installation date is not set,
this message reappears every hour.
Complete the following steps to enter the installation
date to disable this message and enable the preventative
maintenance reminders based on this date.
1. Press > DIAGNOSTICS > DATA MAINTENANCE
and log in.
2. Press the INSTALLATION tab.
3. Press the Installation Date field, select a date
(required) from the calendar, and press OK.
Make sure you select the correct date. The
installation date cannot be changed once it is saved.
4. Press EDIT to type a Comment (required - up to 1024
characters) to explain why the
installation date was
reset.
5. Press Save.
6. Press Exit to return to the Diagnostics menu.

 Loading...
