Chapter 5: Configuring settings
44
OsmoTECH PRO Multi-Sample Micro-Osmometer Service Guide
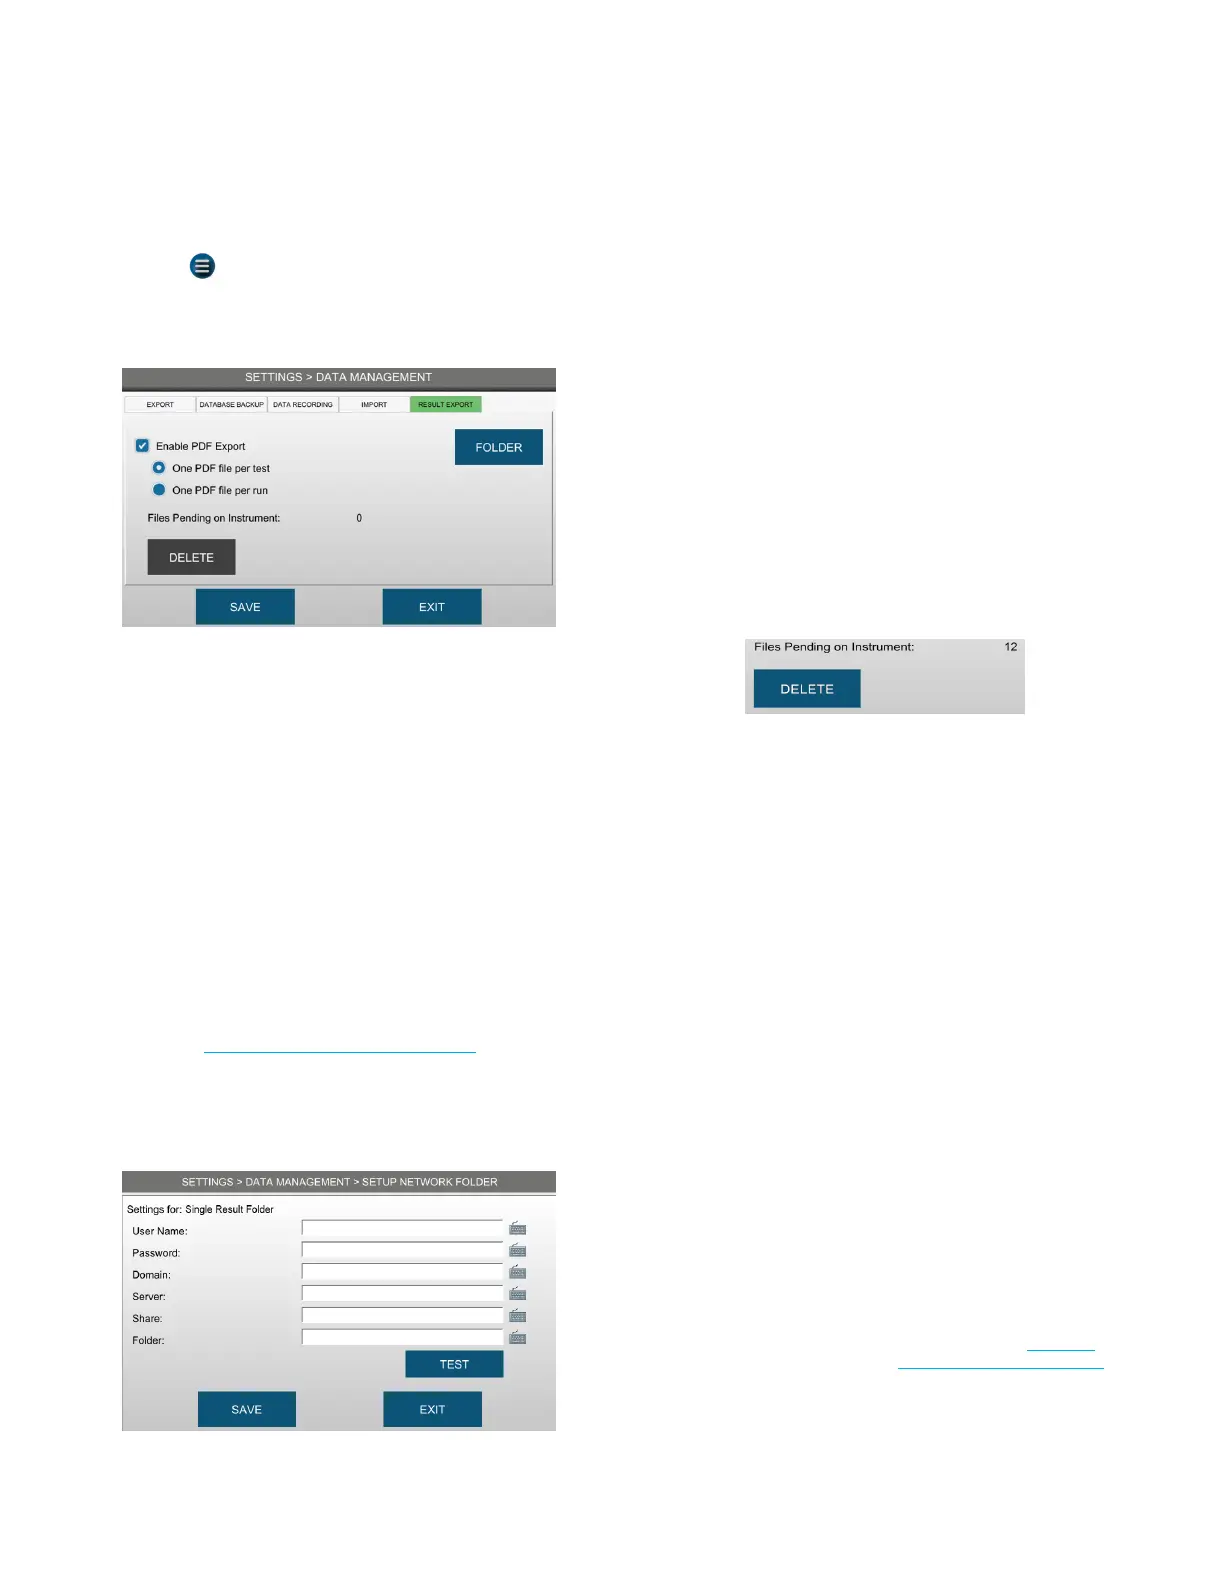
1. Press > SETTINGS > DATA MANAGEMENT and
login with a user ID and password.
2. Press the RESULT EXPORT tab.
3. Select the Enable PDF Export checkbox.
4. Select one of the following options:
• One PDF file per test - Each PDF file contains a
single test result.
• One PDF file per run - Each PDF file contains a
complete run of test results.
NOTE: The One PDF file per run option is disabled
if the Review of Results and/or Approval of
Results checkbox is selected on the
Auditing tab, the Sample ID and User ID
checkboxes are selected automatically. To
disable the Sample ID and/or User ID
requirements, you must first disable Review
of Results and Approval of Results (see
Configuring audits of test results)
5. Select Network and press FOLDER.
6. Enter the user and network folder information.
7. Press TEST to verify that the instrument can access
the folder.
NOTE: Contact your network administrator if the
instrument cannot access the folder over the
network.
8. Press SAVE.
9. Press EXIT to return to the RESULT EXPORT tab
NOTE: Administrators have the option to delete
result PDF files stored on the instrument.
Depending on how often you export results
to PDF, you should delete these files
occasionally to free up data storage space.
Result PDFs only become pending if they
cannot be sent to the designated network
folder—for example, if the device becomes
disconnected from the network.
NOTE: Press DELETE.
NOTE: Press Yes to delete all single
result PDFs, or No to cancel the deletion.
10. Press SAVE .
Each time a test is run, its results are automatically
prepared either individually or in a batch for export to
the selected network folder.
5.7 Assigning user restrictions
Administrators can set which features supervisors and
operators can access before or after adding users to
the instrument.
Administrators and authorized Supervisors can allow or
restrict Operators and from performing the following
operations.
• Change the system
language
• Enable and configure
networking
• Change the system date/
time
• Calibrate the instrument
• Set the probe resistance
• Clean the instrument
(perform maintenance)
• Align the turntable
• Change hardware options
• Edit controls
• Enable/disable OPC/UA
remote lock (see OPC-UA
Features and Configuration)