16
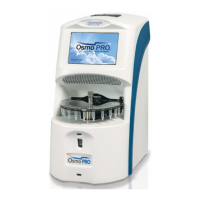
OsmoTECH PRO Multi-Sample Micro-Osmometer Service Guide
Chapter 2: Setup
This chapter describes how to set up the
OsmoTECH PRO in the laboratory.
2.1 Location requirements
Select a location based on the following space and
electrical requirements.
Dimensions
15.3” D x 10” W x 18” H (39 cm D x 25 cm W x 46 cm H)
Recommended clearance
Allow 6 inches (15 cm) of clear space on each side of the
instrument.
Do not block the exhaust fan’s airflow on the back panel
or underneath the instrument.
Electrical requirements
Your instrument must be located within five
feet of a properly grounded, three-prong
electrical outlet capable of continuously
supplying 0.5 amperes at 100–240 VAC
(50–60Hz).
If the instrument is not grounded properly, its
operation may be impaired and a safety hazard
may exist. Verify that the outlet is appropriate
before operating the instrument.
Do not disable the grounding plug.
2.2 Unpacking (first time setup)
The first time you setup the instrument, carefully unpack
the contents and inspect for damage.
• Use the enclosed packing list to verify receipt of items.
• Save shipping material to transport the instrument.
• Complete the online warranty card to register the
instrument.
Qty Description
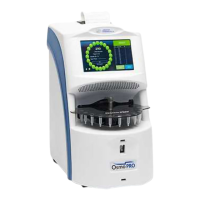
1 OsmoTECH® PRO
1 30-µL pipette
1 Turntable
1 Evaporation cover
1 Barcode ID tag kit
1 Power cord
1 User Guide on USB drive
1 OsmoTECH PRO Routing Maintenance Card
Reporting missing or damaged items
• Missing items: Notify your receiving department
immediately. Advanced Instruments is responsible for
missing items only if reported within 10 days of arrival.
• Damaged items: The insurer will inspect shipping
material.
– Notify the dealer and Advanced Instruments within
24 hours to ensure that your warranty and insurance
can be applied.
– Ask the transportation company to inspect the
items, complete a Report of Concealed Damage, and
file your claim.
– Contact Advanced Instruments immediately for
repair or replacement of items (see Contacting
Advanced Instruments).

 Loading...
