Chapter 3: Calibration
25
OsmoTECH PRO Multi-Sample Micro-Osmometer Service Guide
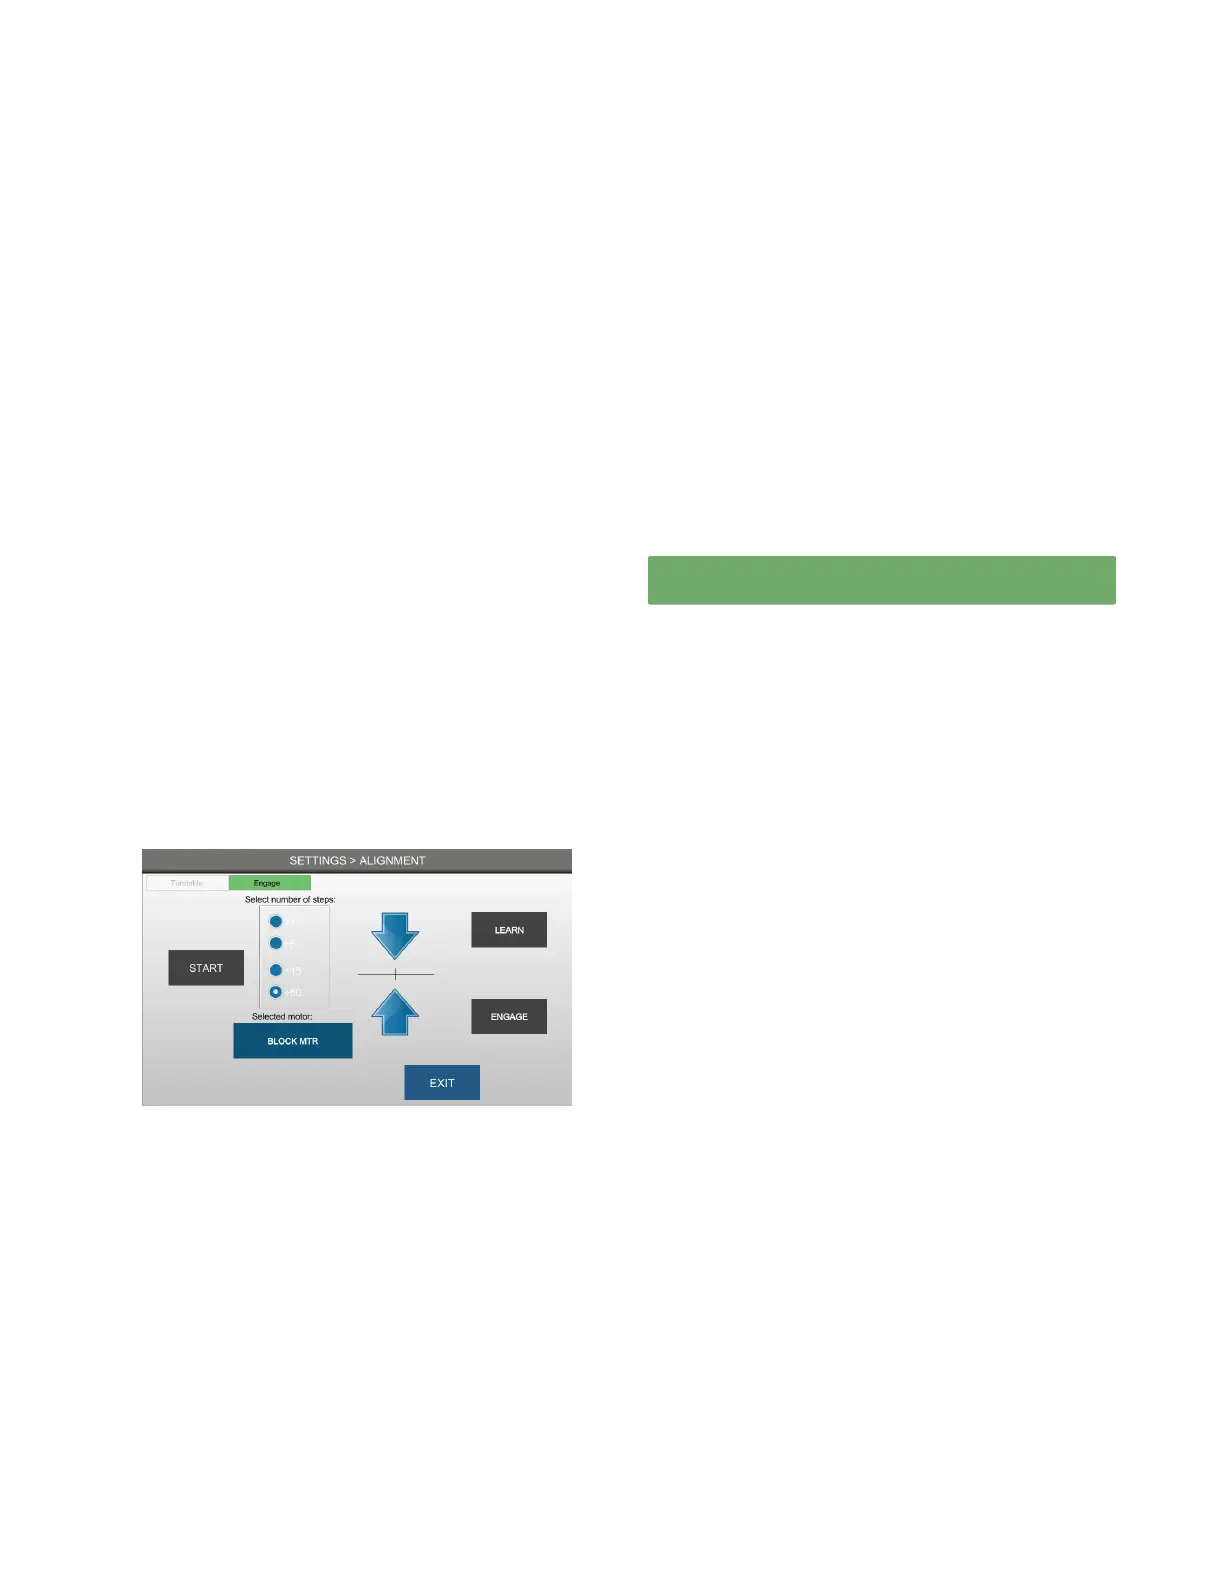
Verifying the turntable alignment
1. From SETTINGS, press ALIGNMENT > Engage.
2. Press WIPE TEST > RETURN.
3. Carefully observe as the sample probe lowers into
the wipe holes at positions 1, 6, 11, and 16.
• To adjust the sample probe height or centering,
select the number of steps.
• Use the arrows to readjust the wipe position
4. Press LEARN.
3.5 Checking the positioning of the sample
probe and cooling assembly
This procedure confirms that the sample probe and
turntable engage properly.
NOTE: You need part number 112170FX, sample tube
height positioning fixture (sample tube fixture).
1. From SETTINGS, press ALIGNMENT > Engage >
START.
2. Load an empty sample tube in the position indicated
in the prompt.
The sample probe and cooling assembly partially
engage.
3. Place the sample tube fixture between the underside
of the stripper bracket and the top surface of the
sample tube.
NOTE: The U cutout in the fixture spans the body of
the sample probe.
4. Make sure that BLOCK MTR is selected.
5. Raise the cooling assembly until the sample tube
fixture is gently wedged between the underside of
the stripper bracket and the top surface of the
sample tube.
NOTE: You should be able to remove the fixture
with little eort.
6. Press BLOCK MTR until SAMPLE MTR is selected.
7. Remove the sample tube fixture and carefully lower
the sample probe until there is minimal interference
between the sample tube and the sample probe.
IMPORTANT: Excessive interference damages
mechanical components.
8. Try to lift the sample tube out of the cooling well
using the sample tube fixture.
If you can lift the sample tube, there is interference
between the sample tube and sample probe.
9. Press LEARN.
10. The sample probe and cooling assembly disengage
and the turntable rotates.
Verifying sample probe positioning
1. Press ENGAGE and DISENGAGE intermittently.
2. Observe the sample probe and cooling assembly
engage.
3. Make sure the sample tube’s height position is
correct using the sample tube fixture (if necessary).
4. Verify that the sample tube is properly clamped.
5. Make adjustments and press LEARN.