Appendix C: OPC-UA Features and Configuration
59
OsmoTECH PRO Multi-Sample Micro-Osmometer Service Guide
Example of a Remote OPC Setup
IMPORTANT: The following information Is presented
only as an example. Workflow and use may dier based
on the remote OPC application used along with other
factors.
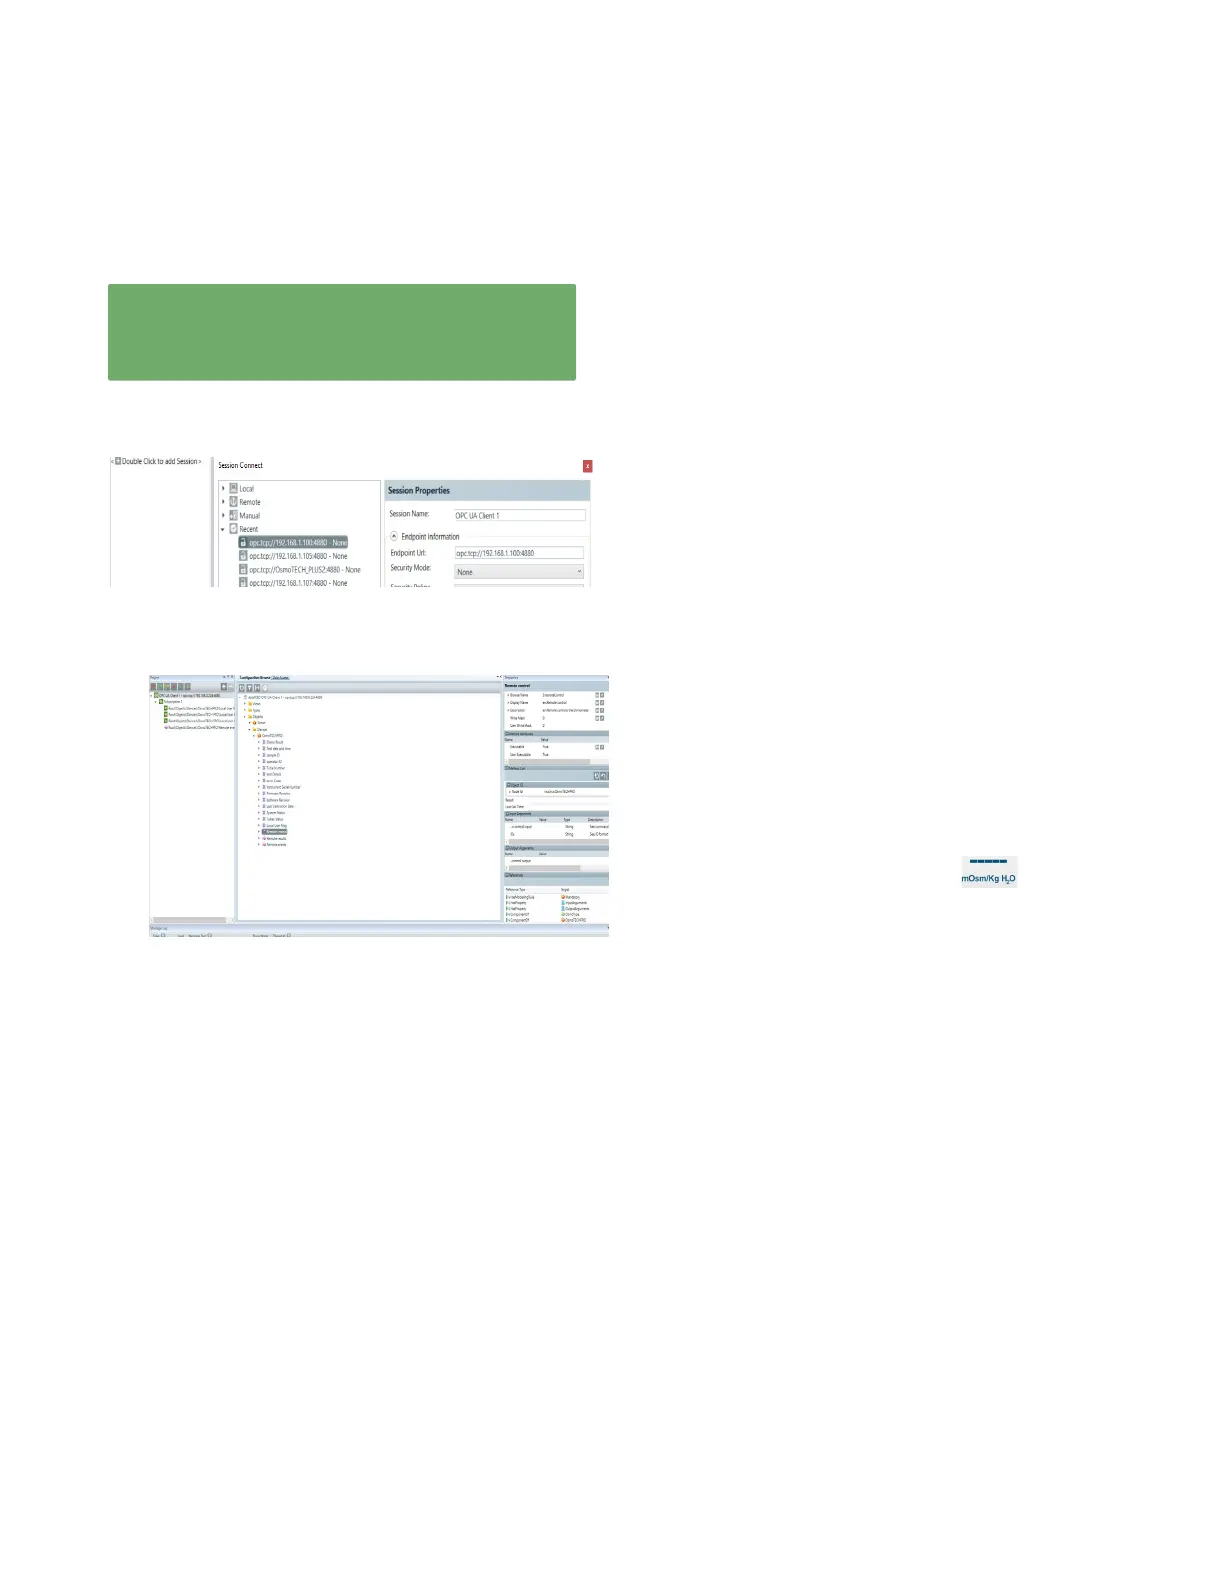
1. The remote OPC user connects to an OPC server via
a client software session:
Traversing nodes in client shows osmometer data
similar to below.
2. Right-click on the instrument to display the
properties window and gain access to the Remote
control (highlighted below) and Remote results
method calls.
3. Use the method call window to submit commands
(LOCK, UNLOCK, START, CANCEL) with the
following input arguments
Argument-1: Remote control input
Argument-2: IDs consists of a semicolon-delimited
list of each of sample ID in a test:
BatchA#1;BatchA#2;…
The normal test workflow then proceed as follows:
4. The OPC user enters LOCK in the Remote control
input argument and submits the method call via
client to attempt to lock the remote instrument.
5. The OPC user checks the output message of the call
and the Local User Msg value shown for any system/
user response message to this command, such as
LOCKED.
6. If successful, the OPC user enters the string of
sample IDs in the IDs argument
Enter sample IDs to be used as a list separated by ;
(semicolons) in the IDs input argument to the
Remote Control method. The instrument verifies that
there are enough available tube positions to perform
the number of tests in the list.
7. Enter START in the Remote control input and submit
this method call.
If the turntable is already on the instrument from
earlier tests, the user is prompted to load each
sample in the list in the position chosen by the
instrument.
If the turntable was just put on the instrument, the
available tubes are matched to the appropriate
sample ID as sent in the START command. The only
verification in this case is the list on the right side of
the instrument display which shows the positions
with their assigned sample ID and indicating
where the result value will be shown.
The result value appears when the test has been
performed. If the user selects to Cancel during the
loading process or when prompted to start the tests,
a record of the canceled sample IDs are saved to the
event table.
– The OPC user can check test status in the Test
Progress value at any point while the test runs. This
status will be READY (no plate currently testing),
BUSY (plate is active), TESTING, or ERROR.
– The OPC user can submit a CANCEL and/or UNLOCK
request, although it is strongly recommended to
avoid UNLOCK of the system during a running test.
– The OPC-user should UNLOCK the system to permit
local user access when all testing is completed.
Otherwise, a local user can unlock the instrument by
tapping anywhere on the locked screen and entering
login credentials (not normally recommended).
– The OPC user can examine the contents of Local
User Msg to verify a state of UNLOCKED.
– The OPC user can send a Remote Results request at
any time to examine recent results saved in the
database.