MM-400A
9. Measurement
9-18
10) Set items in the BASIC SETUP screen according to the type of welding power
supply used. (For more information, refer to (2) l-1 in Chapter 8 and (1) 8) in
Chapter 9.)
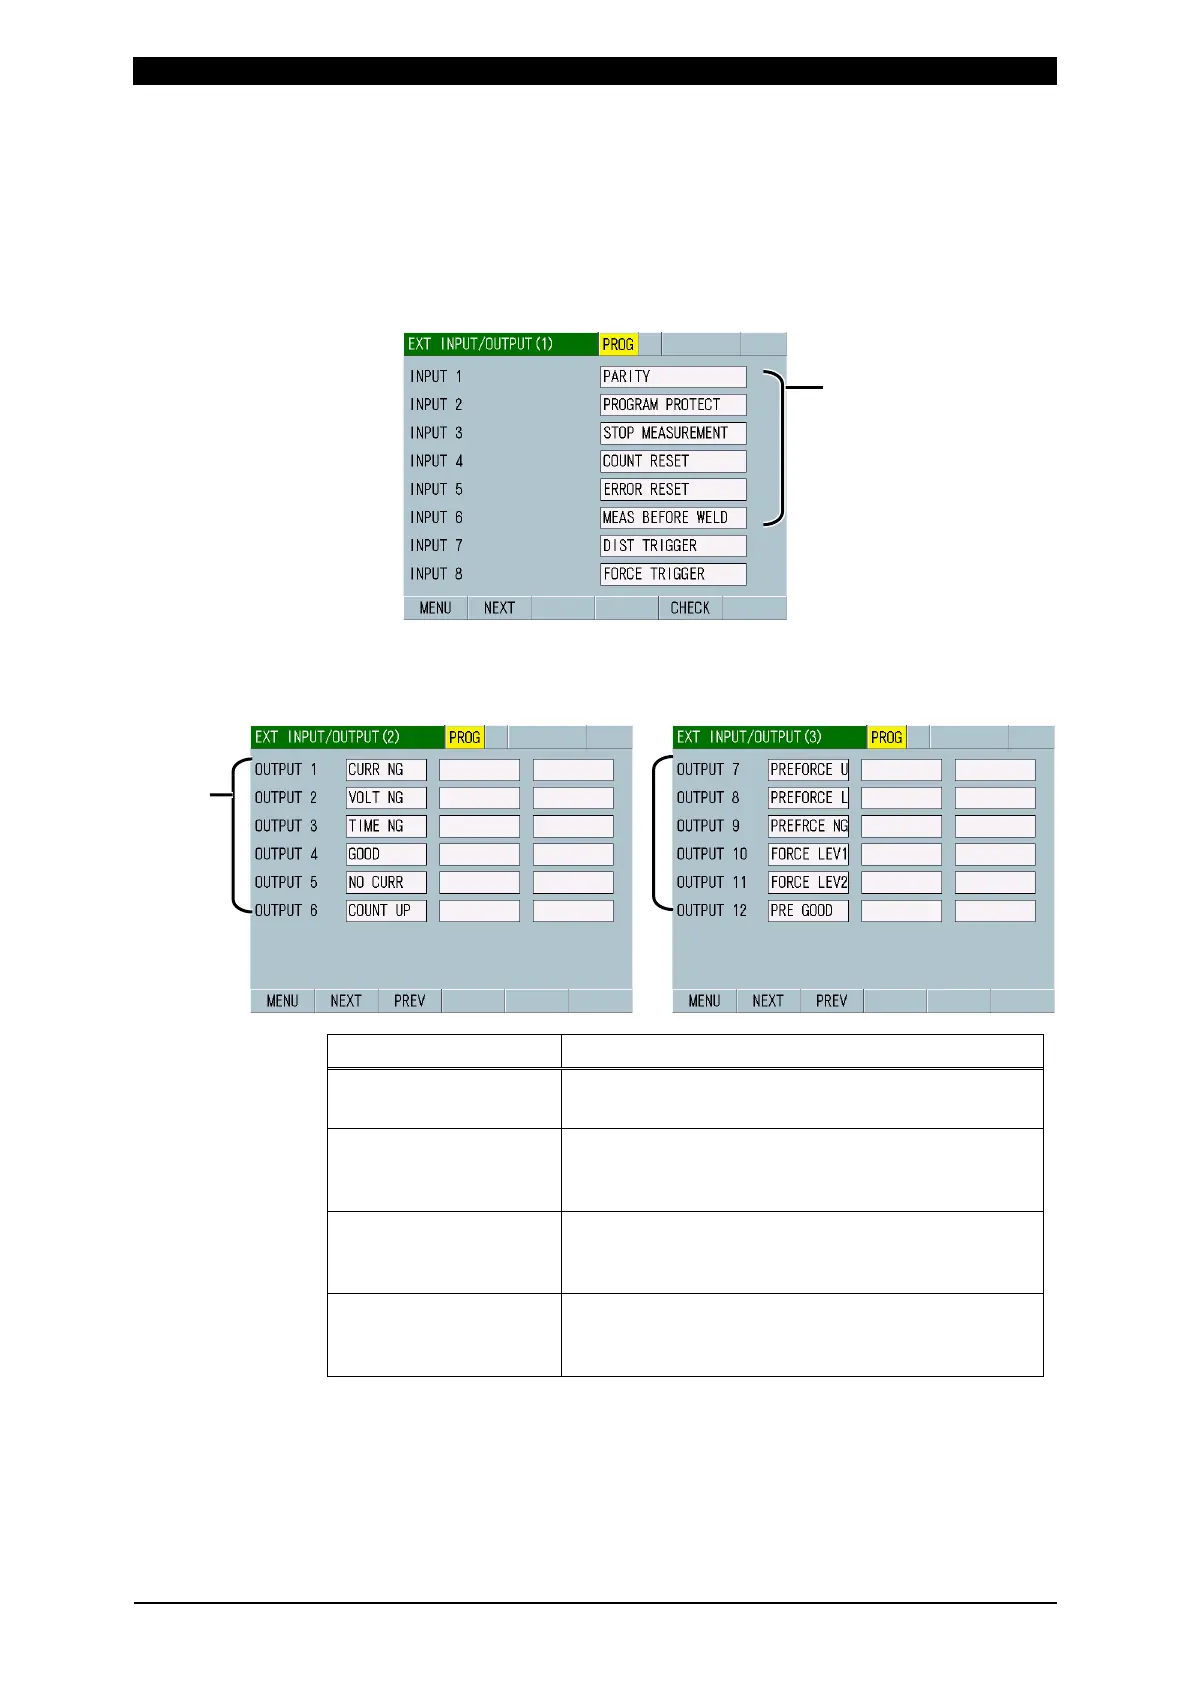
11) Touch the MENU key to select EXT INPUT/OUTPUT.
Set MEAS BEFORE WELD in one of INPUT 1 to 6 on the EXT
INPUT/OUTPUT (1) screen. (For more information, refer to (2) o-1 in Chapter
8.)
12) Select the EXT INPUT/OUTPUT (2) or (3) screen.
Set the following items in one of OUTPUT 1 to 12, as necessary. (For more
information, refer to (2) o-2 in Chapter 8.)
PRE GOOD:
Normal before welding
Output when the measured value before a welding
start is within the upper and lower limits.
PREFORCE NG:
Force before welding
error
Output when the force before a welding start
exceeds the upper limit or falls below the lower limit.
PREFORCE U:
Force before welding
upper limit error
Output if the force before a welding start exceed the
upper limits.
PREFORCE L:
Force before welding
lower limit error
Output if the force before a welding start fall below
the lower limits.
MEAS BEFORE WELD