MM-400A
9. Measurement
9-20
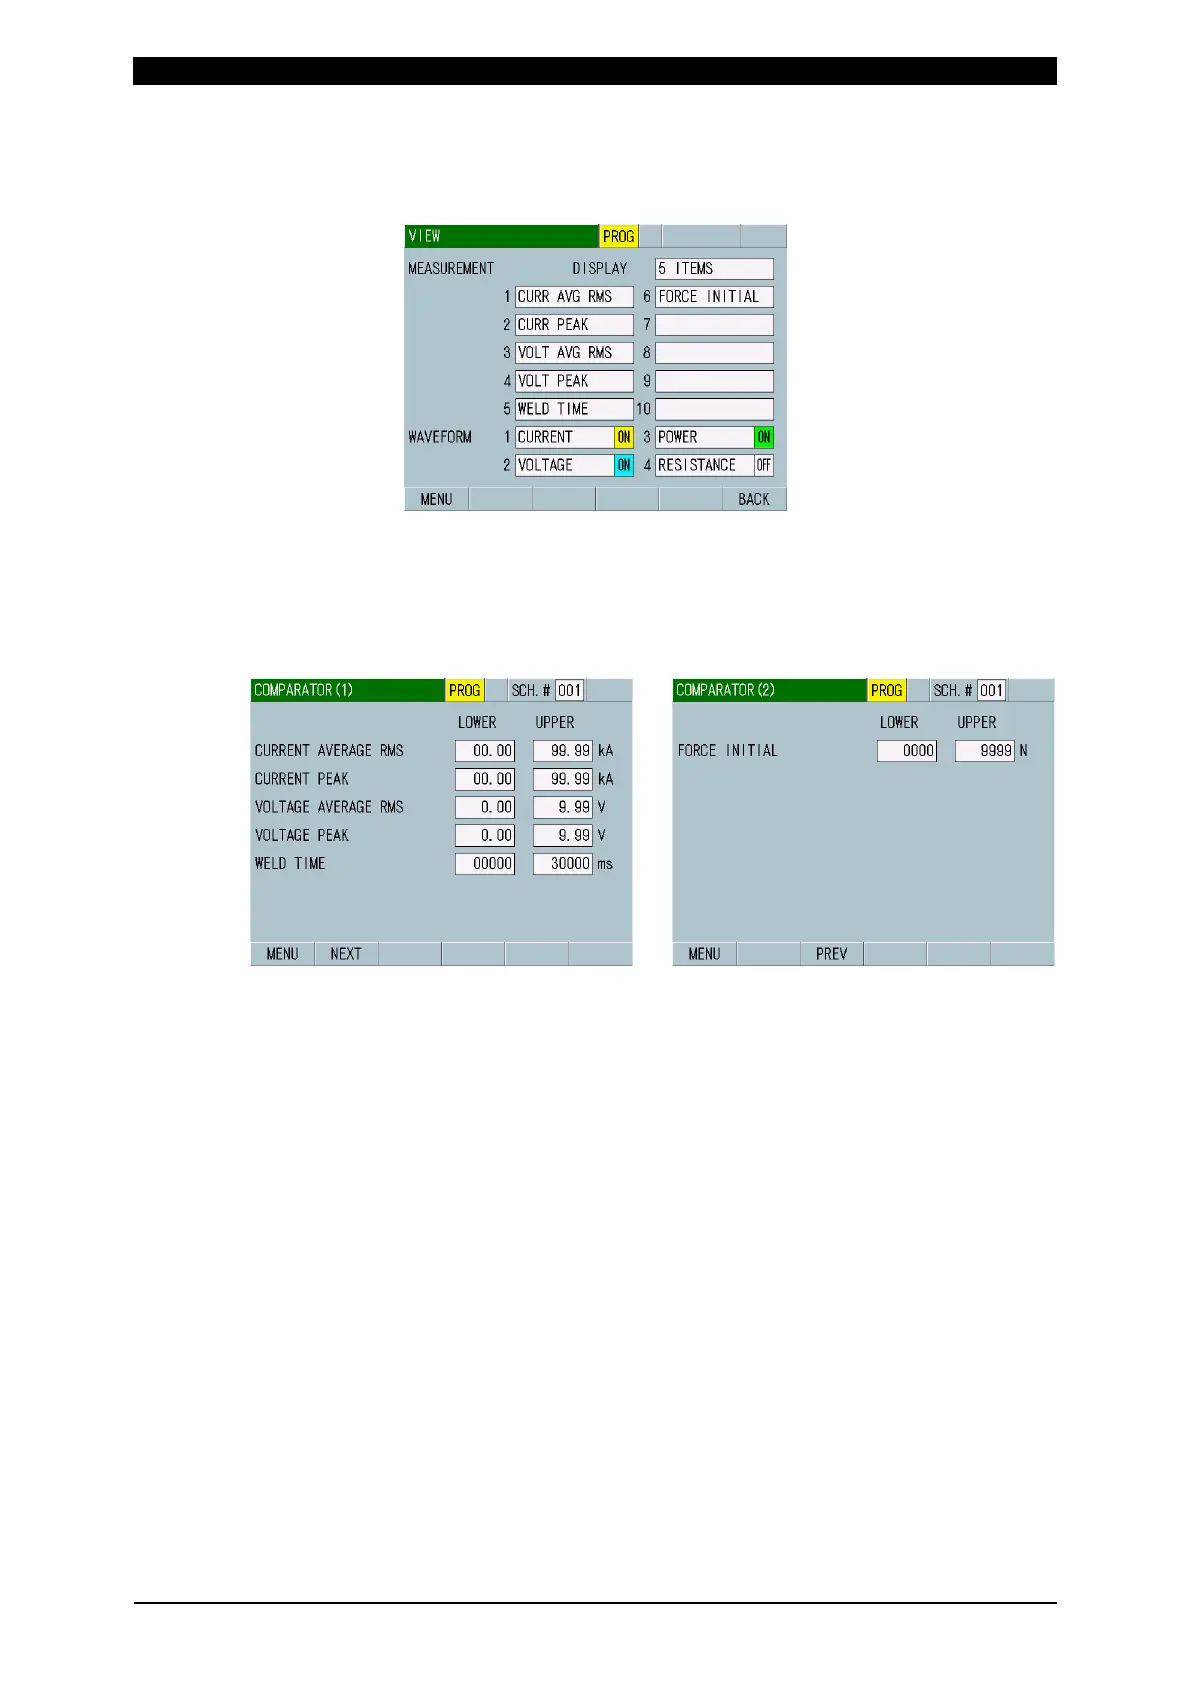
14) Touch the MENU key to select VIEW.
Set FORCE INITIAL in one of MEASUREMENT 1 to 10 on the VIEW screen.
(For more information, refer to (2) c in Chapter 8.)
15) To display the waveforms of the measured items, set those items in
WAVEFORM 1 to 4. (Refer to (2) c in Chapter 8.)
16) Touch the MENU key to select COMPARATOR.
Set upper and lower limits on the COMPARATOR screen. (For more
information, refer to (2) e in Chapter 8.)
17) Touch the MENU key to select MEASUREMENT or WAVEFORM.
18) Select a schedule number to measure.
When setting by the touch panel, set a schedule number to measure in
“SCH.#” without inputting a signal to the external input (SCH1 to 64).
When selecting by the external input (SCH1 to 64), input a signal in the
external input (SCH1 to 64). (Refer to (1) and (2) in Chapter 10.)
19) Touch PROG to change it to MEAS, putting the MM-400A into wait state until
measurement starts (the signal selected as trigger is input).
20) When the external input signal that sets it to MEAS BEFORE WELD is closed,
FORCE INITIAL is measured. After measurement, a signal is output from the
external output number of the item set in step 12).
21) Start welding from the welding power supply by using the external output
signals.