69
MU Series (Windows)
User’s Manual
Process Menu Tools
Stch
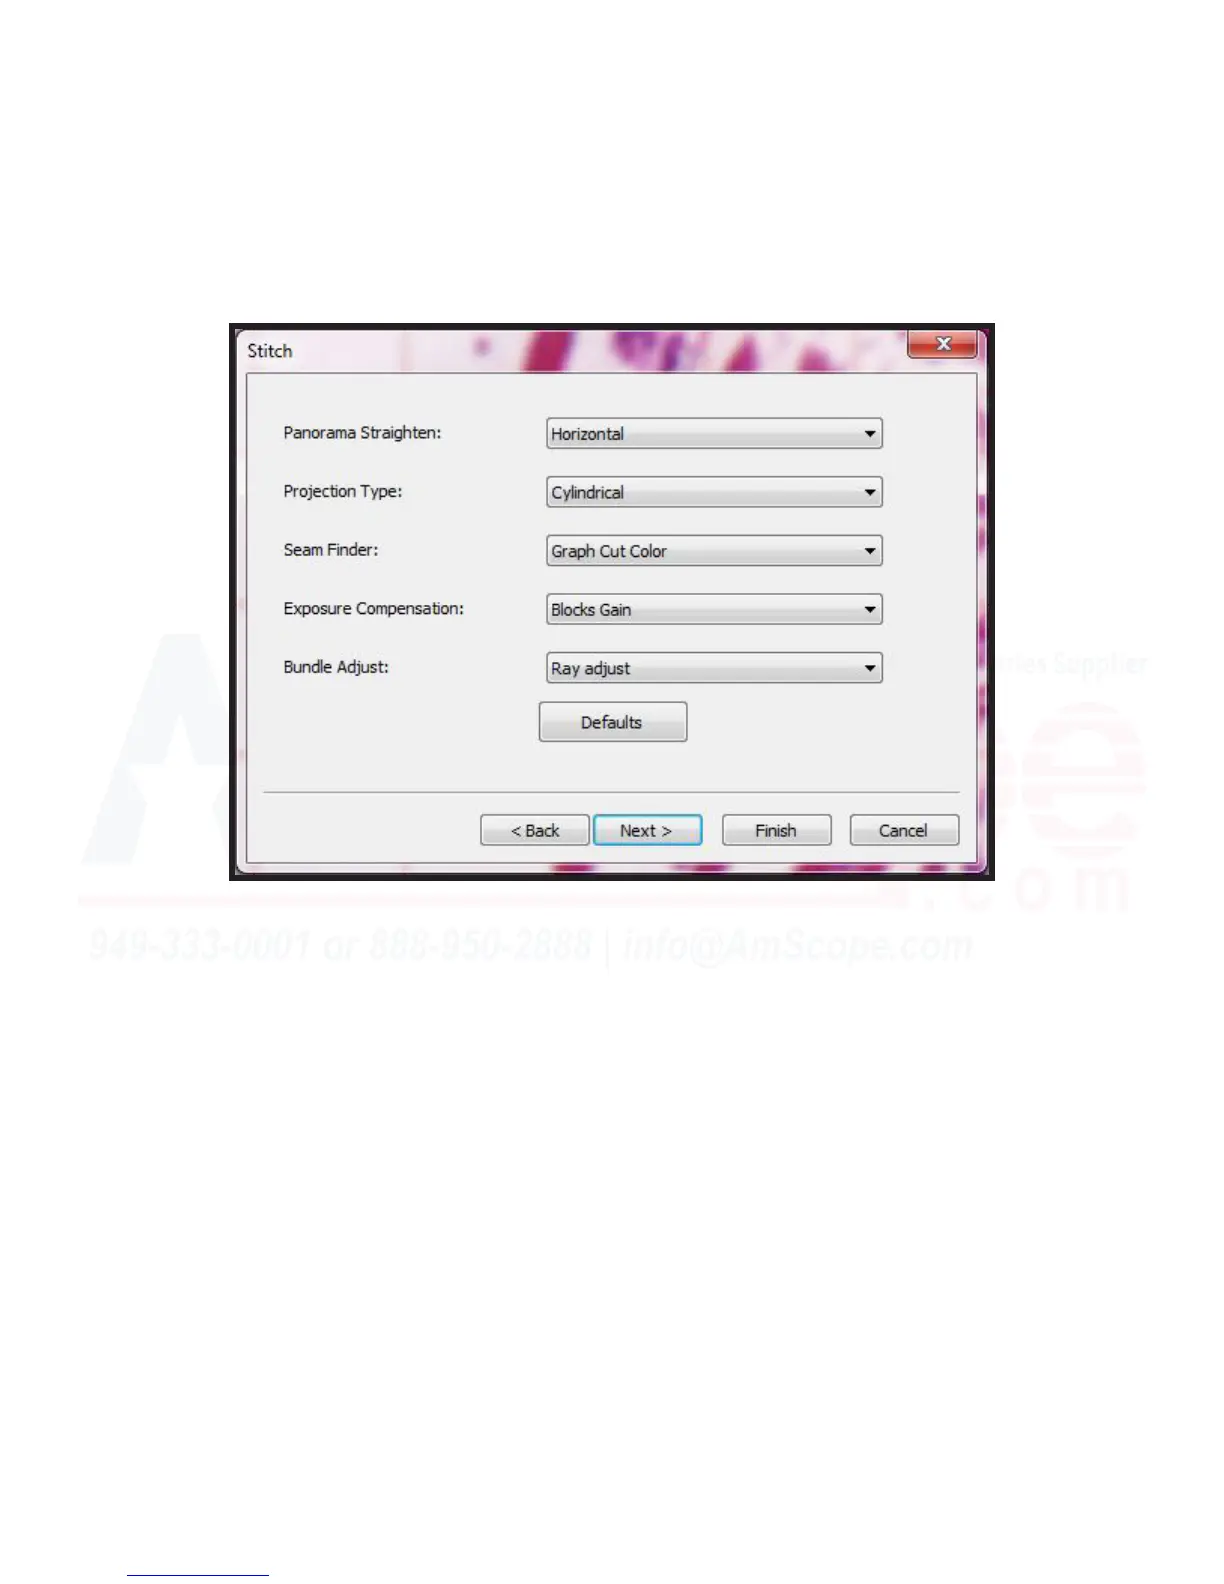
3. The following menu allows you to designate a variety of sengs to determine how the “Stch” tool will be-
have with the images you have taken.
Panorama Straighten - This seng tells the “Stch” tool which direcon you are stching in, either Horizontal,
Vercal, or None. Choose None if performing a grid type operaon, or choose the direcon you are moving in.
Somemes it is easier to do mulple stches if needing a large grid, by doing a horizontal line at a me, then
stching each element of a line together, then stching all lines together.
Projecon Type - The “Projecon Type” seng may seem confusing at rst, but, it is both useful and simple.
The “Projecon Type” is a seng that will adjust the stched image paern to appear as if taken with a par-
cular type of a lens, by projecng the image over a specied image “map.” Opons such as cylindrical, spheri-
cal, sheye, stereographic, plane, mercator, or transverse mercator can be selected here, while cylindrical is
default.
Seam Finder - The “Seam Finder” opon allows you to set what method the “Stch” tool uses to nd seams to
stch the images together at. There are several opons here as well, such as Voronai diagram, graph cut color,
grapch cut color grad, and none. Graph cut color is the default opon, and works for most samples.
Exposure Compensaon - The “Exposure Compensaon” opon is used to determine how the “Stch” tool
will handle dierences in exposure between the various images to be stched together. Opons here include
gain, blocks gain, or none. Default seng is blocks gain.