6.1 Setup Menus 31
6.1.2 Numeric Data Entry Mode
Numeric data entry mode is activated anytime you enter a menu that requires a change in numerical
value and press either the UP or DOWN key to change the digit value. When in this mode, the
function of the SETUP and ENTER keys change to give left and right cursor control. For example,
suppose you are in the System Delays menu. When you press the ENTER key, you should see
something like the following menu.
SET CABLE DELAY?
DELAY = 000060 ns
To change the setting, you will first need to press either the UP or DOWN key to start changing
the setting value. In this example, the “ones” digit will change. Next, press the SETUP key to
move the cursor to the left to the “tens” digit. Now, use the UP or DOWN key to change the value.
At the conclusion, press the ENTER to move the cursor back to the “ones” digit and ENTER again
to install the new value.
6.1.3 Default Firmware Settings
All models will be configured with default settings when shipped from the factory, unless specified
otherwise at the time of order. Most users elect to modify the clock settings to fit their locale and
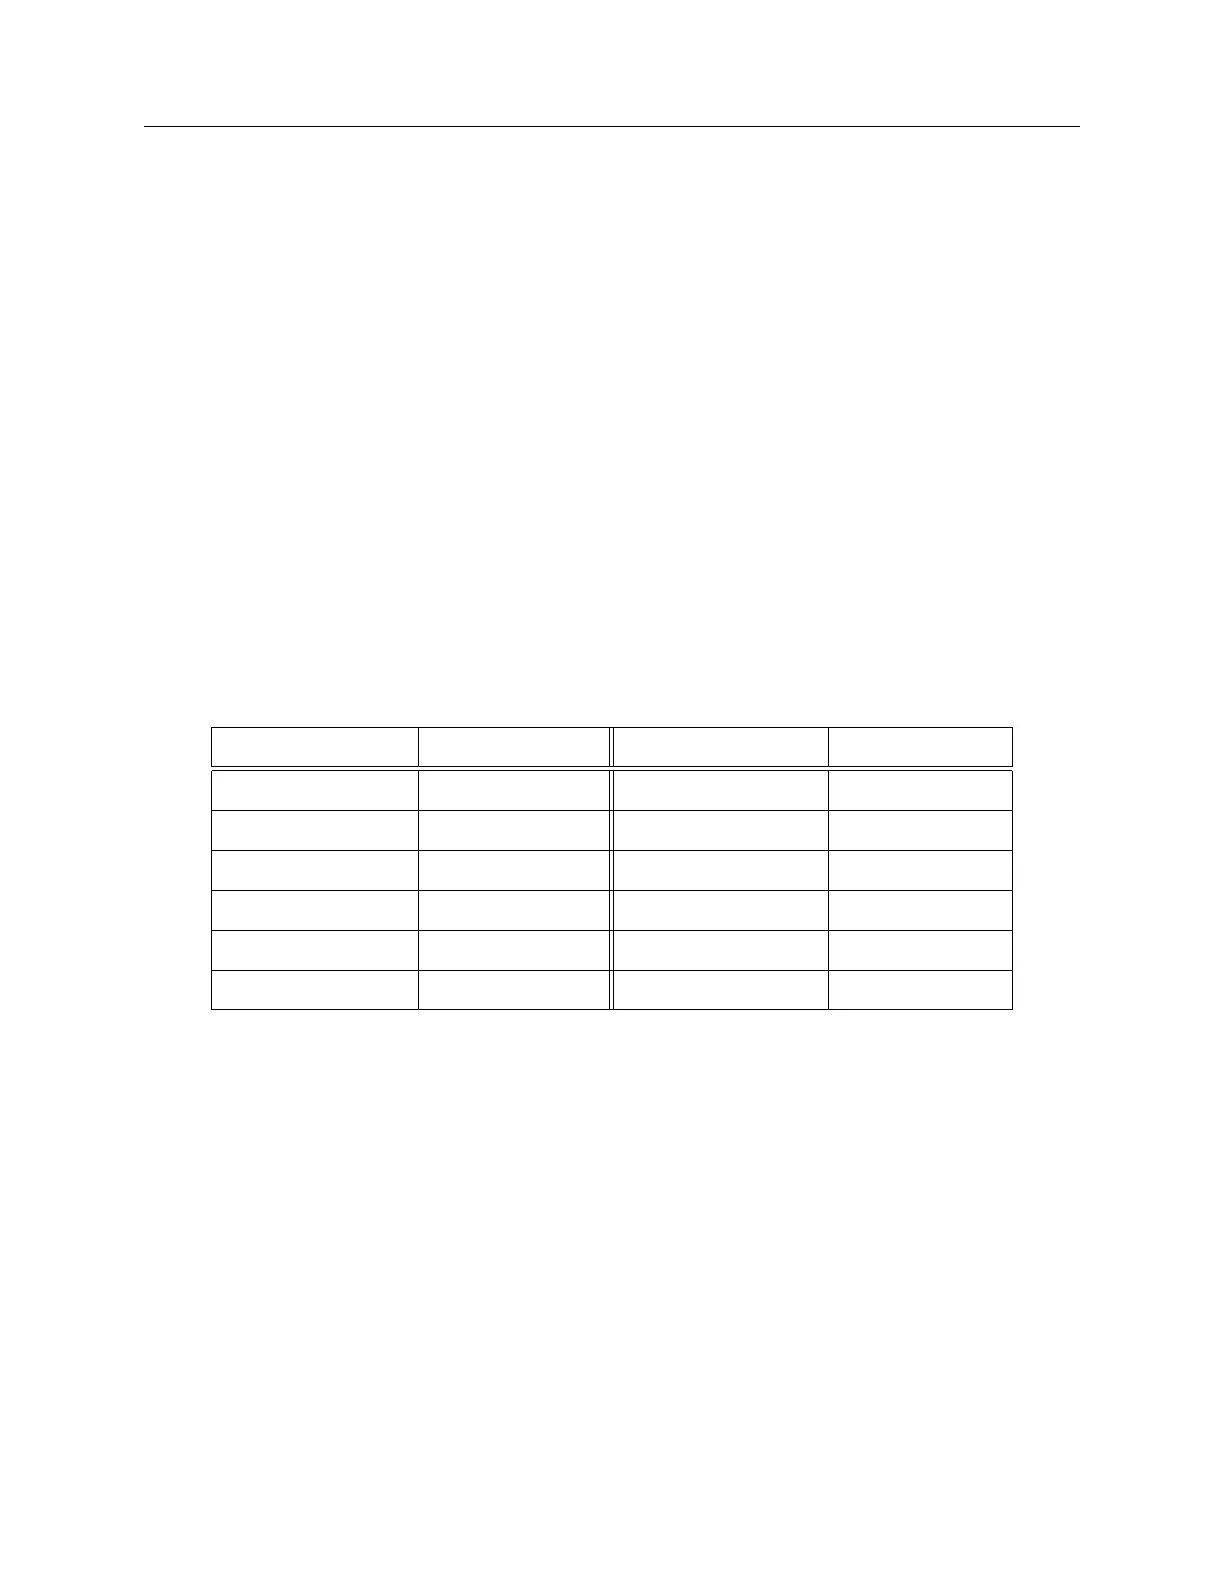
desired operation. Default settings are listed in Table 6.2.
Menu Item Default Menu Item Default
Main RS-232 9600, 8, N, 1 Local Offset & DST none, OFF
Out-of-Lock 01 min. Backlight Auto
System Delays 60 ns Prog. Pulse Sec. per Pulse
IRIG-B Time Data UTC, 1344 OFF Event/Deviation 1 PPS Deviation
Auto Survey Power On Survey Position Hold ON
Option Control None – –
Table 6.2: Default Firmware Settings
6.1.4 To Exit Setup Menus
To exit any configuration menu without saving, press any of the upper row of keys before pressing
ENTER (which installs a new value). To return to the configuration menus, press SETUP again.
If you make a configuration error, you can scroll through the menus again and press ENTER when
you find the menu you want to change.