3-50
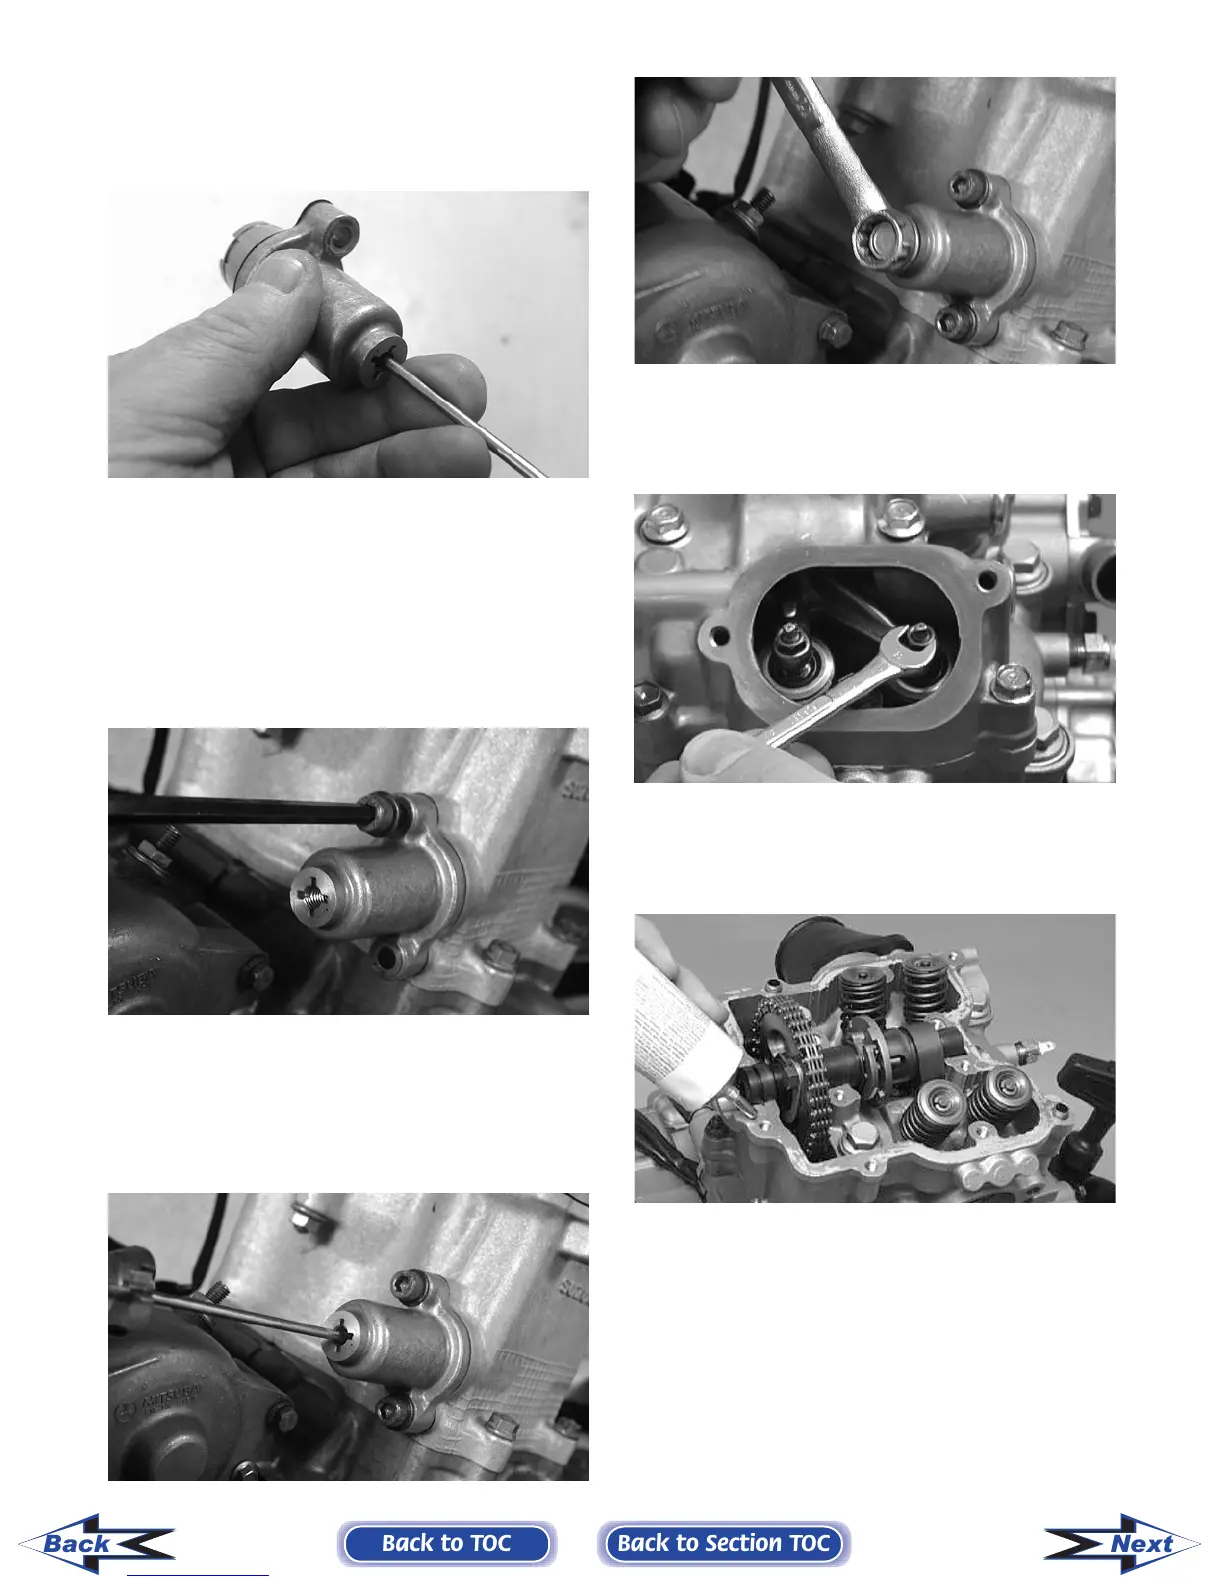
22. Remove the cap screw from the end of the chain
tensioner; then using a flat-blade screwdriver,
rotate the adjuster screw inside the tensioner
clockwise until the screw bottoms.
CD501
NOTE: The adjuster shaft will be drawn into the
tensioner as the adjuster screw is rotated clock-
wise. The adjuster shaft tension will be released in
step 24.
23. Place the chain tensioner adjuster assembly and
gasket into position on the cylinder and secure
with the two Allen-head cap screws.
CD469
24. Using a flat-blade screwdriver, rotate the
adjuster screw inside the tensioner counter-
clockwise until all tension is released; then
install the cap screw into the end of the chain
tensioner.
CD470
CD471
25. Loosen the four adjuster screw jam nuts; then
loosen the four adjuster screws on the rocker
arms in the valve cover.
CC005D
26. Apply a thin coat of Three Bond Sealant to the
mating surfaces of the cylinder head and valve
cover.
CC275D
27. Place the valve cover into position.
NOTE: At this point, the rocker arms and
adjuster screws must not have pressure on them.
28. Install the four top side cap screws with rubber
washers; then install the remaining cap screws.
Tighten only until snug.
Back to TOC
Back to Section TOC
Next
Back
FOR ARCTIC CAT ATV DISCOUNT PARTS CALL 606-678-9623 OR 606-561-4983
www.mymowerparts.com