4-5
4
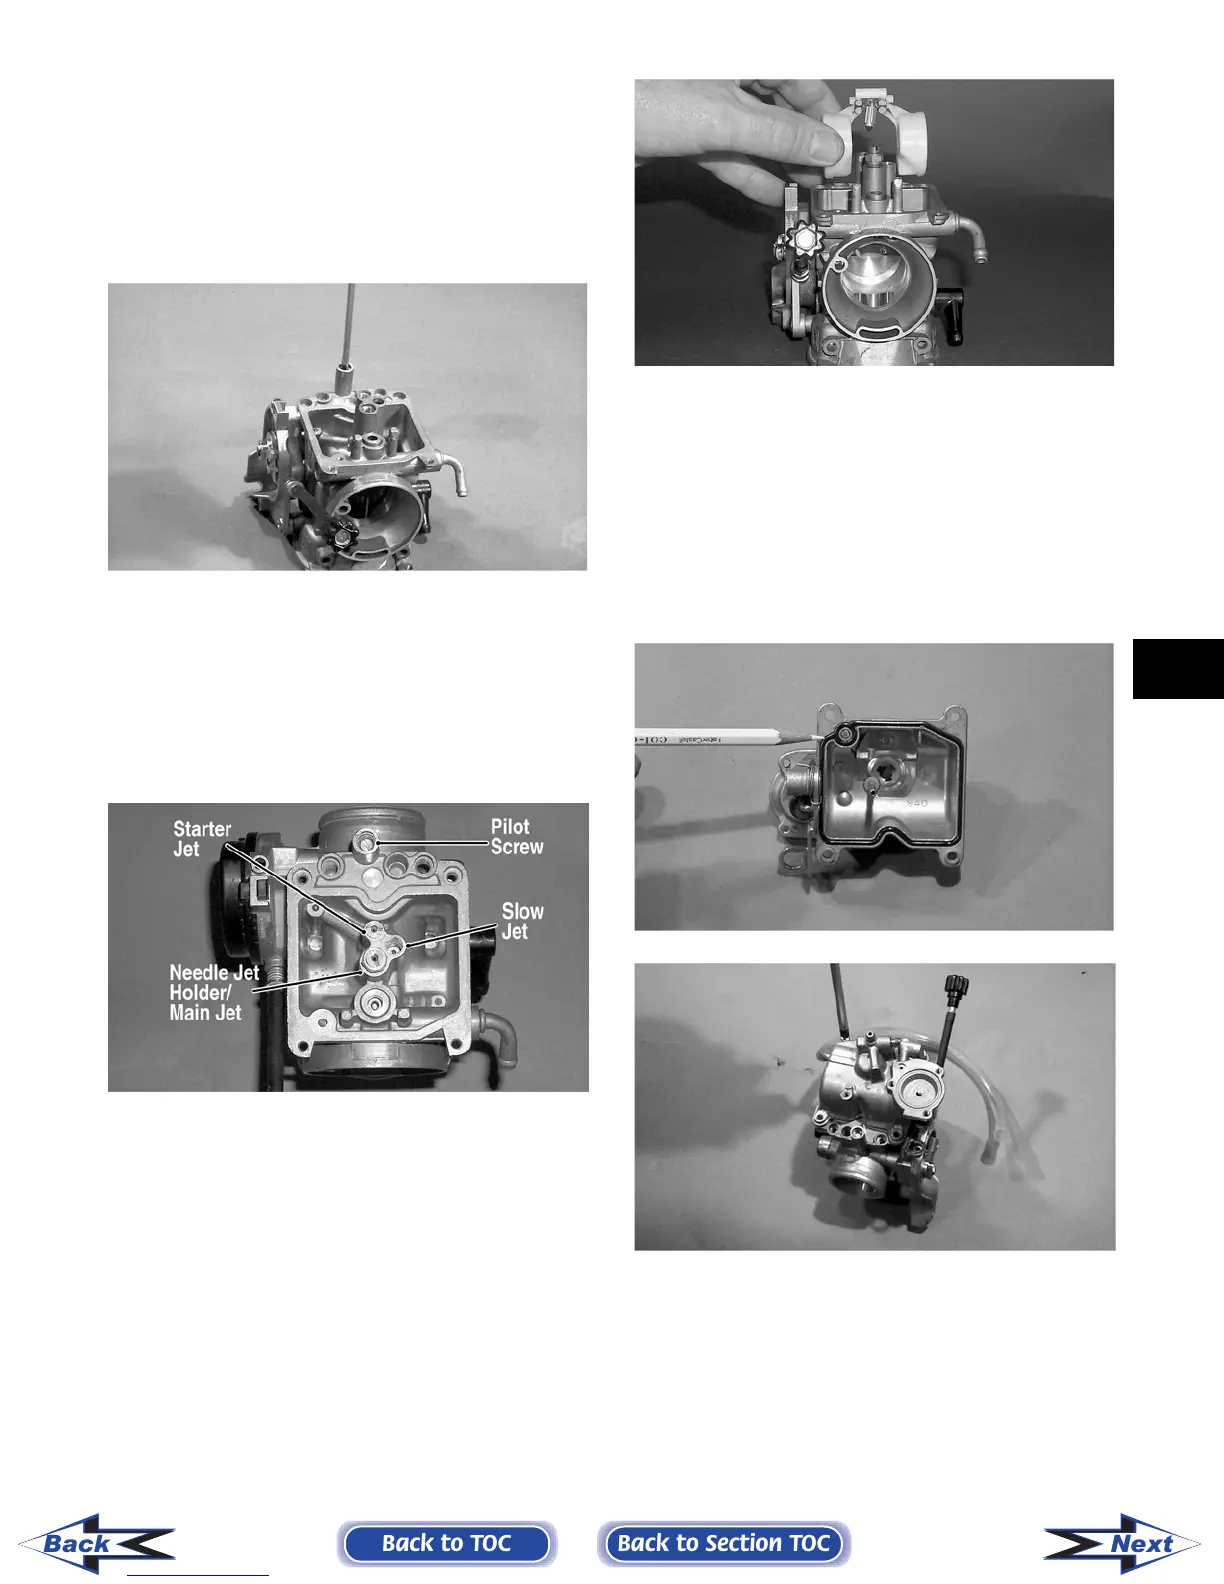
ASSEMBLING
1. Thread the idle adjust screw assembly into the
carburetor making sure the washer and spring
are properly positioned.
2. Install the pilot screw with the spring, the
washer, and the O-ring in this order.
CC758
NOTE: Turn the pilot screw clockwise until it is
lightly seated; then turn it counterclockwise the
recommended number of turns as an initial set-
ting.
NOTE: Note the locations of the jets and holder
during assembling procedures.
CC761A
3. Install the slow jet. Tighten securely.
4. Install the main jet into the needle jet holder and
tighten securely; then install the needle jet and
needle jet holder assembly into the carburetor
and tighten securely.
5. Place the float assembly (with float valve) into
position and secure to the carburetor with the
float pin.
CC753
NOTE: Check float arm height by placing the car-
buretor on its side w/float contacting the needle;
then measure with a caliper the height when the
float arm is in contact with the needle valve. Float
arm height should be 17 mm (0.7 in.).
6. Place the float chamber into position making
sure the O-ring is properly positioned; then
secure with the Phillips-head screws.
CC750
CC749
7. Place the U-ring into the pump housing. Posi-
tion the spring and diaphragm assembly (lip
toward the carburetor) onto the carburetor; then
secure the assembly with the pump housing and
three screws. Tighten securely.
Back to TOC
Back to Section TOC
Next
Back
FOR ARCTIC CAT ATV DISCOUNT PARTS CALL 606-678-9623 OR 606-561-4983
www.mymowerparts.com