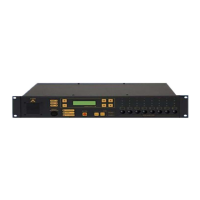
Link the DIVA master units and the computer to the Ethernet switch, see diagram below.
After the devices have been connected and in order to know if your network is well configured, go to
the "Device Search" window: Tools -> Device Search and start a search.
If some DIVA master aren't visible, please check wiring and/or IP address settings. Also check your
computer network card parameter and be sure they are set in accordance to the DIVA network
builded.
NOTE: DIVA master won't be able to communicate with each other through the network. This
network only intend to offer quick configuration solution over IP.
8.16 Add Messages into DIVA
In order to store messages into DIVA memory, you have to use the message manager window.
• Go under menu: View -> Message. The message window will pop up, see below
• In the upper part of the Message window, you can select the DIVA master unit you want to work
on for messages
The message window is divided in two section, one for the message taken from the message library
(left one) and one for the messages stored in DIVA (right one). Here is a list of buttons and their
corresponding function.
• Select All: allows to instantaneously select all the messages from the list
• Select None: instantaneously deselect all the selected message
Ateïs International
Ch. du Dévent, 1024 Ecublens, Switzerland.
Phone : +41 21 881 25 10
56