6.Adjustment
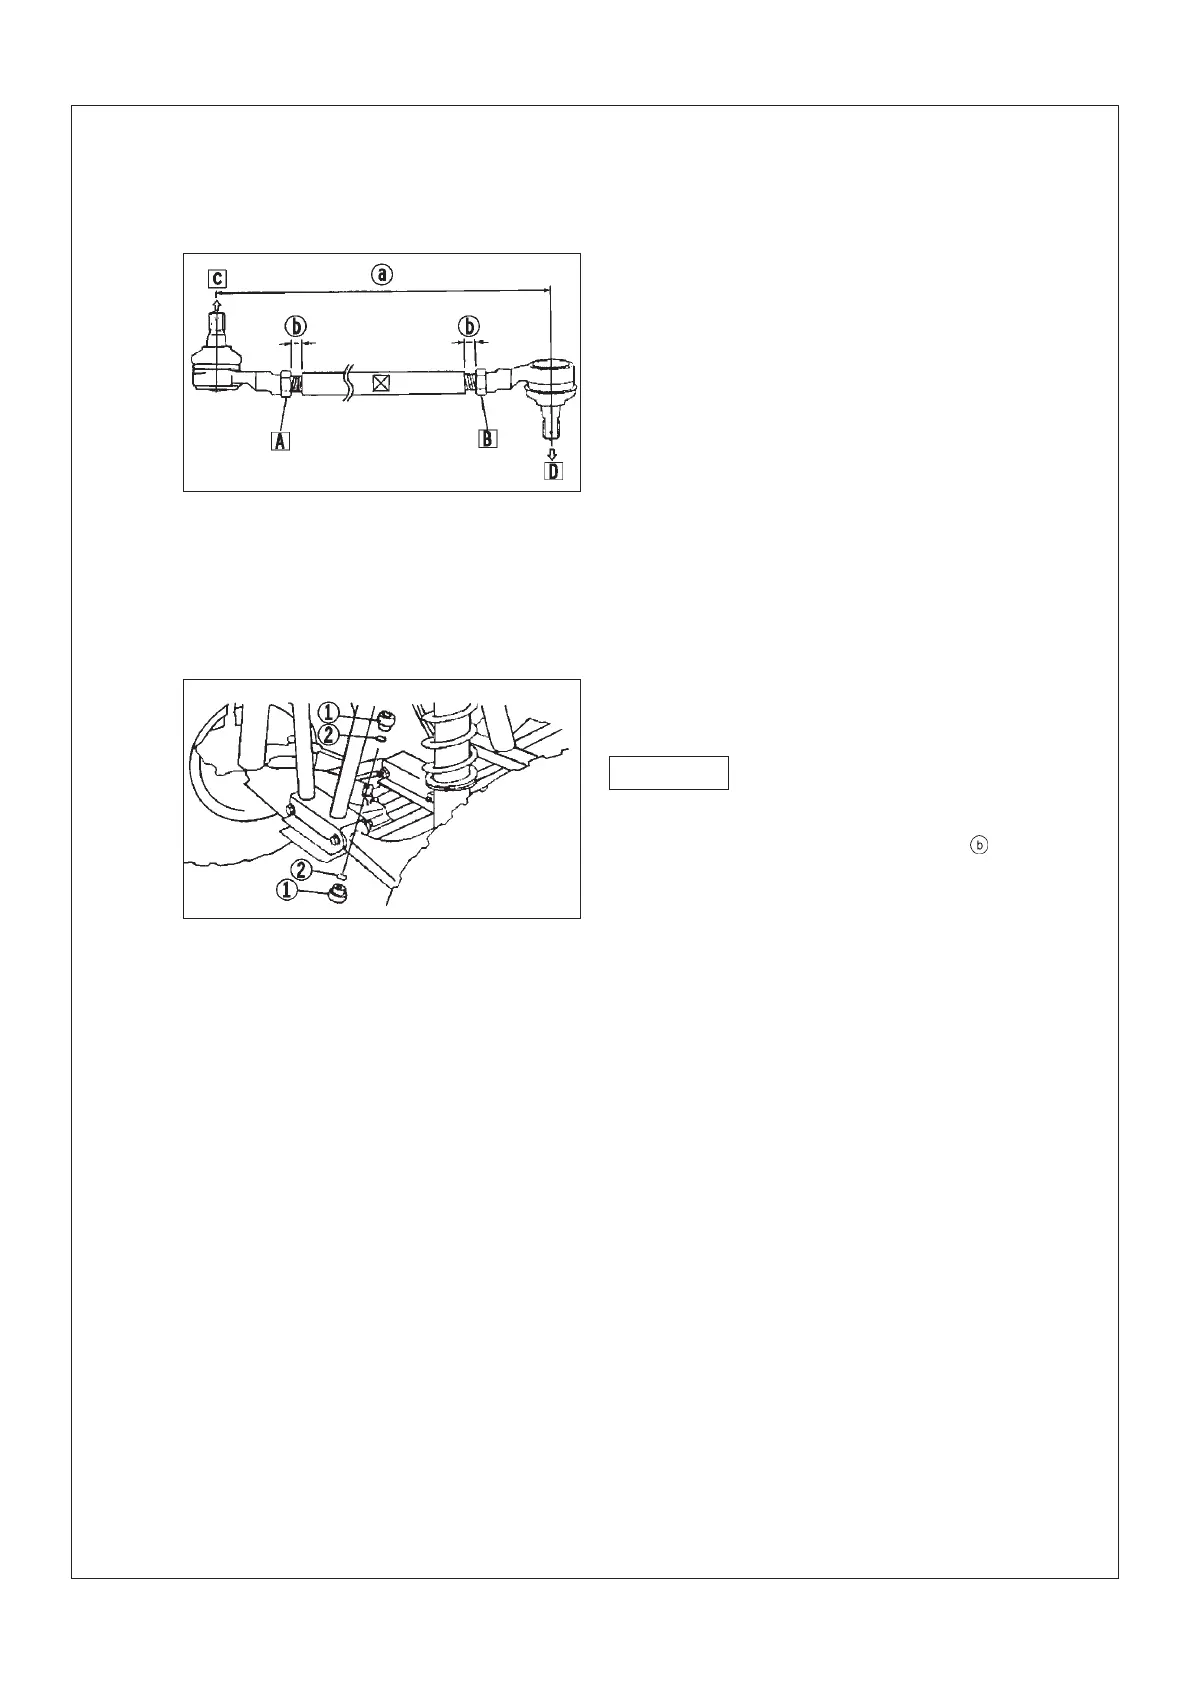
Assembly length of tension rod
Adjustment steps of tension rod assembly
length
Loosen the connecting nut (A).(B)
Adjusting the assembly length of tension rod
by rotating the tension rod.
Attached:Tension rod assembly length @:
297mm
(A)Right-hand thread
(B)Left-hand thread
Connect (C)position to the steering vertical col-
umn welding assy.
Connect (D)position to the front seat assy, the
front brake.
The connection nut (A)(B)can be tightened
up only when the revealed thread length of
two ends of tension rod are the same.
Attached:Connecting nut torque of tension rod:
30Nm
7.Inspection
If the bearing ¢Ùand O-seal ¢Úunder the
steering vertical welding are worn or damaged,
replace them.
(IV)Installment steps
The reversal steps of “Removal”steps
“Installment”steps, pay attention to the follow-
ing points during installment.
1.When installing steering vertical column
welding, lubricate the bearing¢Ùand seal ring
¢Úunder the steeing vertical column welding.
Caution
- 97 -