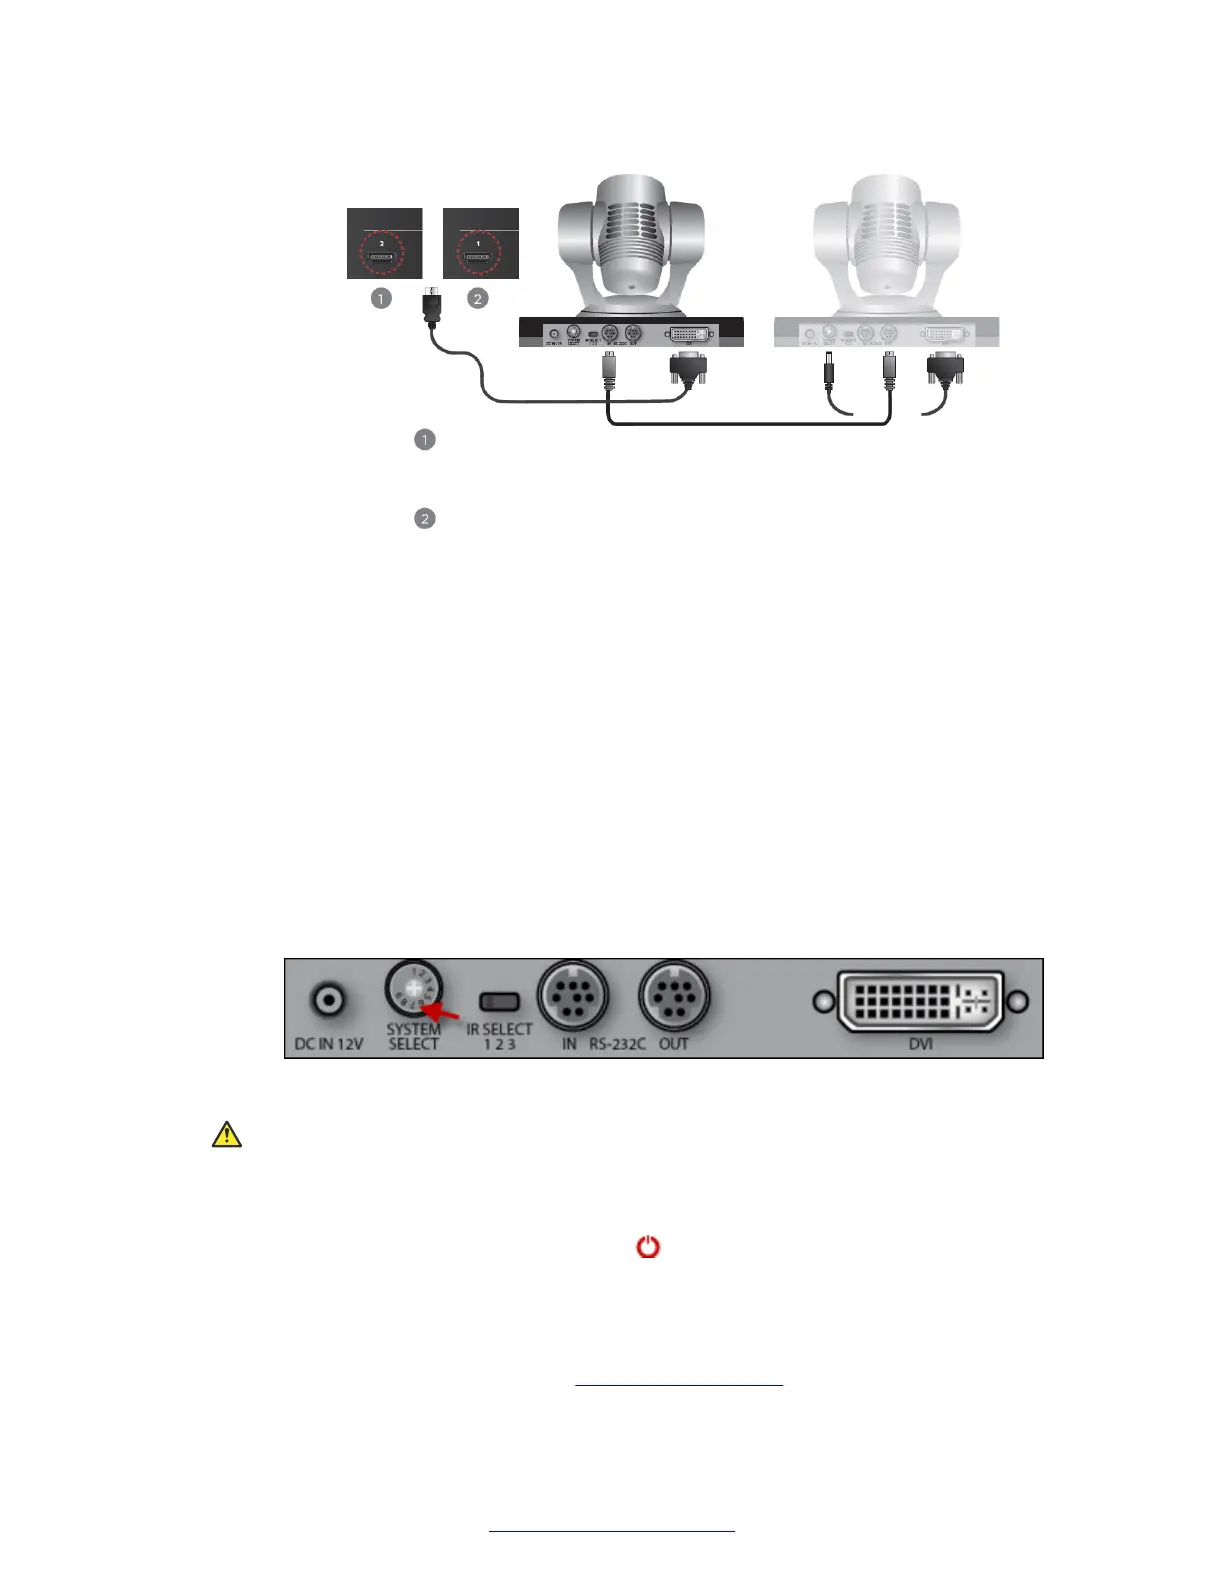
XT Camera Switch
Connected to XT5000
XT Camera Switch
Connected to XT7000
Second Camera
First Camera
Figure 34: Connecting the second camera
• Attach one end of the VISCA control cable to the IN RS-232C connector on the
second camera.
• Attach the other end to the OUT RS-232C connector on the previous camera.
b. Connect the DVI-HDMI cable:
• Attach the DVI connector to the DVI socket on the second camera.
• Attach the HDMI connector to the HDMI socket labeled 2 on the Scopia
®
XT Camera
Switch.
6. If required, repeat the above step for a third or fourth HDMI device.
7. Check that the SYSTEM SELECT switch on the back panel of each camera is set to 7:
Figure 35: Checking the SYSTEM SELECT switch
Caution:
To adjust the switch, you must first turn the camera off. Adjust it using a slotted 2.5 mm
screwdriver.
8.
Turn on the XT Codec Unit by pressing the power key on the XT Remote Control Unit.
This also turns on the Scopia
®
XT Camera Switch.
9. Connect one end of the power supply cable to the DC IN 12V connector on each camera,
and the other end into one of the power sockets on the wall.
10. Configure the cameras' settings (see
Configuring Cameras on page 100.)
Connecting Cameras or DVD players
April 2015 Avaya Scopia
®
XT Series Deployment Guide 57
Comments? infodev@avaya.com

 Loading...


