Chapter 7 DISASSEMBLY/ASSEMBLY PROCEDURES
7 - 8
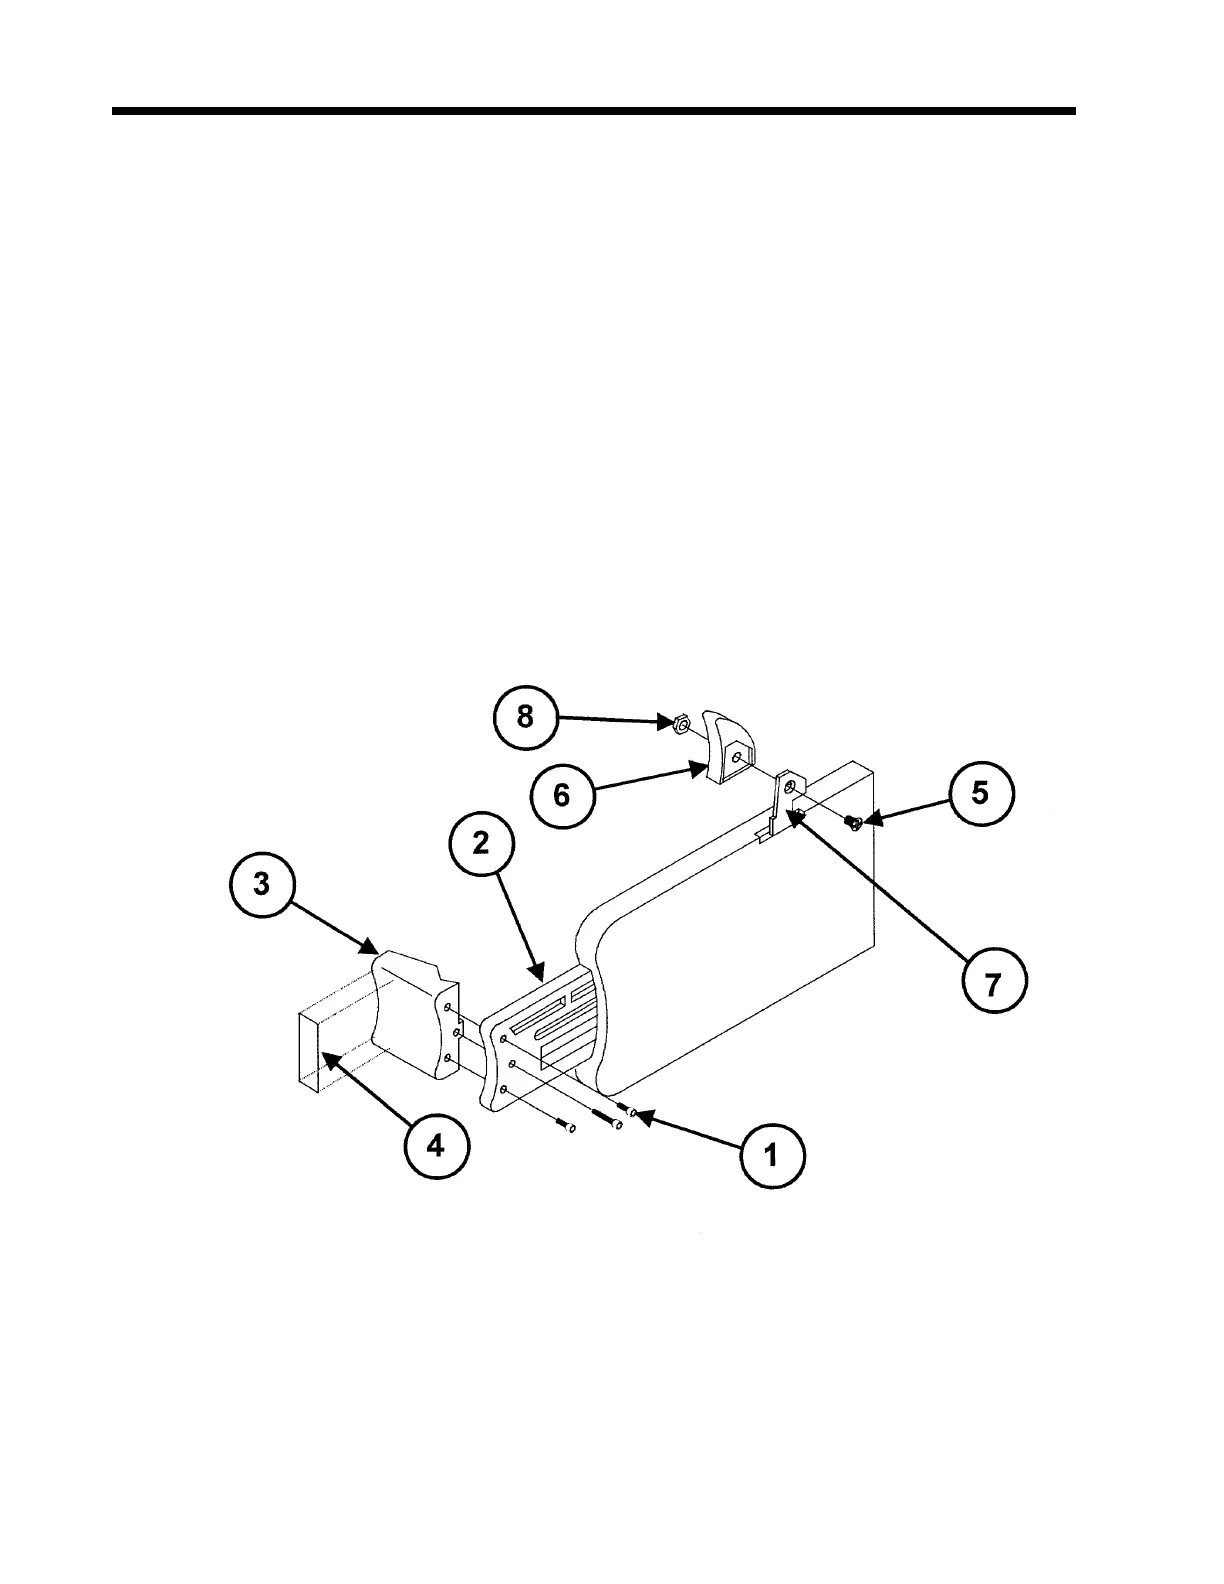
7.2.4.3 Barrel Clamp Face
1. Remove the three socket head cap screws (1) securing the Barrel Clamp Slide (2) to
the Barrel Clamp Face (3). Observe that the screw removed from the center of the
clamp is longer than the other two screws removed.
2. Separate the Barrel Clamp Face (3) from the Barrel Clamp Slide (2).
NOTE
If the Barrel Clamp Face is to be replaced, affix a new Clamp Face
Decal (4) onto the replacement.
7.2.4.4 Molded Lever End
1. Unscrew and remove the flat head screw (5) and hex nut (8) securing the Molded Lever
End (6) to the primary brake lever (7).
2. Separate the Molded Lever End (6) from the primary brake lever (7).
Figure 7-7 Barrel Clamp Face and Molded Lever End Replacement

 Loading...

