DISASSEMBLY/ASSEMBLY PROCEDURES Chapter 7
7 - 7
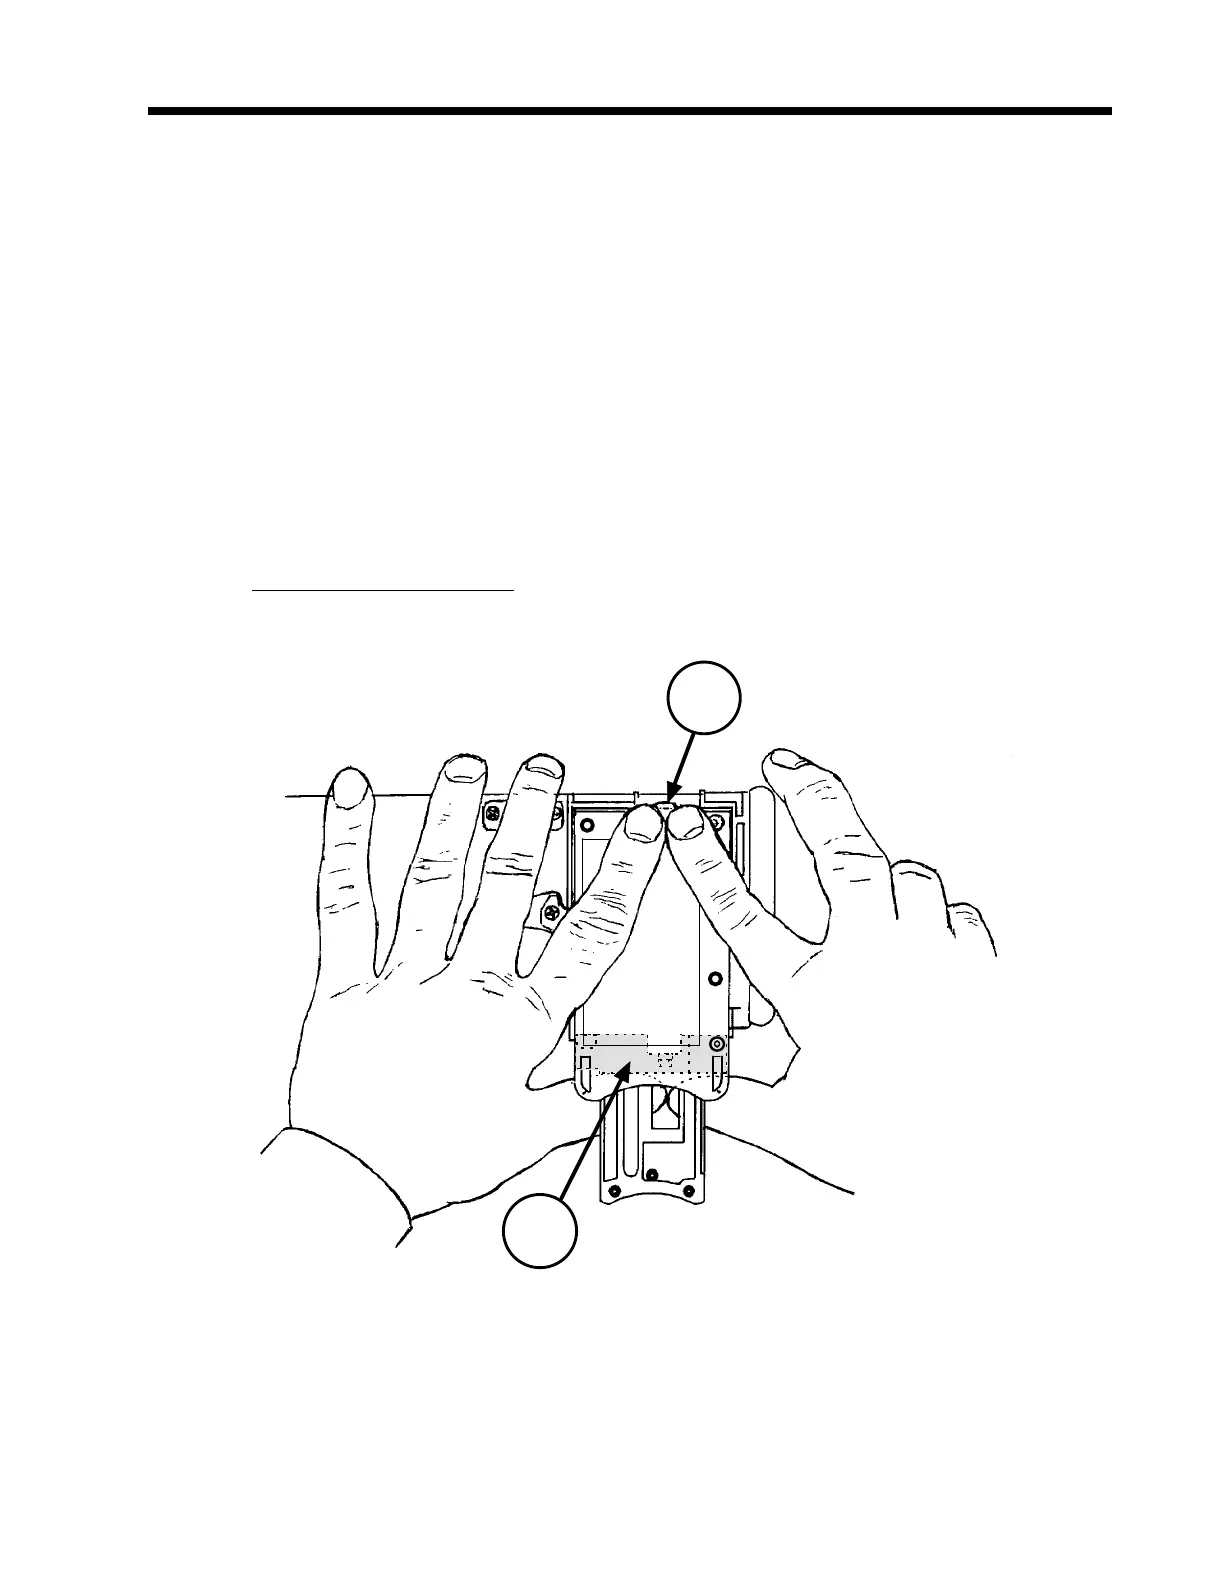
3. Without moving the pump, position the index fingers of both hands on the secondary
brake lever (6) of the Barrel Clamp Assembly (4) and position the thumbs of both hands
on the cradle (7) of the Barrel Clamp Assembly. Apply inward and downward pressure
against the cradle (7) until the clamp snaps onto the case. If the clamp and case were
in perfect alignment when the clamp was placed on the case, the snap may not be
heard.
4. To confirm that the Barrel Clamp Assembly (4) is properly assembled to the case (5),
position the fingers of either hand below the Face (8) of the Barrel Clamp Assembly (4)
and attempt to lift the Barrel Clamp from the pump. The clamp should not separate
from the pump. If it does, repeat steps 3 and 4.
5. Exercise the Barrel Clamp Assembly (4) by closing the clamp and alternately using both
primary (9) and secondary (6) release (brake) levers to open the clamp. Ensure that
the clamp opens and closes fully.
Recalibration is required once the Barrel Clamp is reassembled to the
Case. Refer to Chapter 5.
7
6
Figure 7-6 Seating of the Barrel Clamp Assembly to the Case

 Loading...

