FUNCTIONAL TESTS Chapter 4
4 - 11
6. Remove the fixture from the pump.
4.2.11.3 Plunger Driver Potentiometer and Plunger Capture Checks:
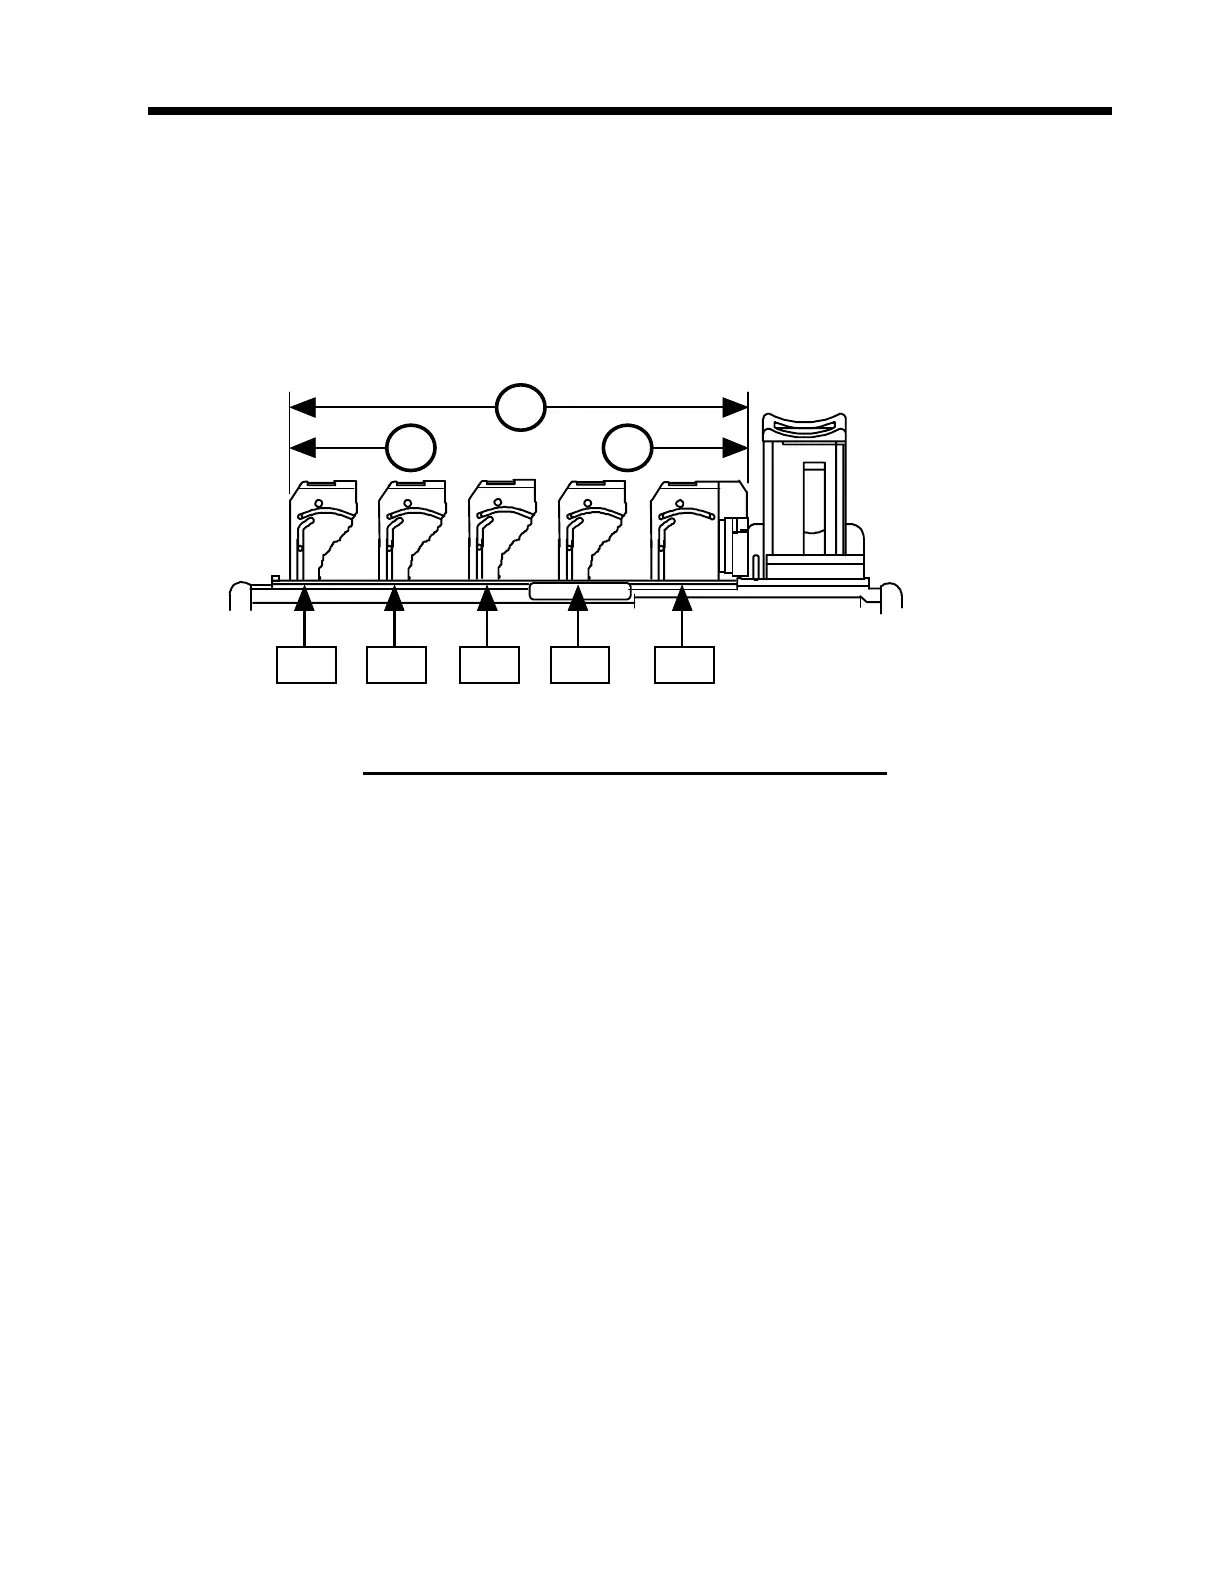
This check is performed to verify that the plunger driver position sensor operates properly
throughout the entire travel range (1) of the plunger driver from start (2) to end (3) of
plunger driver travel. Five approximately evenly spaced test points [(TP1 through TP5)],
are to be used to perform this check.
1. (*D*) Position the plunger driver at the first test point (TP1) and insert a coin in the
plunger driver. Ensure that the plunger driver is fully closed and confirm that the
“BATTERY” LED turns “ON.”
2. (*D*) Without moving the plunger driver from TP1, retract the driver until it is fully
extended and remove the coin. With the driver held in its fully extended position, verify
that the A/D count number (Field #3) is less than 3. Release the plunger driver and
allow it to fully close. With the driver fully closed, verify that the A/D count number is
again less than 3.
3. (*D*) Move the plunger to the next test point. Repeat steps 1 and 2, recording the
appropriate entries to the data sheet for test points TP2 through TP5.
NOTE
DO NOT PRESS THE CONFIRM KEY.
1
2 3
TP1 TP2 TP3 TP4 TP5

 Loading...

