Cube
®
Installation & Startup
1MANUL963 Belanger, Inc. * PO BOX 5470. * Northville, MI 48167-5470 * Ph (248) 349-7010 * Fax (248) 380-9681 6-11
Chapter 6 Frame and Carriage Assembly
Frame Assembly: Rails and Head Beams
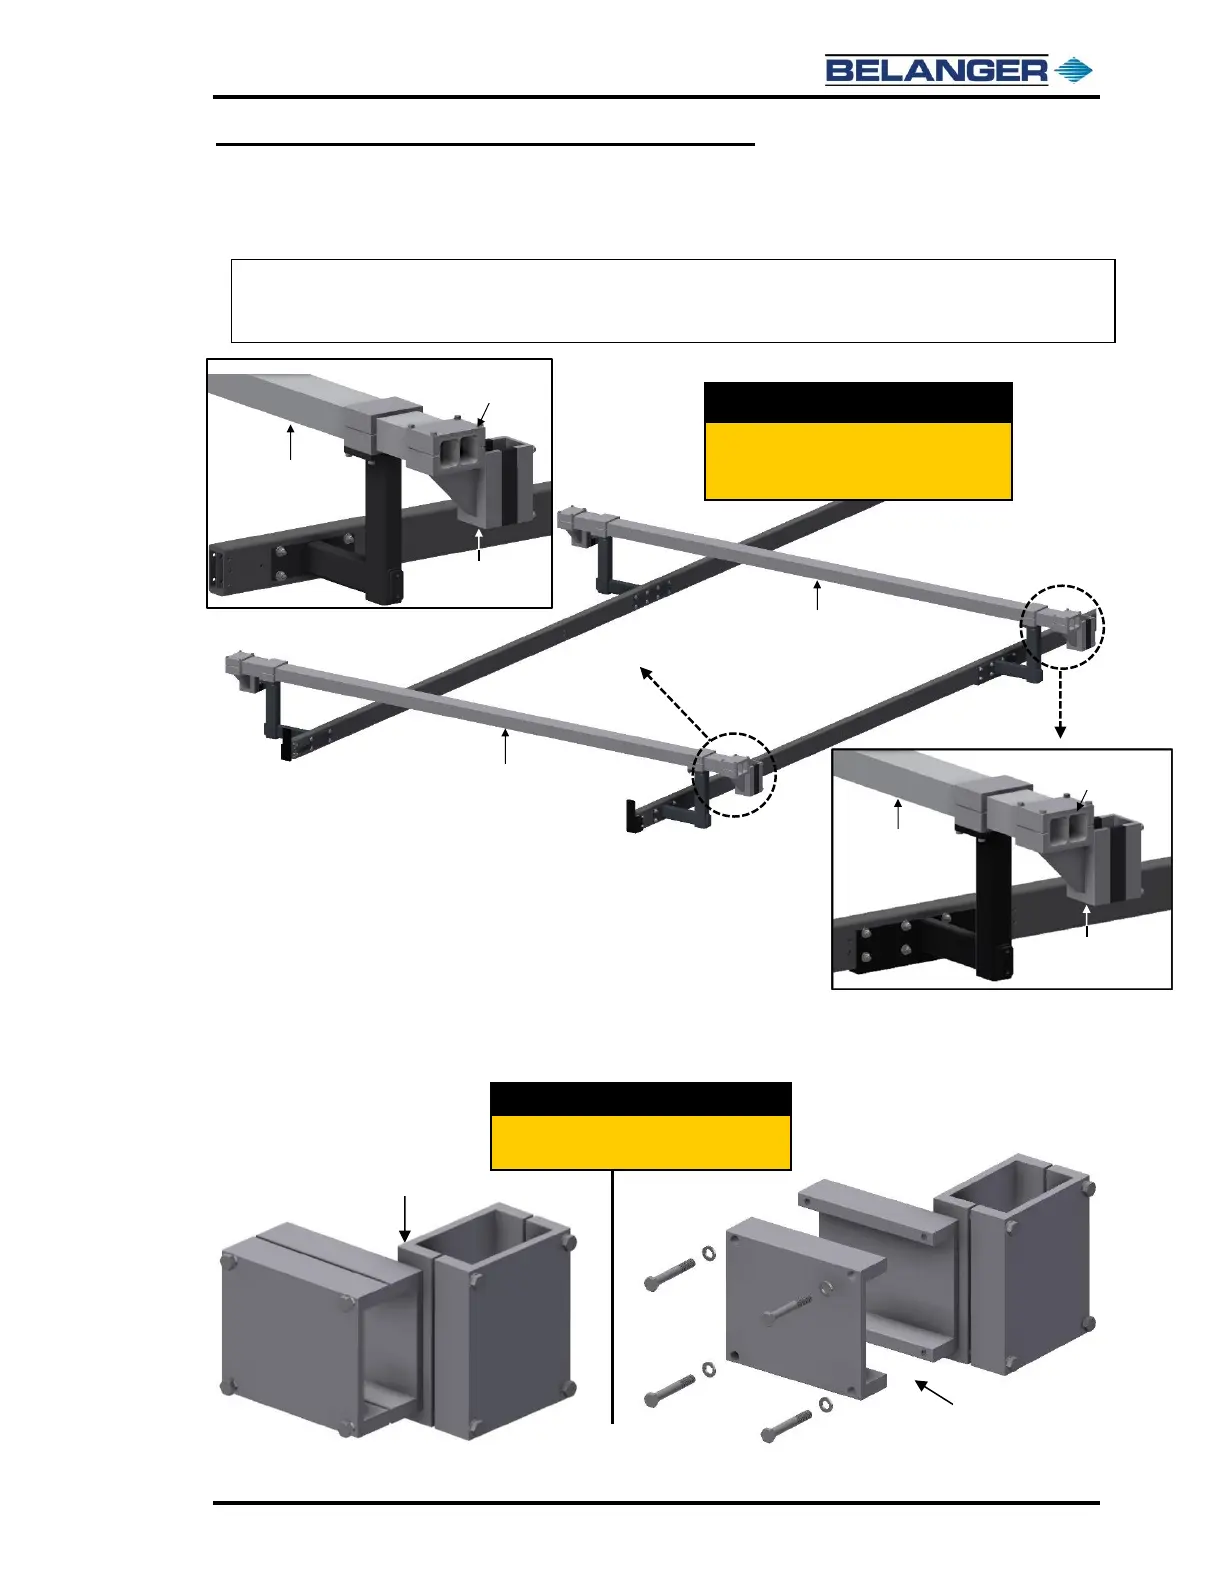
32) Attach these Leg/Head Beam Brackets to the Head Beams making sure that the edge of the
Head Beam Clamp is flush with the end of the Head Beam, for clarity see the image below.
Note: Positioning the Leg/Head Beam Brackets as specified will ensure that these brackets are located
in their final position when the frame is lifted which will make attaching the Leg Assemblies to
the Frame easier.
33) Locate the two (2) Exit Leg/Head Beam Brackets, remove the fasteners and half of the Head
Beam Clamp on the Brackets, see images below.
Attach the Leg/Head Beam Brackets to the
Entrance and Middle Head Beams with the
clamp flush with the end of the Head Beams.