Each tab contains a table with the positions that can be adjusted for each arm (2).
Depending on each position, the necessary adjustment boxes (4) will be activated for moving the selected element
step by step.
With respect to the 3 possible values to be changed in each position: vertical, Z and rotor, not all can be memorised
as adjustments. Some can be changed to facilitate the adjustment, but not memorised. e top of the table is marked
in yellow, to indicate which parameters are adjustments and are memorised.
After making and saving the adjustments, an OK tick will appear at the side of the element and then the next ele-
ment is automatically accessed.
It is also possible to verify the positioning of each mechanical element in this screen. To do this, press the Checkbut-
ton (3). e selected element will be moved to the adjusted position.
en the dierent positions that can be adjusted, depending on the arm, are displayed.
Sample arm
Adjustment position Description
Dispensation Adjustment of the dispensation point in the reagent rotor
Predilution Adjustment of the dispensation point in the reagent rotor predilution well
Z Ref. Adjustment of the reference position for lowering the tip in the reaction rotor. To
facilitate the adjustment, the reference is the rotor surface.
See Figure 6.12
Washing Adjusting the position of the tip in the wash station.
Ring 1 Adjusting the position of the arm in ring 1 of the sample rotor. e vertical angle
of the arm, arm depth and rotor angle are adjusted. e depth is adjusted for each
sample well.
Ring 2 Adjusting the position of the arm in ring 2 of the sample rotor. e vertical angle
of the arm, arm depth and rotor angle are adjusted. e depth is adjusted for each
sample well.
Ring 3 Adjusting the position of the arm in ring 3 of the sample rotor. e vertical angle
of the arm, arm depth and rotor angle are adjusted. e depth is adjusted for each
sample well.
Z tube Adjusting the depth of the tubes. is adjustment is used for the 3 rotor rings.
ISE position Adjusting of the dispensation tip when the sample enters the ISE module.
Parking Adjustment of the arm parking positioning.
Reagent 1 and 2 arms
Adjustment position Description
Dispensation Adjustment of the dispensation point in the reagent rotor
Z Ref. Adjustment of the reference position for lowering the tip in the reaction rotor. To
facilitate the adjustment, the reference is the rotor surface.
See Figure 6.12
Washing Adjusting the position of the tip in the wash station.
Ring 1 Adjusting the position of the arm in ring 1 of the reagent rotor. e vertical angle of
the arm, arm depth and rotor angle are adjusted.
Ring 2 Adjusting the position of the arm in ring 2 of the reagent rotor. e vertical angle of
the arm, arm depth and rotor angle are adjusted.
Parking Adjustment of the arm parking positioning.
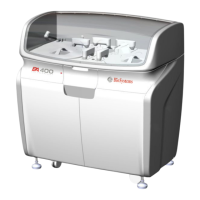
Service Manual
76