7. Maintenance and cleaning
7.1. Cleaning
Material and tools needed to clean the appliance:
• Dry air aerosol container or air blower
• T20 torx key with a minimum length of 40 mm
7.1.1. Cleaning the interior compartments
Every time an operation is performed with the analyser, it is advisable to clean the electronic and uidic compartments.
1. Remove the side housings
2. Remove the side panels
3. Blow the dust from the electronic boards, components and fans with dry air.
7.1.2. Checking the fluidic connections
Check that all the uidic connections and connections to the electro valves and pumps have no leaks.
1. Remove the side housings
2. Remove the side panels
3. Touch each connection with your hand to verify that the joints are not leaking.
4. Use the service programme to open and close the electro valves and activate the pumps. Ensure there are no
uid leaks in each element when in both states.
7.1.3. Cleaning the water and low contamination waste containers
1. Remove the rear cover.
2. Remove the clamps securing the distilled water and low contamination waste bottles.
3. Empty the uid system using the service programme.
4. Unscrew each bottle.
5. Wash the distilled water and low contamination waste containers with neutral soap and water
6. Check and replace the water inlet lters in each container.
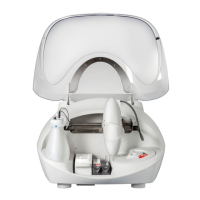
7.1.4. Washing the outside of the tips
Wear gloves and protective clothing when handling the tips.
With the analyser o, lift the 3 tips, 2 stirrers and wash station manually.
Take care when lifting the tips.
1. Clean each tip, stirrer and the wash station tips with a cloth soaked in washing solution.
2. Repeat the process with 70 alcohol
3. Start up the analyser with the service programme and wash the tips using the washing utility.
93