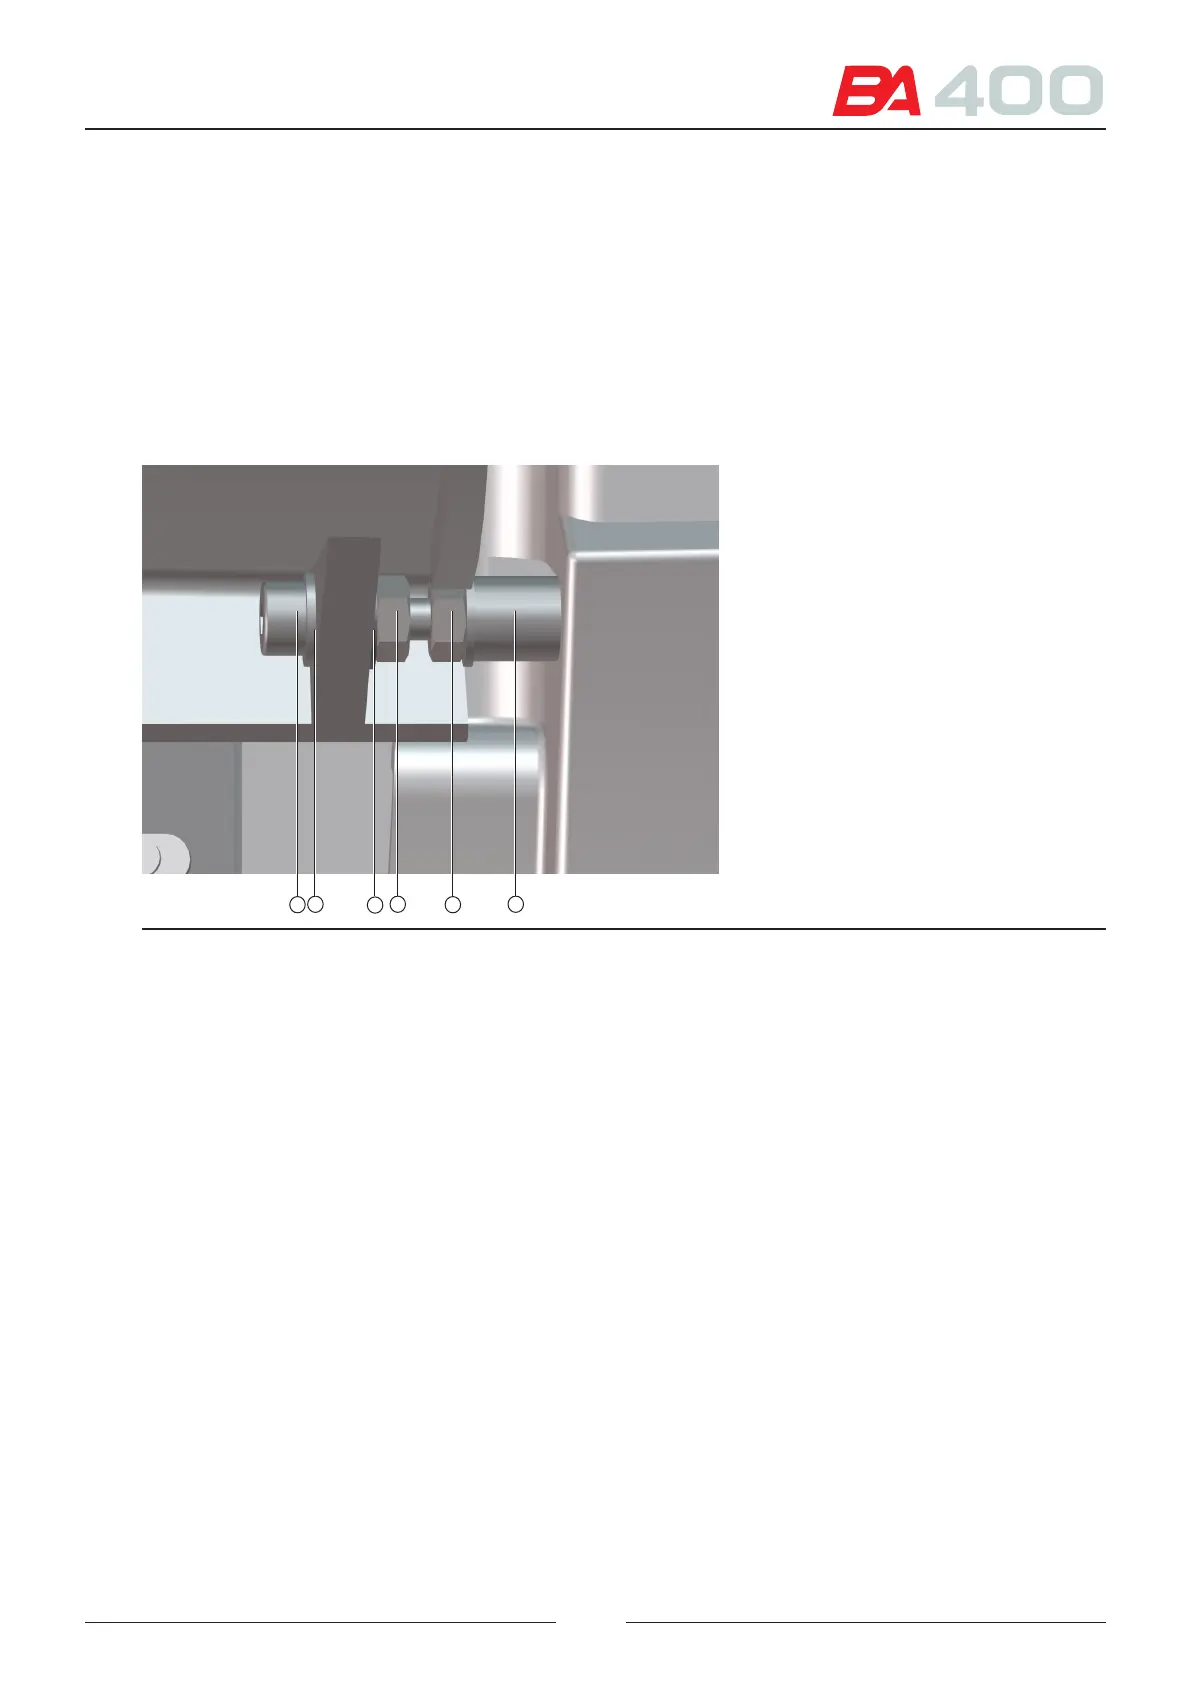
Proceed as follows to assemble the ISE cover (see Figure 8.4):
1. Assemble the screw, washers, nuts and divider in the cover before reassembling it again on the analyser.
2. Mount both assemblies as shown in Figure 8.4, one on each side of the ISE cover.
3. Do not tighten the nuts.
4. Position the ISE cover on the analyser and slightly tighten the screws (1) on each side.
5. Tighten one screw or the other until the ISE cover is correctly centred.
6. Secure the screw with the Allen key and tighten the nut with a Ford key (3)
7. Repeat the process with the nut (4)
Figure 8.35 Detail of installing the ISE cover
3
1 4
5
2
2
8.1.5. Remove the top front housing
e top front housing has two parts. Proceed as follows to remove one from the other.
Follow the same process to remove the other.
1. Remove the ISE cover.
See how to remove the ISE cover in chapter 8.1.4
2. Remove the left side (to remove the left part)
3. Remove the 4 screws from the top tray.
4. Remove the 4 internal screws.
5. Remove the housing. Before removing the housing make sure you have rst removed the LED indicator cable.
6. To reassemble the housing, follow the above steps in reverse order. First assembly the LED indicator cable.
99