3 Specifications of the Devices
Page 91
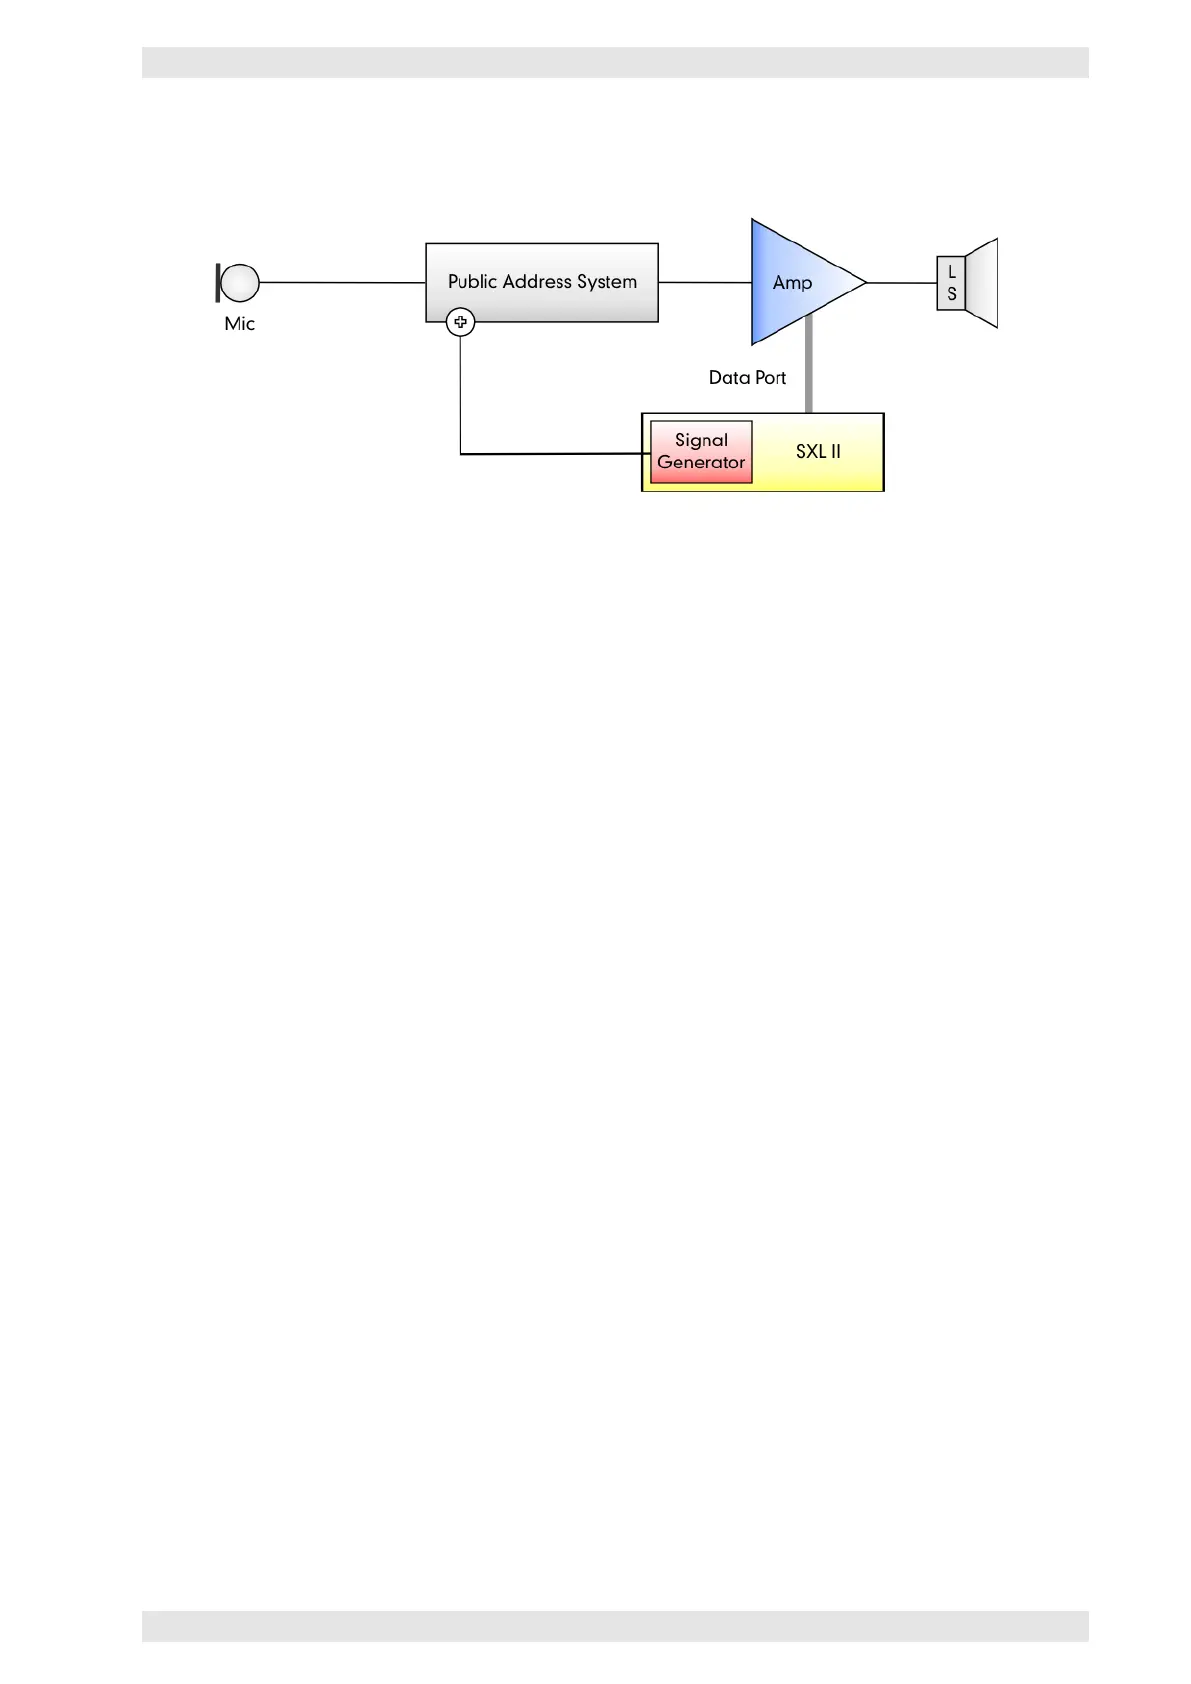
The following illustration shows the principal lay-out. The diagram shows an uninterrupted monitoring of
the audio path in compliance with the EN–60849:
Figure 3.75: SXL II - Line Monitoring
The paging system is responsible for the monitoring from microphone capsule to its own inputs, whereas the
SXL II monitors the rest of the audio chain. Every 90 seconds the signal generator switches a 20 kHz pilot
tone for 10 seconds to the transmission chain. During the 10 seconds, the SXL II measures the impedance of
the amplifier channels of interest (parameter LoadSigChk). In the case that the measured value is not within
the impedance window, an error will be displayed.
To ensure a reliable measurement, a sufficiently high output level is required. This level averages at about
1 to 2 Watts, depending on the amplifier model. Therefore, the line length and its corresponding losses are
important.
At very low levels (close to the lower limit), the measurement taken during the first few minutes after turning
on the amplifier may yield inaccurate results. To avoid misunderstandings, the system offers the parameter
LoadSig start after to delay the first measurement after power-on. A value of 600 s (= 10 minutes) has
proven to be adequate.
3.14.9.4 Error Acknowledgment
A possible amplifier problem will be indicated by a blinking AMPLIFIER LINK STATUS LED on the front panel
of the SXL II (refer to section 3.14.5) and by a short description on the LCD (refer to section 3.14.12). In
addition, the error is recorded to the logbook (refer to section 3.14.8.9).
To meet the safety requirements of today’s installations, a detected error needs to be confirmed after its
clearance. The confirmation results in two events:
• The SXL II tests whether the error has really been removed or still exists
• If the test has been successful, the verification will be recorded to the logbook
It is not possible to confirm an error via the network. Therefore, it is necessary to perform the following
steps on the front panel of the device:
• After an error has been detected, the display of the SXL II enters the ErrMatrix menu automatically
and shows the appropriate error codes under LastErr (refer to section 3.14.12).
• Pushing the DOWN key once will go to the parameter ErrorClr. Its value is OFF.
• Push ENTER and UP or DOWN to set its value to ON.
• Complete the setting with ENTER. The SXL II will automatically start the verification (this may take up
to 10 seconds).
c
2016 Bittner Audio Int. GmbH