BBP™31 Sign & Label Printer
User Guide
2-11
Creating Your First Label
Resetting the Printer
Creating Your First Label
Creating your first label on the BBP™31 Sign & Label Printer is as easy as
starting to type! You don’t need special software and you don’t have to be
connected to a PC to create or print labels.
This procedure describes how to create a text label with minimal formatting, using
basic editing techniques, and printing the label.
Note: Take advantage of the powerful label creation and editing capabilities by
using the pre-designed layouts, templates and graphics included with the BBP™31
Sign & Label Printer. See the procedures in this manual for detailed instructions.
To create a text-only label:
1. From the Home page, start typing.
2. To create another line in your text object, press Enter.
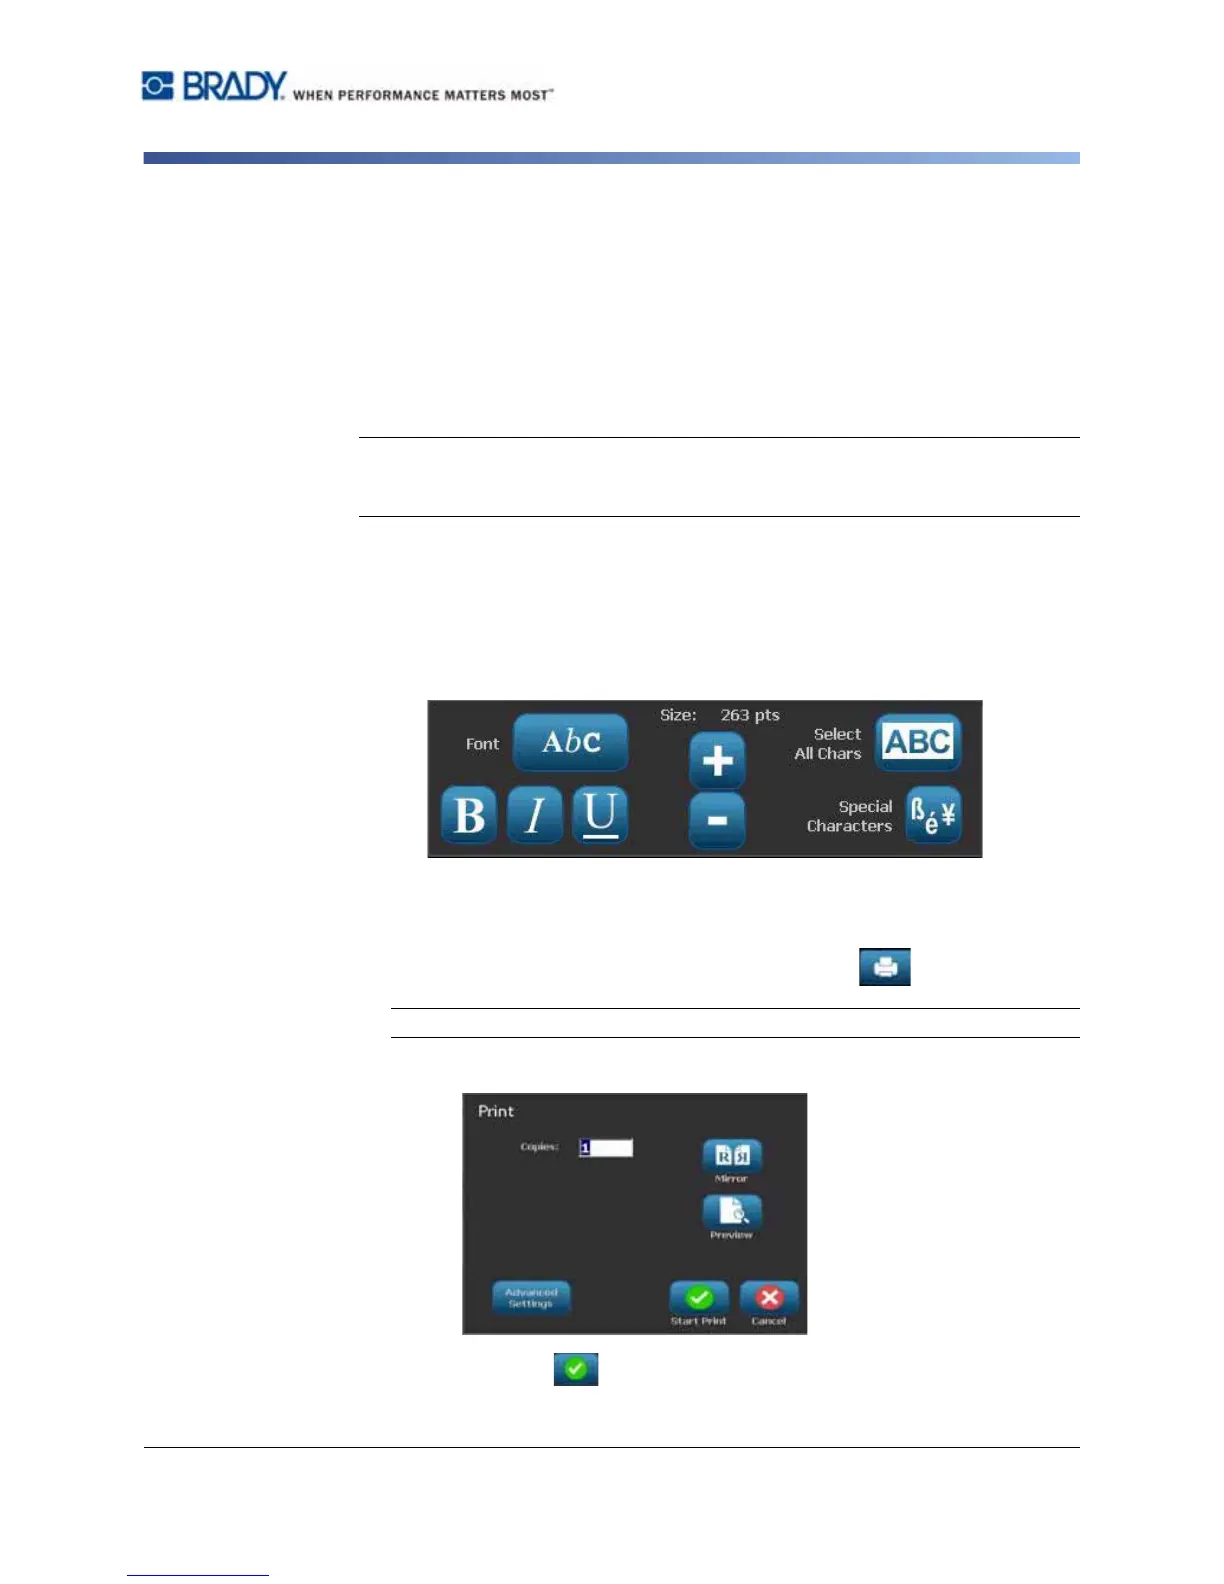
3. To change the look of your text, you can select any of the available font or text
attributes that display in the Control Panel as soon as you start typing.
To print your label:
1. When you are done creating your label, select Print .
Note: The printer must have ribbon and tape installed before you can print.
2. In the Print dialog box, type the number of copies you want to print.
3. Press Start Print .