Brooks Automation 7. Service Procedures
Part Number: PF40-DI-00010 Rev. A Tensioning the J1 (Z Column) Belts
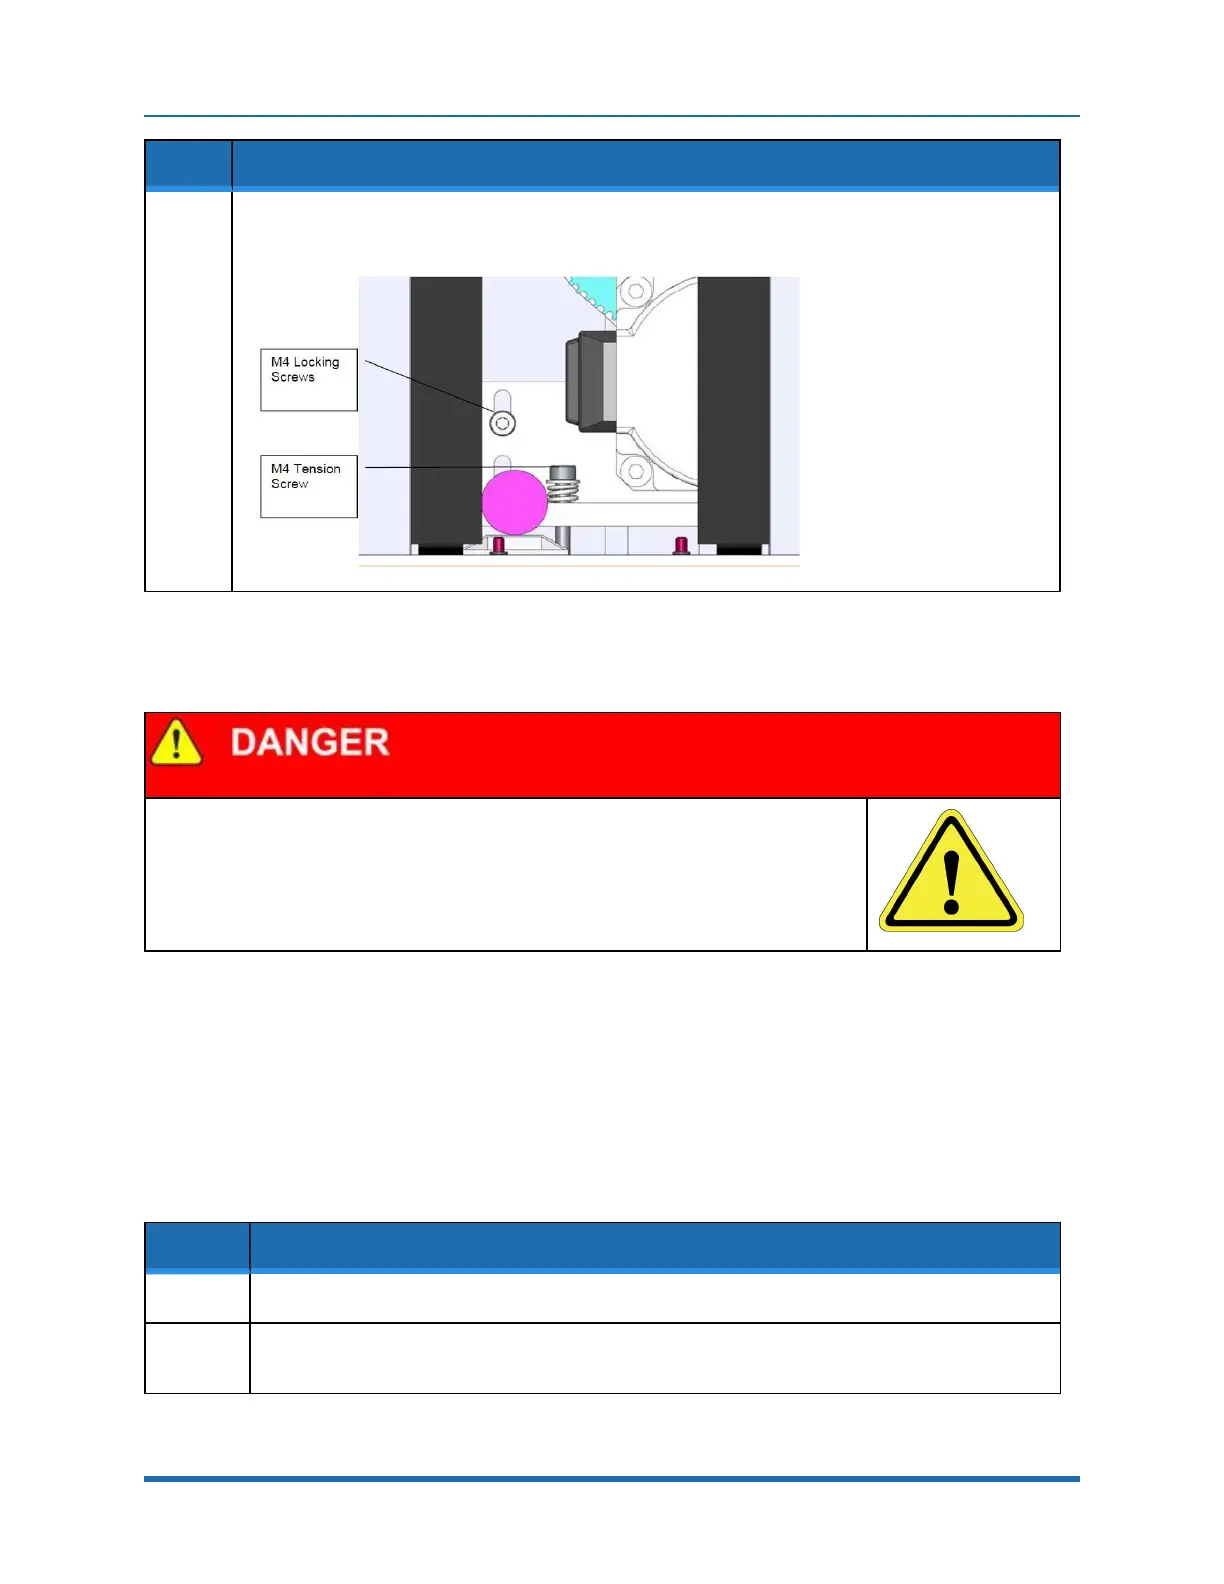
Step Action
6.
After adjusting the Tension Screw, the M4 locking screws should be tightened to lock the assembly in
place and the Front Cover and Top Plate should be replaced.
Tensioning the 2
nd
Stage Belt
Electrical Shock
Before tensioning the timing belts or replacing any motors, the AC power should be
disconnected. Removing the front cover allows access to the AC power terminals.
Tools Required:
l
Gates Sonic Belt Tension Meter, Model 507C
l
3.0 mm hex driver or hex L wrench
l
2.5 mm hex driver or hex L wrench
Step Action
1.
Turn off the robot power and remove the AC power cord.
2.
Remove the Top Plate of the robot by removing the (4) M5 socket head screws from the top plate of
the robot that attach the top plate to the Z column. Lift up the Top Plate.
Copyright © 2023, Brooks Automation
102