7. Service Procedures (Undefined variable: MyVariables.ProductName)
Tensioning the J3 Belt (Before 2014) Part Number: PF40-DI-00010 Rev. A
Step Action
5.
Remove the Z Carriage Stiffener Plate by removing the M3 X 6 FHCS attaching it to the Z
Carriage (shoulder).
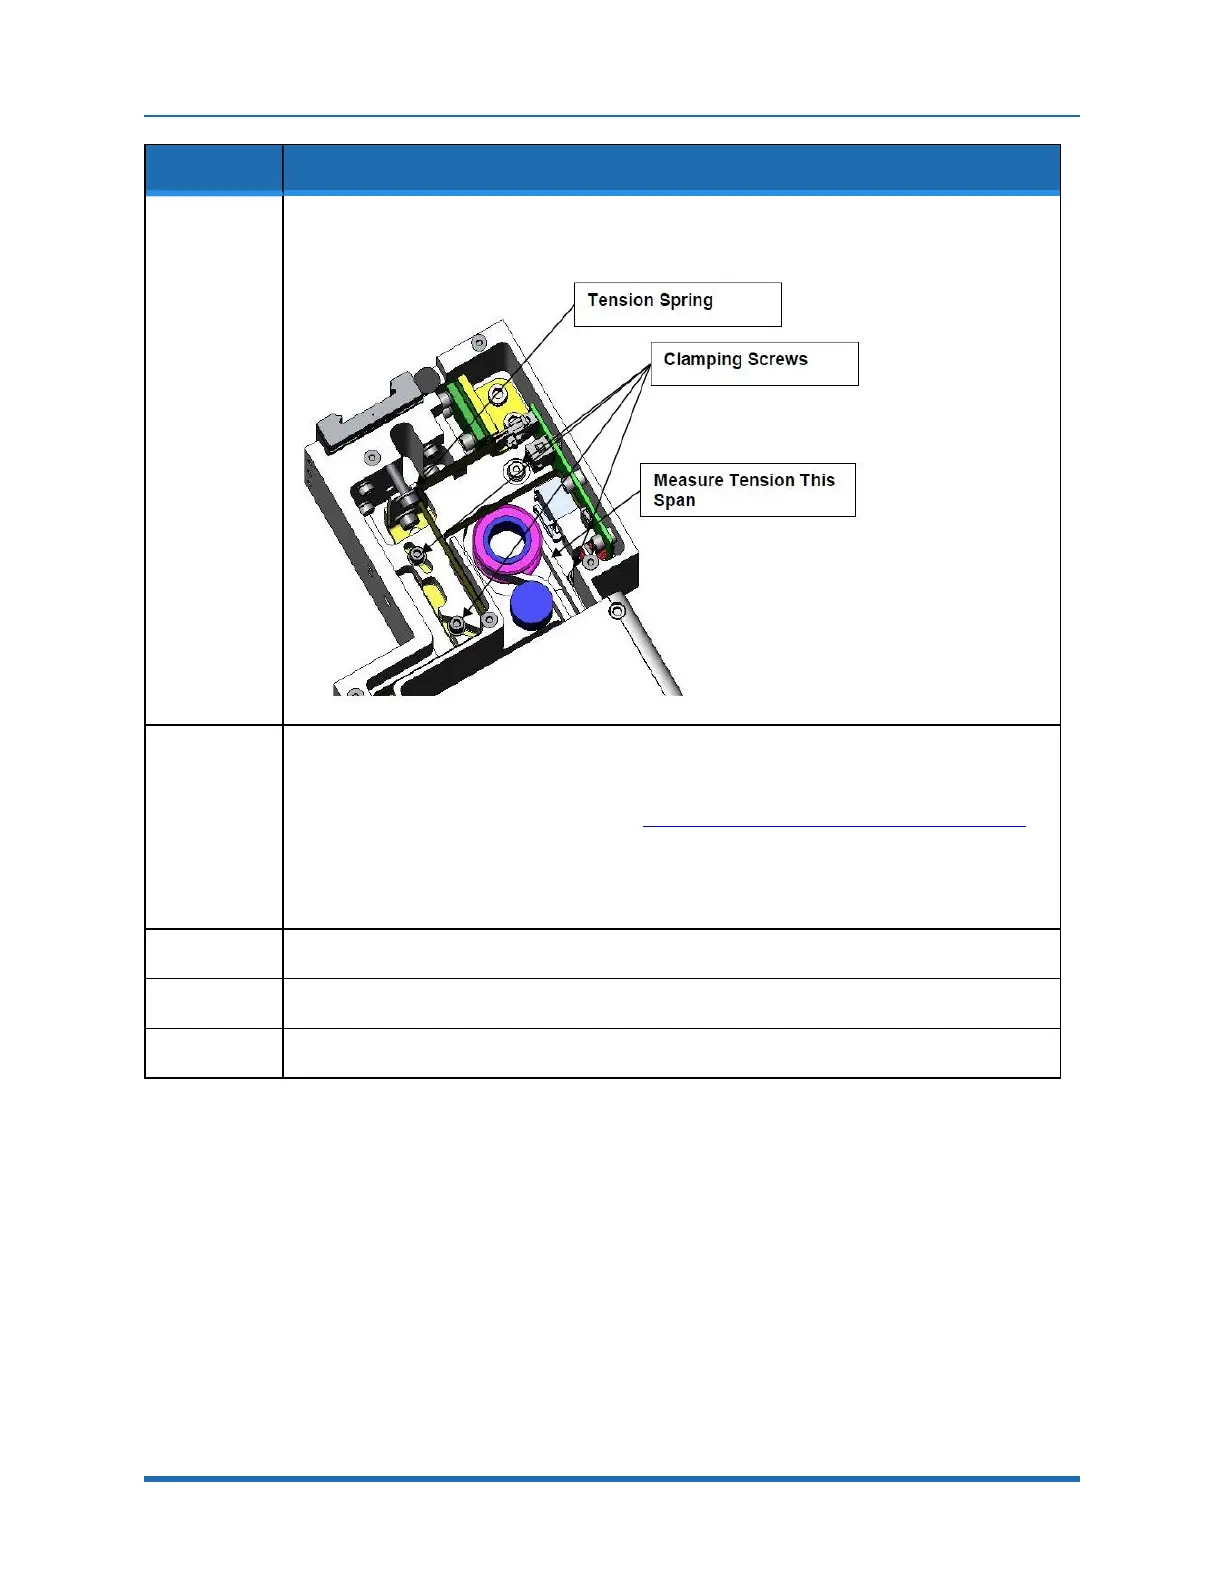
6.
Loosen the (3) M3 SHCS and (1) M4 Shoulder screw clamping the J2 Motor Mount Plate to the
Z Carriage. It may be necessary to remove the tie wrap securing the J2 Motor cables to the Z
carriage in order to access the clamping screw under these cables. It is best to measure the belt
tension with a tension meter as described in Appendix E: Belt Tensions, Gates Tension Meter. If
a belt tension meter is not available, the Tension Leaf Spring will automatically reset the belt
tension. It is helpful to jiggle the motor a little bit to be sure any friction is overcome. The motor
can be easily grasped by reaching under the Z carriage (shoulder). Then re-tighten the clamping
screws. Replace the tie wrap if it was removed.
7.
Replace the Z Carriage Stiffener Plate.
8.
Replace the Front Cover.
9.
Replace the Top Plate.
Tensioning the J3 Belt (Before 2014)
Tools Required:
l
Gates Sonic Belt Tension Meter, Model 507C
l
3.0 mm hex driver or hex L wrench
l
2.5 mm hex driver or hex L wrench
105
Copyright © 2023, Brooks Automation