7. Service Procedures (Undefined variable: MyVariables.ProductName)
Tensioning the Belt on the Optional
Linear Axis
Part Number: PF40-DI-00010 Rev. A
Tensioning the Belt on the Optional Linear Axis
Tools Required:
l
Gates Sonic Belt Tension Meter, Model 507C
l
3.0 mm hex driver or hex L wrench
To tension the Linear Axis Belt:, perform the following procedure:
Step Action
1.
Remove the linear axis cover by sliding the carriage to one end of travel, remove the (4) M4 X 30
mm SHCS from the end caps retaining the cover. It may also be necessary to loosen the connector
end cap by loosening the screws attaching the connector end cap to the Linear Axis Extrusion, so
that the cover can be lifted up and removed.
2.
Slide the carriage so that there is a 500 mm span of the belt between the belt tension clamp block
and the idler roller on the carriage.
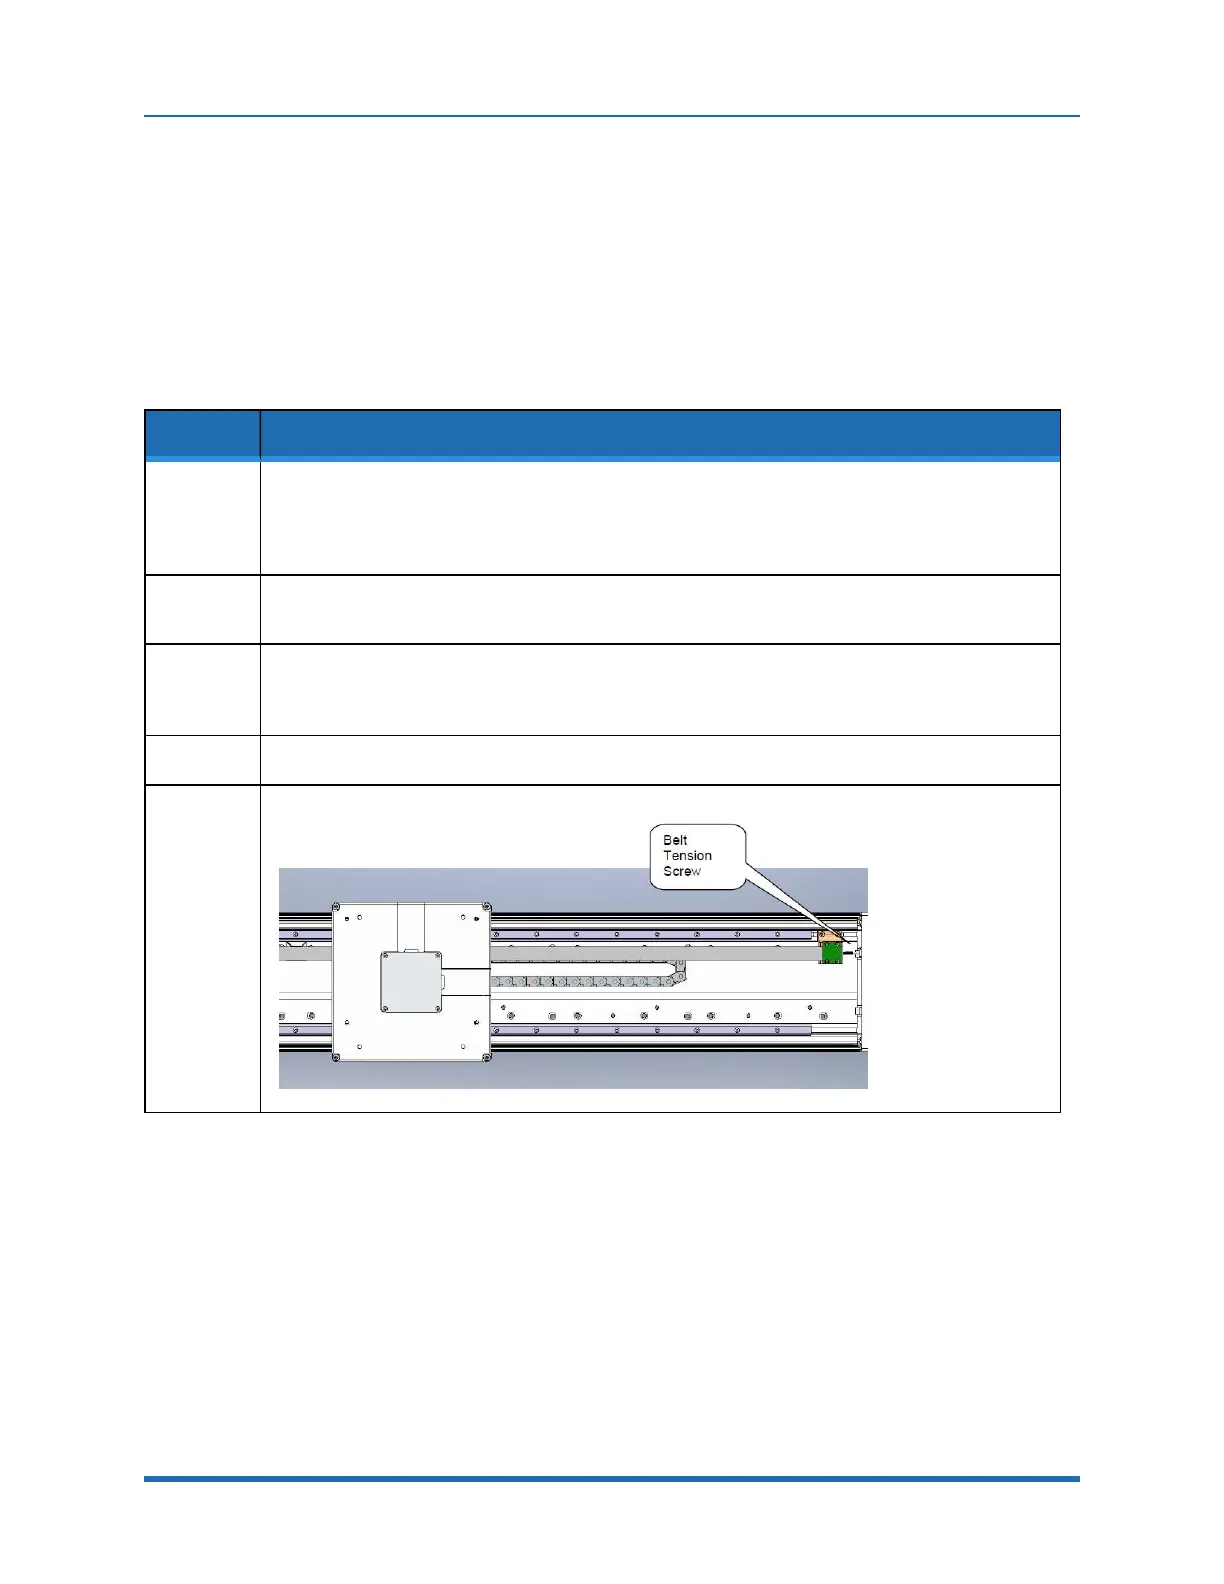
3.
Loosen the (2) clamping screws on the belt tension clamp block slightly. Adjust the belt tension
screw to adjust the belt tension to the values in "Appendix E: Belt Tensions, Gates Tension Meter"
on page 164. Tighten the clamping screws.
4.
Move the carriage back and forth the full length of travel and check the belt tension again.
5.
Replace the cover.
109
Copyright © 2023, Brooks Automation