7. Service Procedures (Undefined variable: MyVariables.ProductName)
Replacing the Power Supplies, Energy
Dump PCA, or J1 Stage Two (Output)
Timing Belt
Part Number: PF40-DI-00010 Rev. A
Step Action
4.
Remove the Front Cover by lifting it out vertically.
5.
Lay the robot down on its back side on a table where there is room to work.
6.
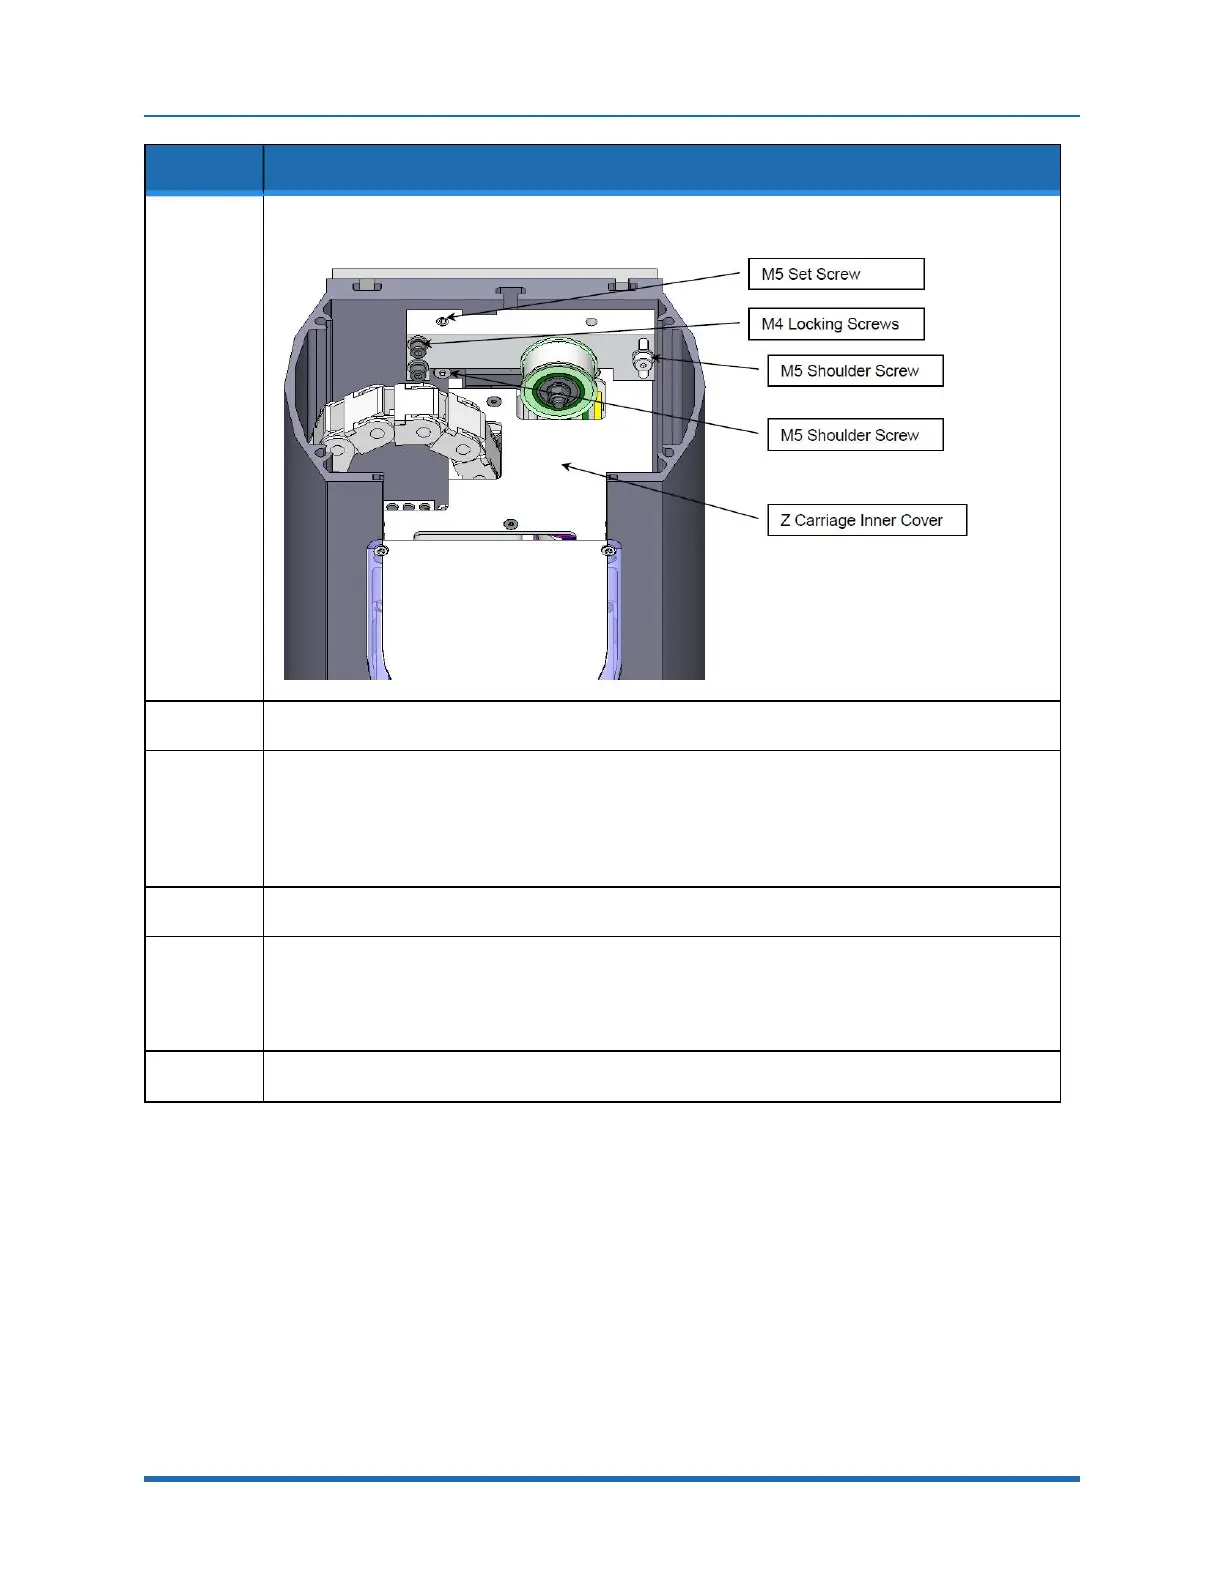
Remove the Idler Plate Assembly by removing the M5 set screw that compresses the Idler Plate
Spring, the (2) M4 SHCS that clamp the Idler Plate, and the M5 Shoulder Screw that forms the Idler
Plate pivot. Be careful not to drop the pressure washer and tension spring that are inside the Idler
Plate assembly. The tension spring presses against an M5 shoulder screw to tension the Z-axis
Stage 2 belt.
7.
Remove the remaining M5 shoulder screw.
8.
Disengage the Z Carriage Timing Belt from the lower Drive Pulley. If it is necessary to replace the Z
Carriage 2
nd
Stage Timing Belt, remove the Z Carriage Inner Cover and then the Timing Belt
Clamp from the Z carriage by removing the (2) M4 X 12 mm SHCS and lock washers and replace
the belt.
9.
Remove the left splash guard by removing the M3 X 8 mm SHCS on the retaining bracket.
111
Copyright © 2023, Brooks Automation