Brooks Automation 7. Service Procedures
Part Number: PF40-DI-00010 Rev. A Replacing the Robot Controller
l
Small flat bladed screw driver, with 1.5 mm wide blade type
l
M5 socket driver or M5 open end wrench or pliers
Spare Parts Required:
l
Guidance G1400B Controller PN G1X0-EA-B1400-12A
Prior to replacing the controller, the user may want to make copies of both the robot PAC files, and
any project files to a PC, using a procedure similar to that described in Loading a Project (Program)
or Updating PAC Files.
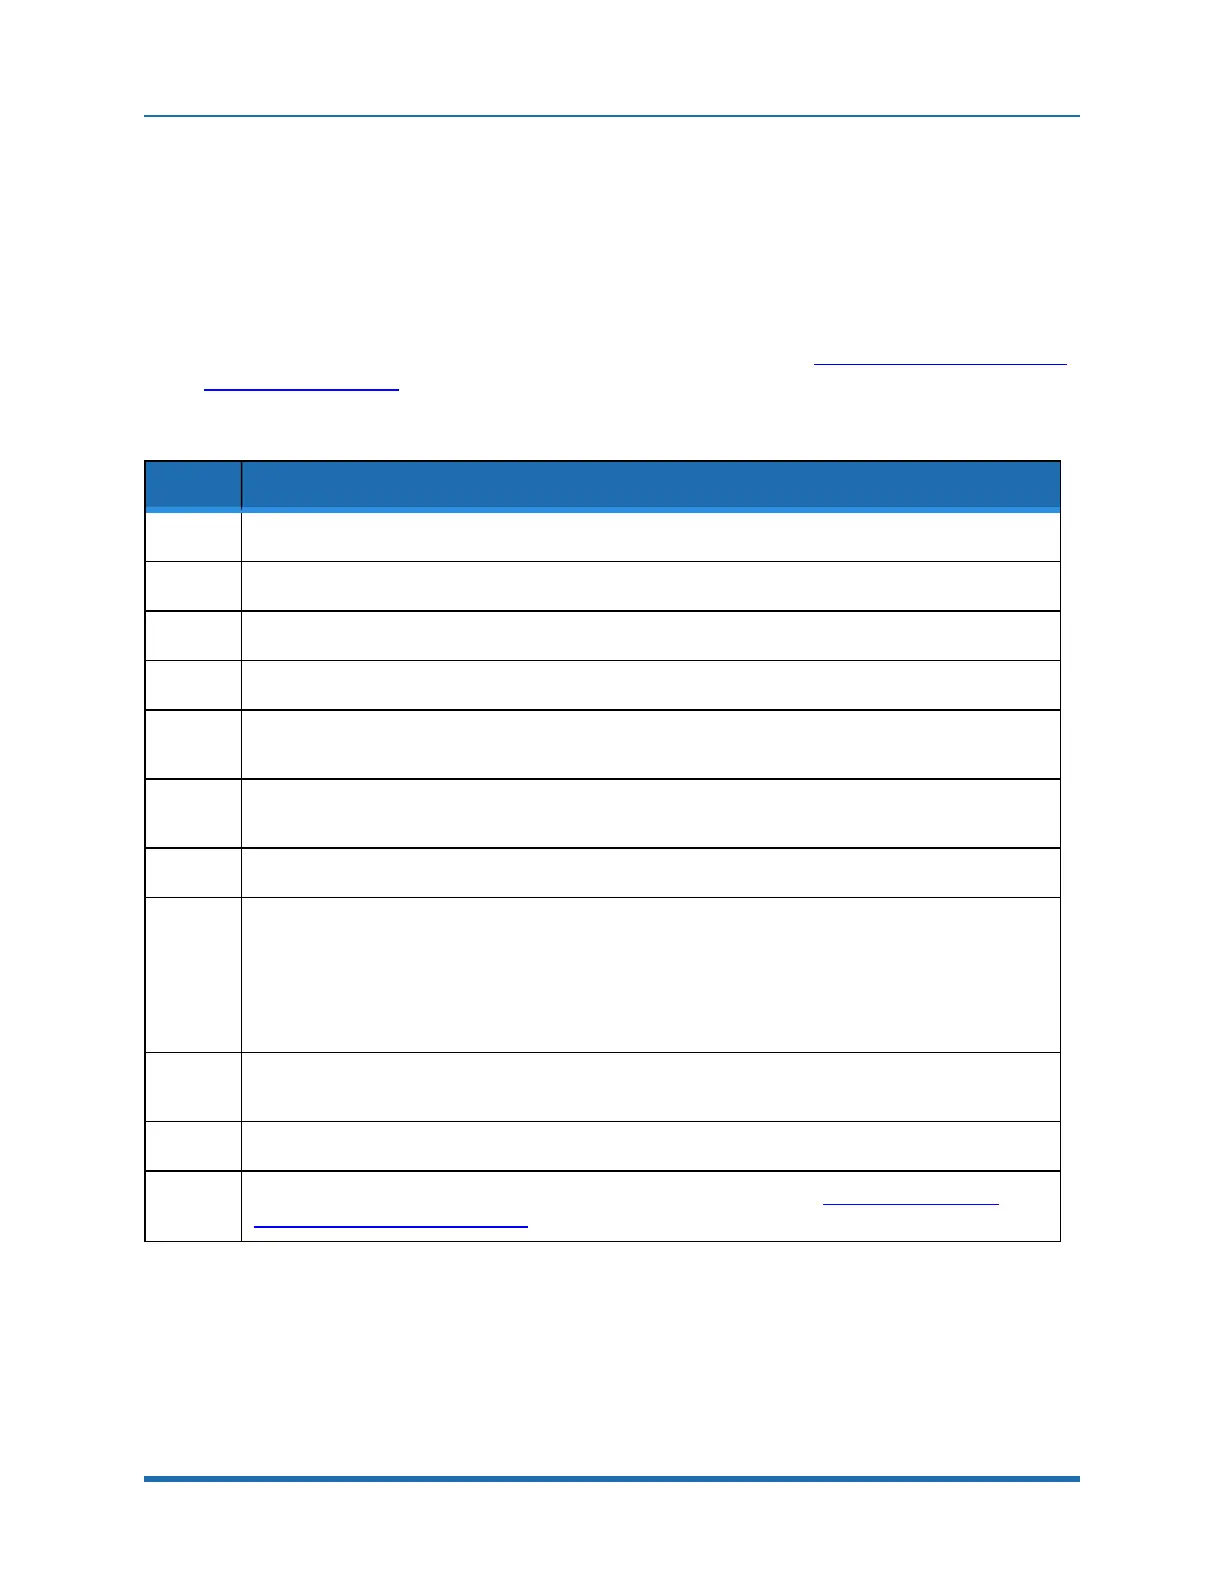
To replace the Robot Controller, perform the following procedure:
Step Action
1.
Turn off the robot power and remove the AC power cord.
2.
Remove the Inner Link Cover by removing the (4) M3 X 20 mm SHCS that attach the cover.
3.
Remove the upper circuit board by removing the (4) M2.5 X 6 mm screws.
4.
Unplug the cables from upper circuit board.
5.
Remove the lower circuit board by removing the (4) M2.5 X 16 mm standoffs with an M5 socket
driver.
6.
Unplug the cables from the lower circuit board. Use a small flat bladed screwdriver to gently release
the 3 zero-insertion-force (ZIF) flat flexible cable (FFC) connector compression lids.
7.
Check the jumpers on the replacement CPU board (top board) per the photo in Step12.
8.
Re-attach the harness and replace the circuit boards.
Refer to the schematics section above for connector labeling on the circuit boards.
Be careful that the 2-pin plug from the brake release switch plugs into the lower board and the 2-pin
plug on the pigtail from the lower board plugs into the upper board.
Be careful to gently press in the compression latch on the FFC encoder connectors with your finger,
not a sharp object.
9.
Make sure the Ethernet cable folds back along the under the upper circuit board but does not obstruct
the board to board connector.
10.
Make sure no cables will be pinched by the Inner Link Cover and replace the Cover.
11.
After replacing the Robot Controller the robot must be re-calibrated. See Calibrating the Robot:
Setting the Encoder Zero Positions.
Copyright © 2023, Brooks Automation
114