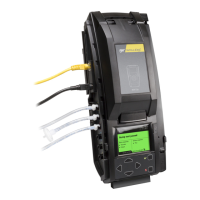
INTELLIDOX DOCKING MODULE USER MANUAL || DETECTOR OPERATIONS
BW TECHNOLOGIES BY HONEYWELL PAGE 53 OF 103
Special Considerations for IntelliDoX Ultra
Pre-Conditioning of the system is required for calibration of Ultra for NH3. Like a bump
test, it is necessary to flow the gas prior to a successful calibration:
1. Place unit in the dock
2. Select calibration using the IntelliDoX menu
Calibrate once to pre-condition the system – This calibration will result in a
fail
Calibrate the second time to test device – This calibration will result in a
pass
For best performance with reactive gases such as CL2 and NH3 it is recommended to use
short lengths of Teflon lined tubing for the connection between the gas cylinder and the
IntelliDoX.
Calibration of PID sensor
PID sensors have two calibration options: 3-point and 2-point. This manual section will
detail the necessary steps to perform both calibration types.
3-point calibration for PID sensor:
1. In the Fleet manager tool enable 3-point calibration option for PID under BW
Ultra configuration tab and save this configuration on Ultra detector.
2. Install multi inlet key in the IntelliDoX and configure 2 inlets for Isobutylene gas in
which one inlet is for span low gas concentration and another is for span high
gas concentration.
3. Place the detector into the IntelliDoX nest and close the lid.
4. After detector recognition IntelliDoX will provide 3 options bump test, calibration
and transfer data-log from my detector.
5. Click on calibration option and apply Isobutylene gas.
6. After successful calibration IntelliDoX will display “calibration passed” with green
color background screen with ICON and on the Ultra detector cal date and cal
status is updated as pass.
NOTE: If only one inlet is configured a missing gas screen will be shown by the IntelliDoX
at unit insertion.
2-point calibration for PID sensor:
1. In the Fleet manager tool disable 3-point calibration option for PID under BW
Ultra configuration tab and save this configuration on Ultra detector.
2. In the IntelliDoX configure one inlet for Isobutylene gas and place Ultra detector
into the IntelliDoX nest and close the lid.
3. After detector recognition IntelliDoX will provide 3 options bump test, calibration
and transfer data-log from my detector.
4. Click on calibration option and apply Isobutylene gas.
5. After successful calibration IntelliDoX will display “calibration passed” with green
color background screen with ICON and on the Ultra detector cal date and cal
status is updated as pass.
Ensuring proper operation of the IntelliDoX BW Clip4 module
After performing a bump test or calibration, remove the detector from the IntelliDoX
docking module to allow any residual gas to clear.
Leaving the detector in the docking module may cause it to fail the calibration. If a detector
is bump tested and then a calibration is performed without removing it from the docking
module, residual gas may cause the calibration to fail.
Calibrating a Detector