253
© Tieline Research Pty. Ltd. 2021
Gateway and Gateway 4 Manual v1.2
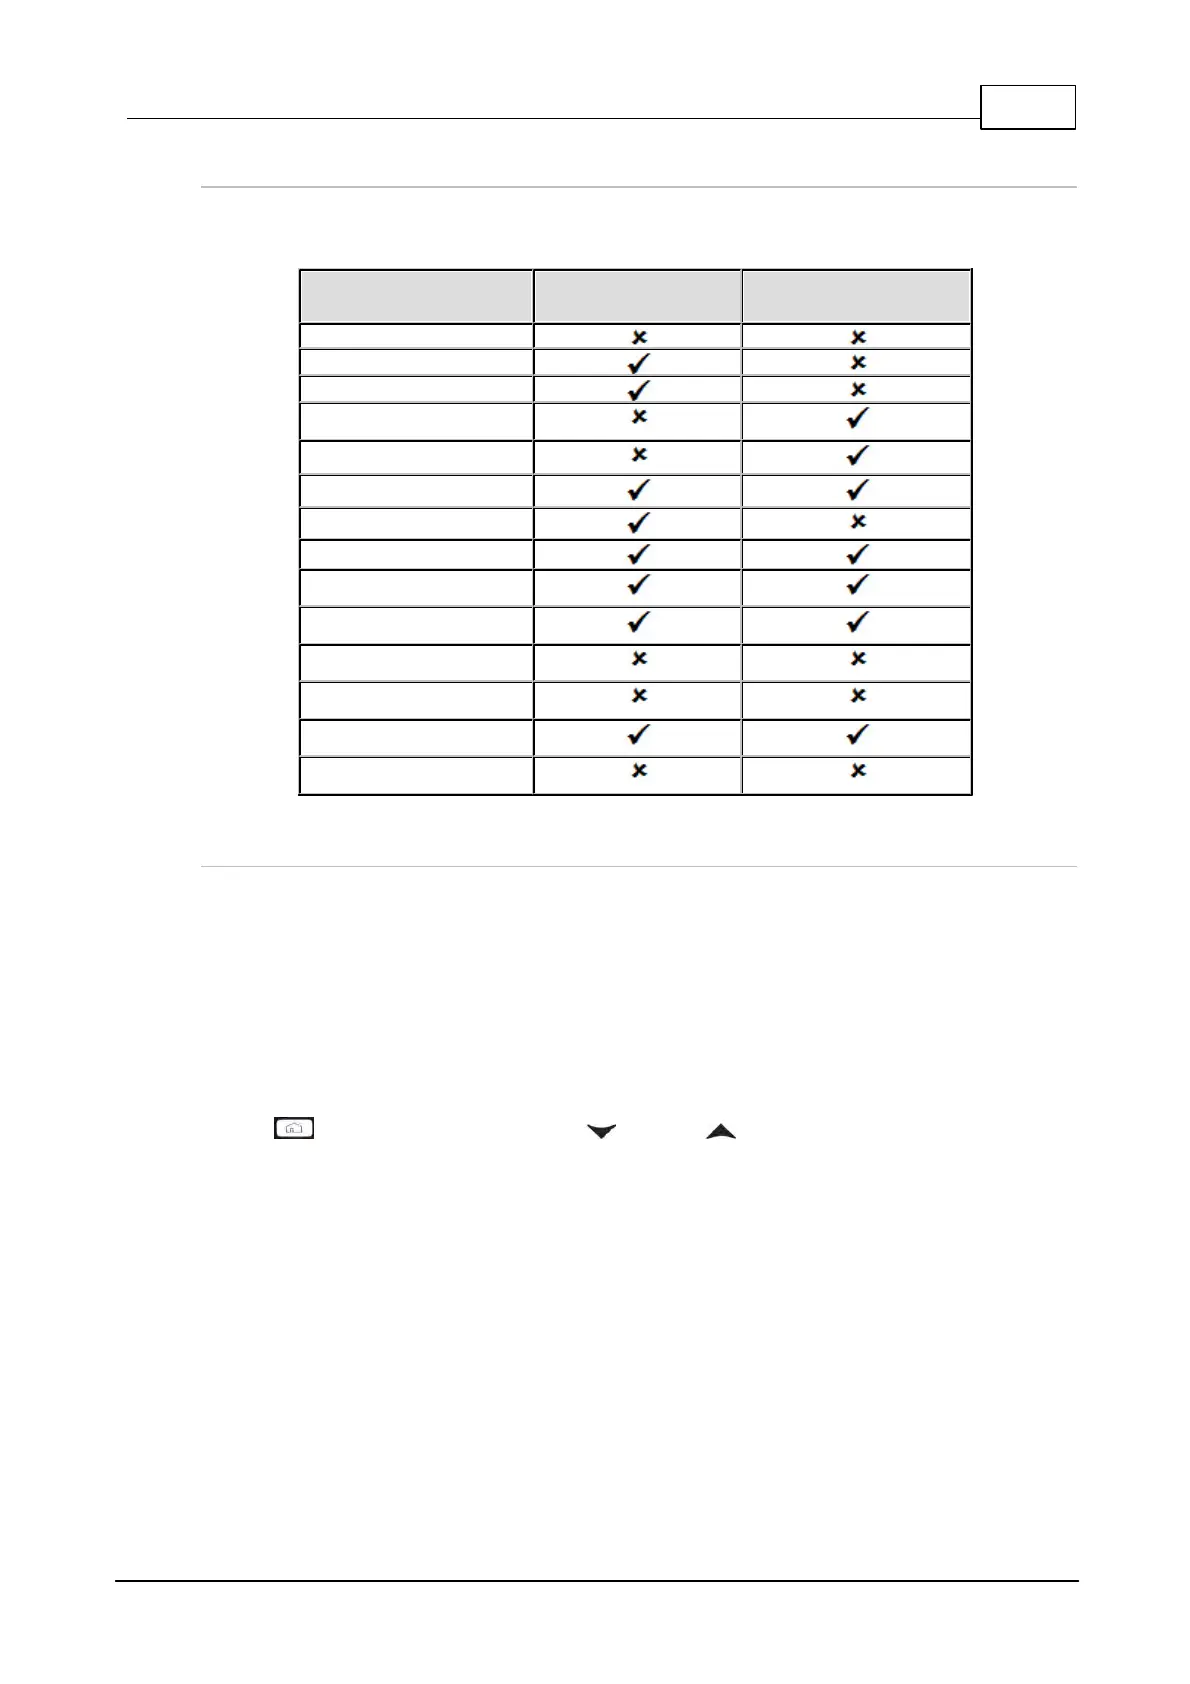
Which Algorithms Support Automatic Jitter Buffering?
The following table provides an overview of which algorithms are capable of using the automatic jitter
buffer feature over SIP and non-SIP connections.
Tieline Session Data
Connections
How to get the Best Jitter Buffer Results
When configuring automatic jitter buffer settings, establish the IP connection for a while before
‘going live’, to allow the codec to evaluate prevailing network conditions. The initial jitter buffer setting
when a codec connects is 500ms and it is kept at this level for the first minute of connection (as
long as observed delay values are lower than this point).
After the initial connection period the jitter buffer is adjusted to suit prevailing network conditions and
is usually reduced. Establish a connection for at least 5 minutes prior to broadcasting, so that the
codec has been provided with enough jitter history to ensure a reliable connection.
There are five jitter buffer states. Jitter buffer and connection status statistics can be viewed via
HOME > Cxns and use the down and up navigation buttons to scroll through
connection statistics. The first four stages are observed in “auto” jitter buffer mode.
1. Stabilization period (a1): A few seconds during which a stable connection is established.
2. Stage 2 (a2): A compatibility check occurs.
3. Stage 3 (a3): If the compatibility check is successful, this is the analysis hold-off period.
During a minute, the jitter buffer is held at a safe, fixed value of 500ms while enough history
is recorded to start jitter buffer adaptation.
4. Stage 4 “live” (A): This is where the codec determines it is safe enough to start
broadcasting using the auto-jitter buffer level. We recommend running the codec for a few
more minutes to obtain a more comprehensive history of the connection’s characteristics.
5. Fixed (F): This state is displayed if the jitter buffer is fixed.