97
© Tieline Research Pty. Ltd. 2021
Gateway and Gateway 4 Manual v1.2
support both DHCP (default) IP addressing and static IP addresses for dialing IPv4 connection
endpoints.
If you want to dial a codec with a public IP address you simply dial the IP address to connect. If you
want to dial a codec with a private IP address you need to perform network address translation
(NAT). NAT allows a single device, such as a broadband router, to act as an agent between the
public internet and a local private LAN. Usually this will be set up at the studio end so you can dial
into the studio from the remote codec.
Support for IPv6 connections allows you to use IPv6 infrastructure to connect to other codecs
globally.
Configuring Ethernet Ports and VLANs
The codec features two physical Ethernet port interfaces and up to four additional VLAN interfaces.
VLAN interfaces have features similar to physical Ethernet interfaces. However, a network
administrator needs to configure VLAN support across a LAN for them to be supported in the codec.
As an example, if only one physical Ethernet interface is available, VLANs can be used to operate
SmartStream PLUS or to separate codec Control and Streaming functions if required. Ethernet
and VLAN interfaces can be configured for:
· Controlling audio: codec control and command only from the Ethernet port.
· Controlling and Streaming: stream audio and control and command the codec via the Ethernet
port.
· Streaming audio: stream audio only from an Ethernet port.
· Nothing: Disable the Ethernet port from streaming audio and codec command and control.
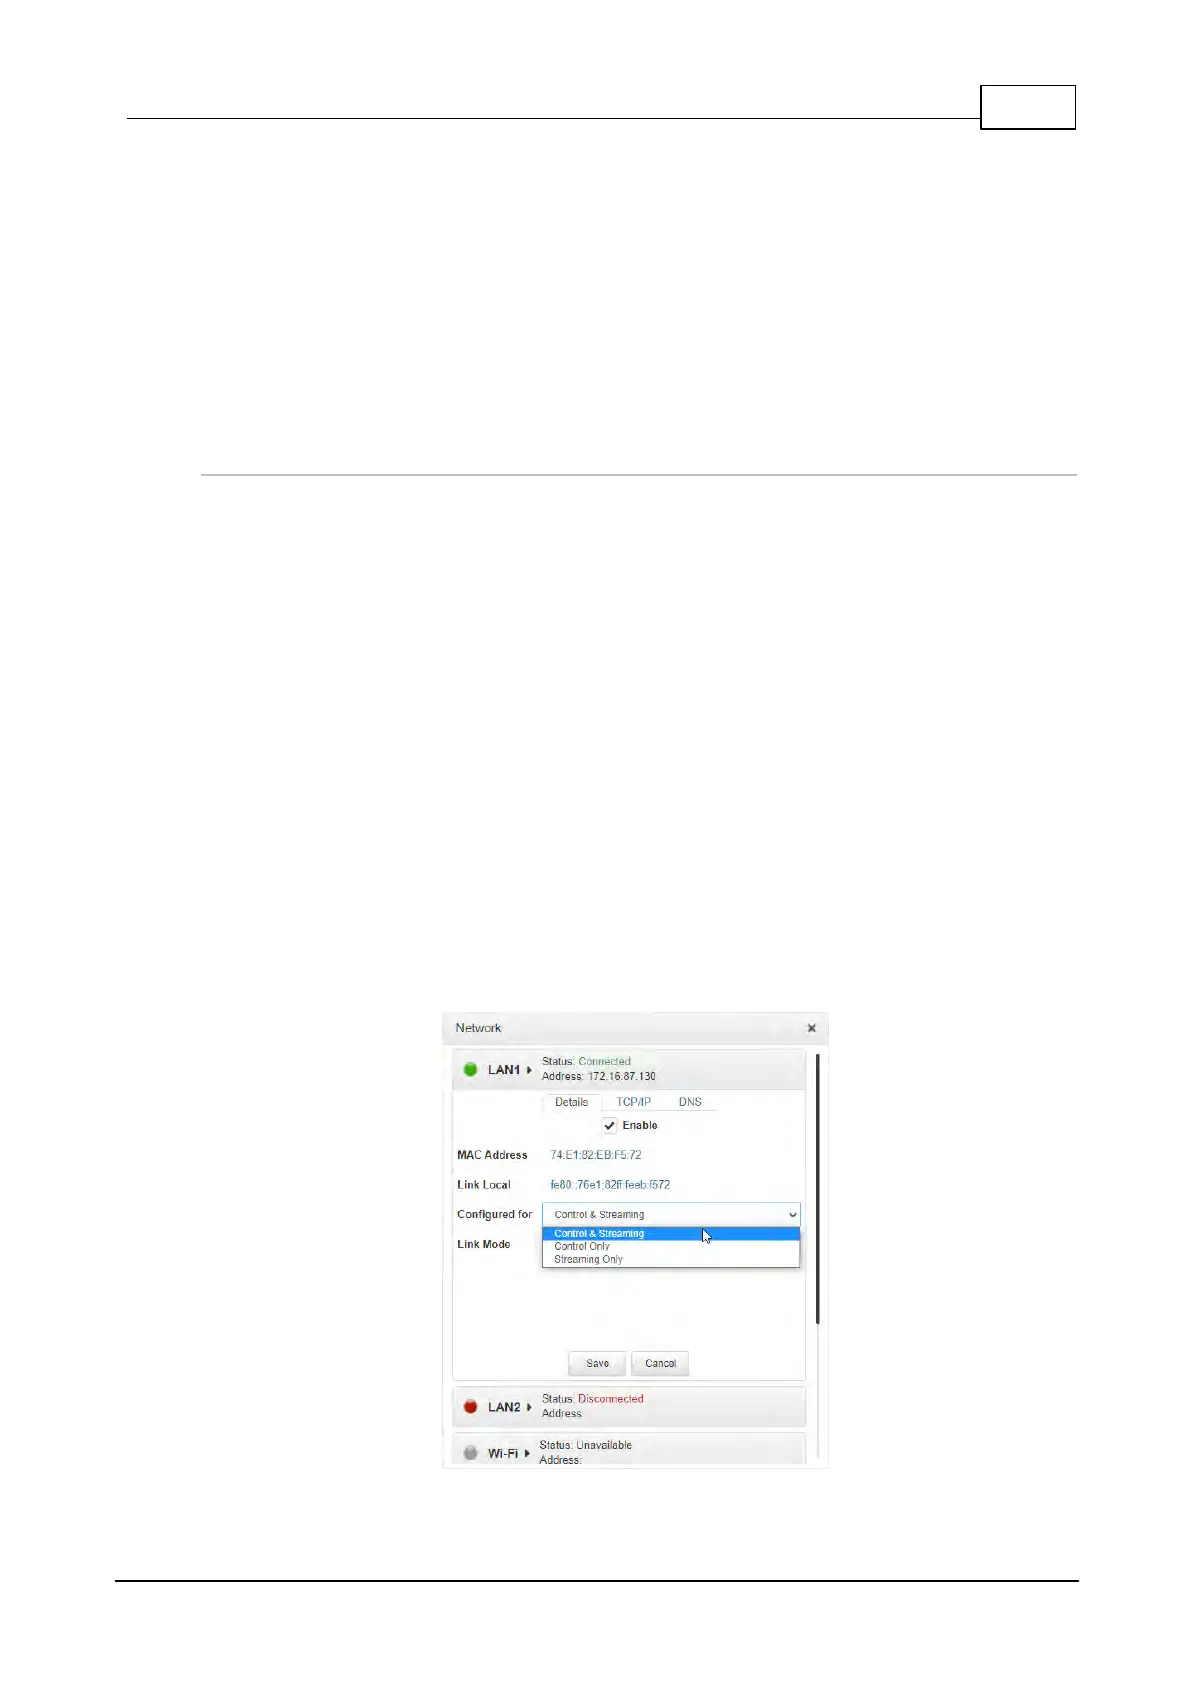
To edit control and streaming settings:
1. Click an interface to expand the details for the selected interface.
2. From the Details tab click the Edit button.
3. Select the Details tab and configure control and streaming as required.
4. Click Save.