User Manual: WaveLinx Lite (4.0)
36
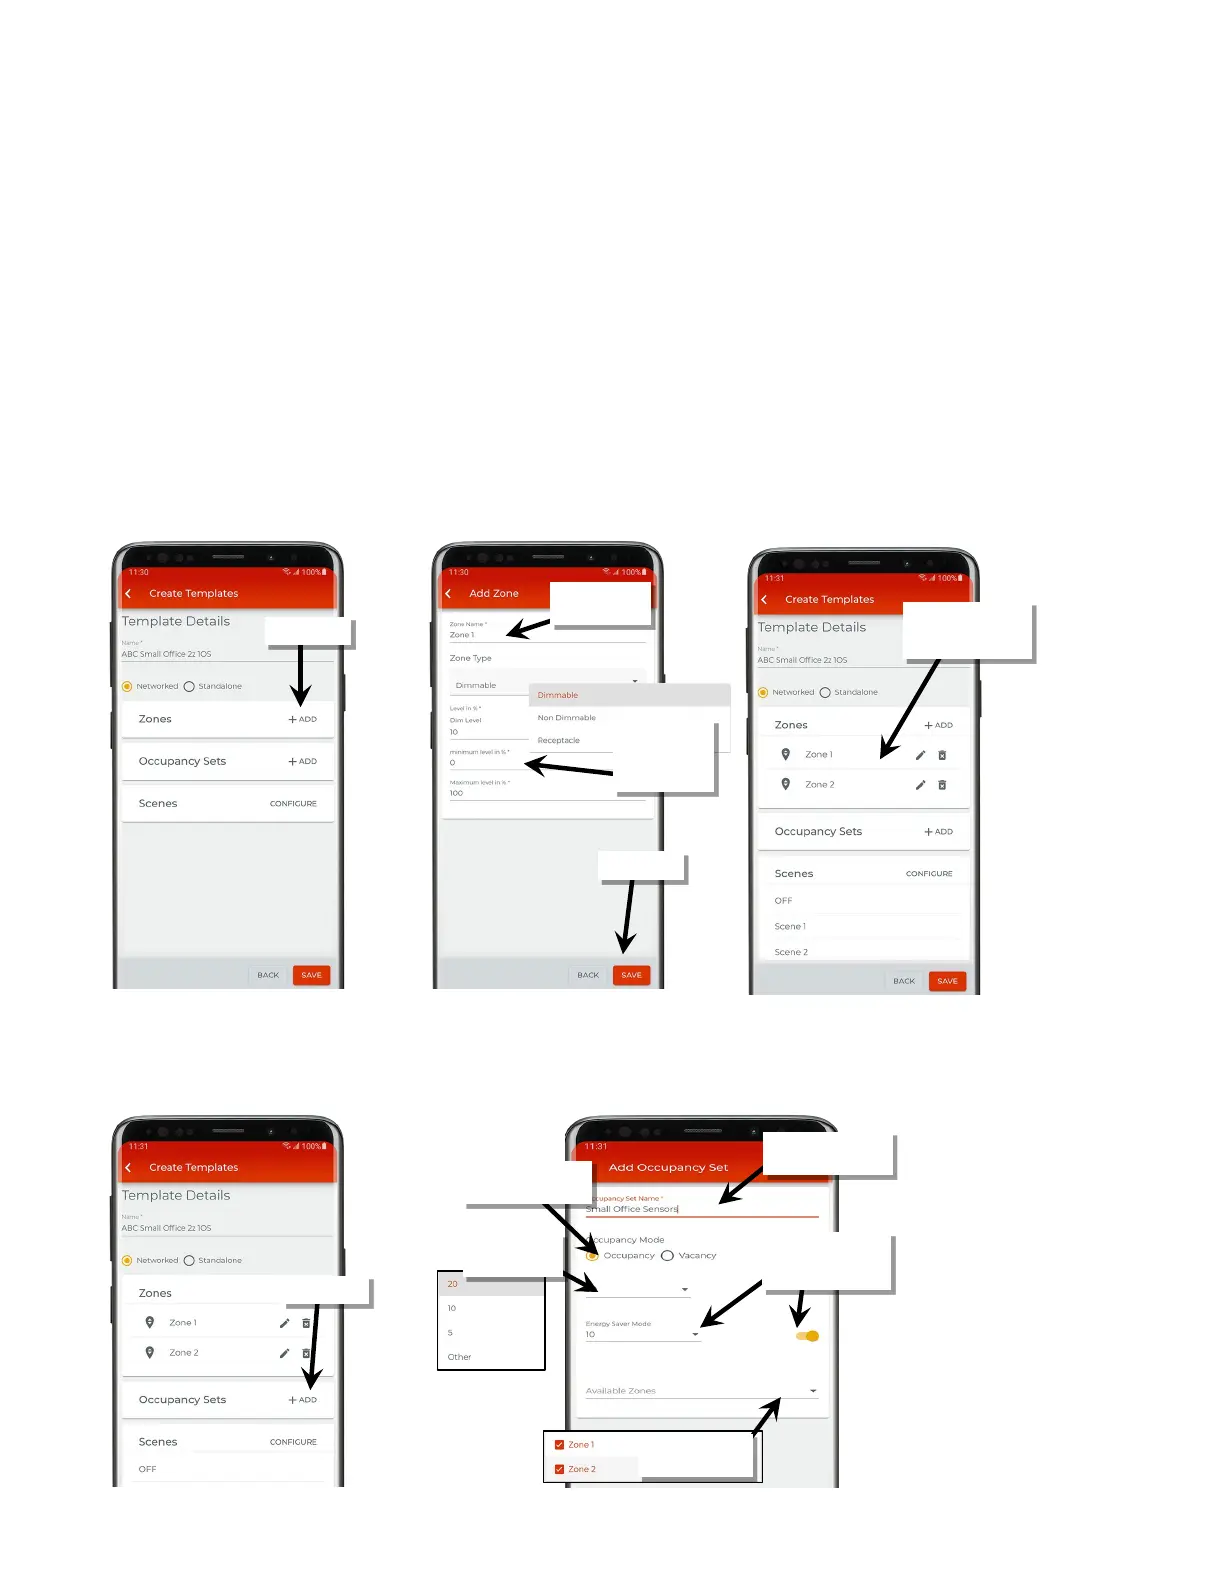
5: Next to ‘Zones’, tap ‘+ Add’ and when prompted, enter the desired zone name for the first zone along with the zone settings:
• Zone type: The zone type determines the options and behavior for the zone. For dimmable devices, select ‘Dimmable’ control. For relays or
lighting loads without dimming capability, select ‘Non Dimmable’ control. For devices controlling plug loads, select ‘Receptacle’. Both ‘Non
Dimmable’ and ‘Receptacle’ zone types follow first ON, last OFF functionality (command @ 1% to 100% = ON, command @ 0% = OFF).
• Dim Level: (dimmable zone type only) The light level that a newly provisioned device should go to when it is added to the zone. A low level
(default 10%) is recommended. When a device is provisioned and assigned to this zone, it will dim to the defined level along with other
devices in the zone. Unprovisioned devices will be ON to 100% if there is occupancy in the area, allowing for easy identification of
unprovisioned vs. provisioned devices.
• Minimum level (low end trim): (dimmable zone type only) The default setting is 0%. Sets the lowest level that dimming commands can set
the dimmable light level to. Typically used to provide a desired aesthetic. Regardless of the minimum level set, a 0% command will turn the
load OFF.
• Maximum level (high end trim): The default setting is 100%. For dimmable zones, this sets the highest level that the dimming command
can set the dimmable light level to. Typically used to save energy or to provide a desired aesthetic. For non-dimmable or receptacle zone
types, the maximum level can be adjusted to set the desired ON level if dimmable light sources are assigned to the zone. When an ON
command is received, the light source will be commanded ON to the maximum level set.
6: Repeat step 5 until all necessary zones are created for the template, then move on to the next step.
7: Next to ‘Occupancy Sets’, tap ‘+ Add’ and when prompted, enter the desired name for the occupancy set and the desired occupancy mode.
Select the desired hold time and enable/disable and configure energy saver mode.
8: Tap the drop down for ‘Available Zones’ and place a checkmark next to the zone(s) that should respond to this occupancy set.
zone name
are added for the
template
type and enter
the desired zone
settings
hold time
Mode
Enter the desired
occupancy set name
that should respond
configure energy saver
mode.