User Manual: WaveLinx Lite (4.0)
37
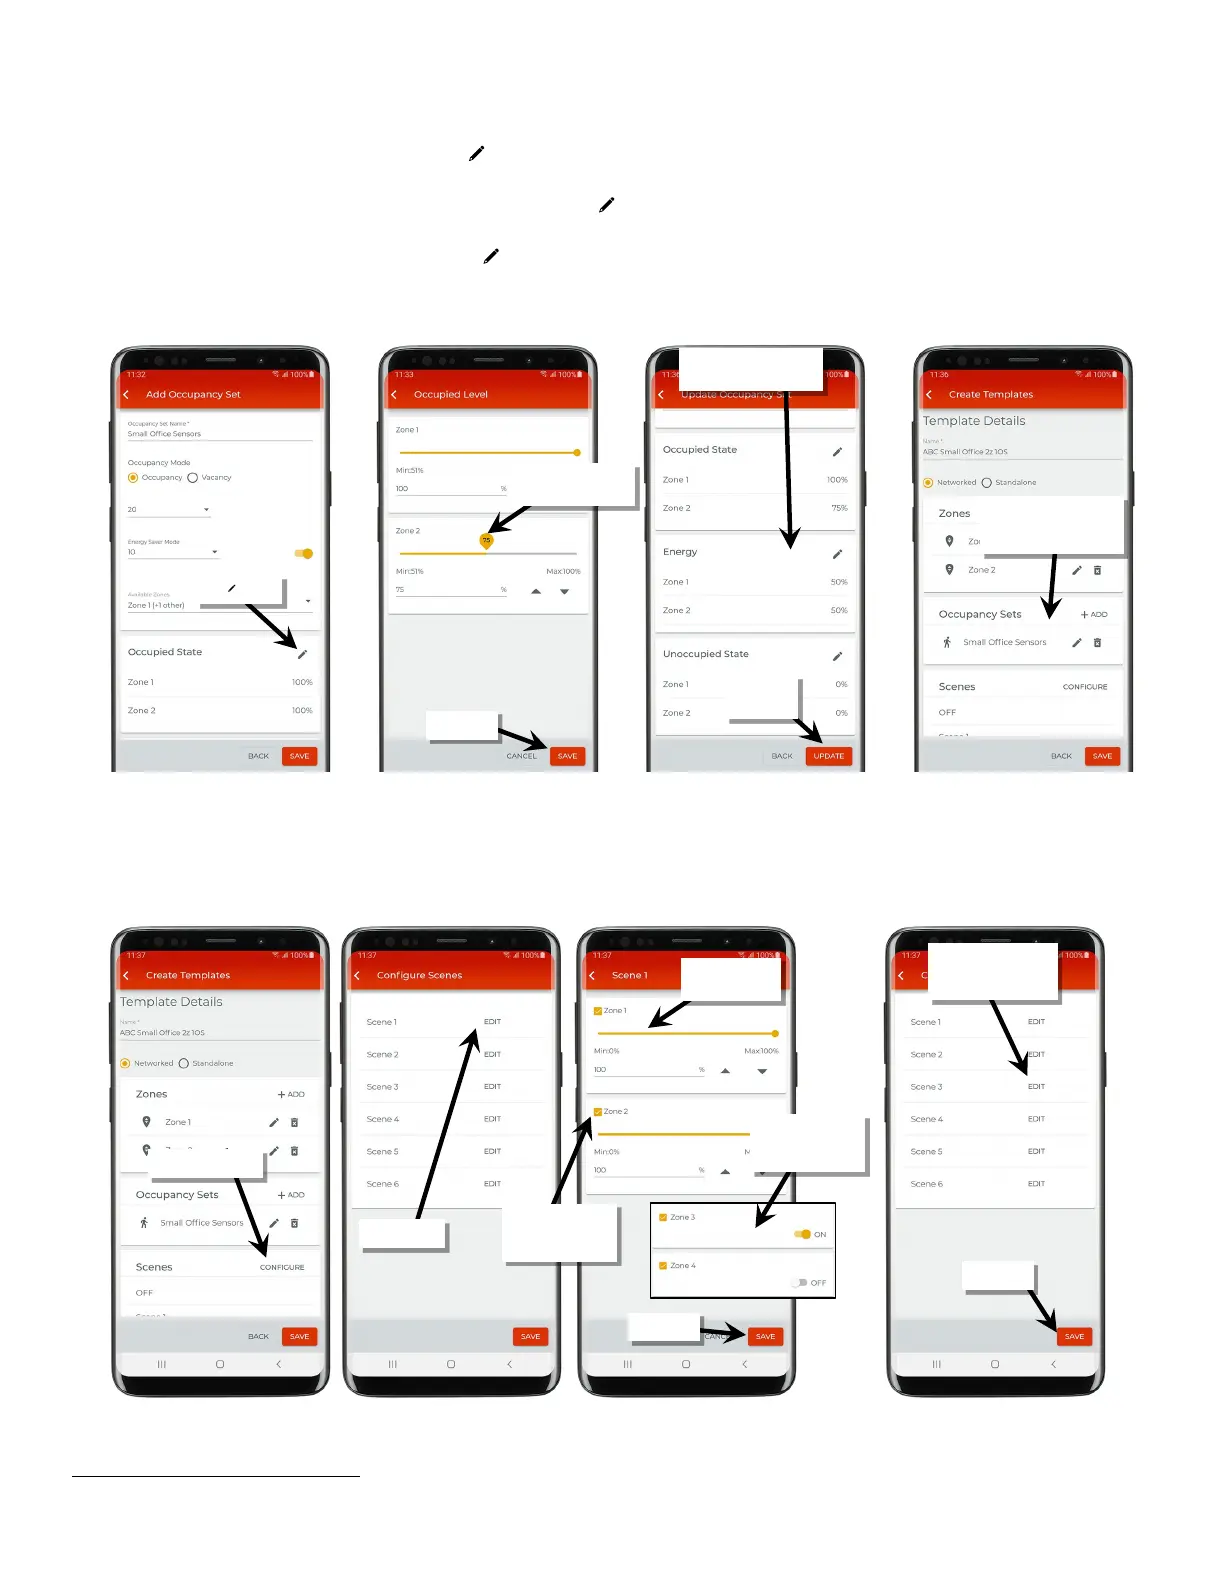
9: In the ‘Occupied State’ section
51
, tap the edit icon ‘ ’ and set the desired level for each zone for when the occupied action occurs. The level
set cannot be lower than the defined level for energy saver. Tap ‘Save’.
10: For dimmable zone types, in the ‘Energy’ section, tap the edit icon ‘ ’ and set the desired level for each dimmable zone for when the energy
saver mode occurs. The level set cannot be higher than the defined level for the occupied state. Tap ‘Save’.
11: In the ‘Unoccupied State’ section, tap the edit icon ‘ ’ and set the desired level for each zone for when the unoccupied action occurs. The
level set cannot be higher than the defined level for the ‘Energy’ level. Tap ‘Save’ and then tap ‘Save’ again.
12: Repeat steps 7 through 12 for any additional occupancy sets needed for the template before moving on to the next step.
13: Next to ‘Scenes’ tap ‘Configure’.
14: Tap ‘Edit’ next to the desired scene and then adjust each zone to the desired light level. Uncheck the zone if it should ignore the scene.
Zones that are unchecked will remain at their prior light level when this scene is recalled. Once all zones are set, tap ‘Save’.
15: Repeat step 13 for each scene until all the desired scenes are defined. Once done, tap ‘Save’.
51
If Vacancy mode is selected, the occupied state options will not be available.
dimmable zone
or ‘Update’
‘Unoccupied State’
Repeat until all occupancy
sets are added for the
template
should ignore this
scene
each zone
all edited as desired for
the template
non-dimmable or
receptacle zones