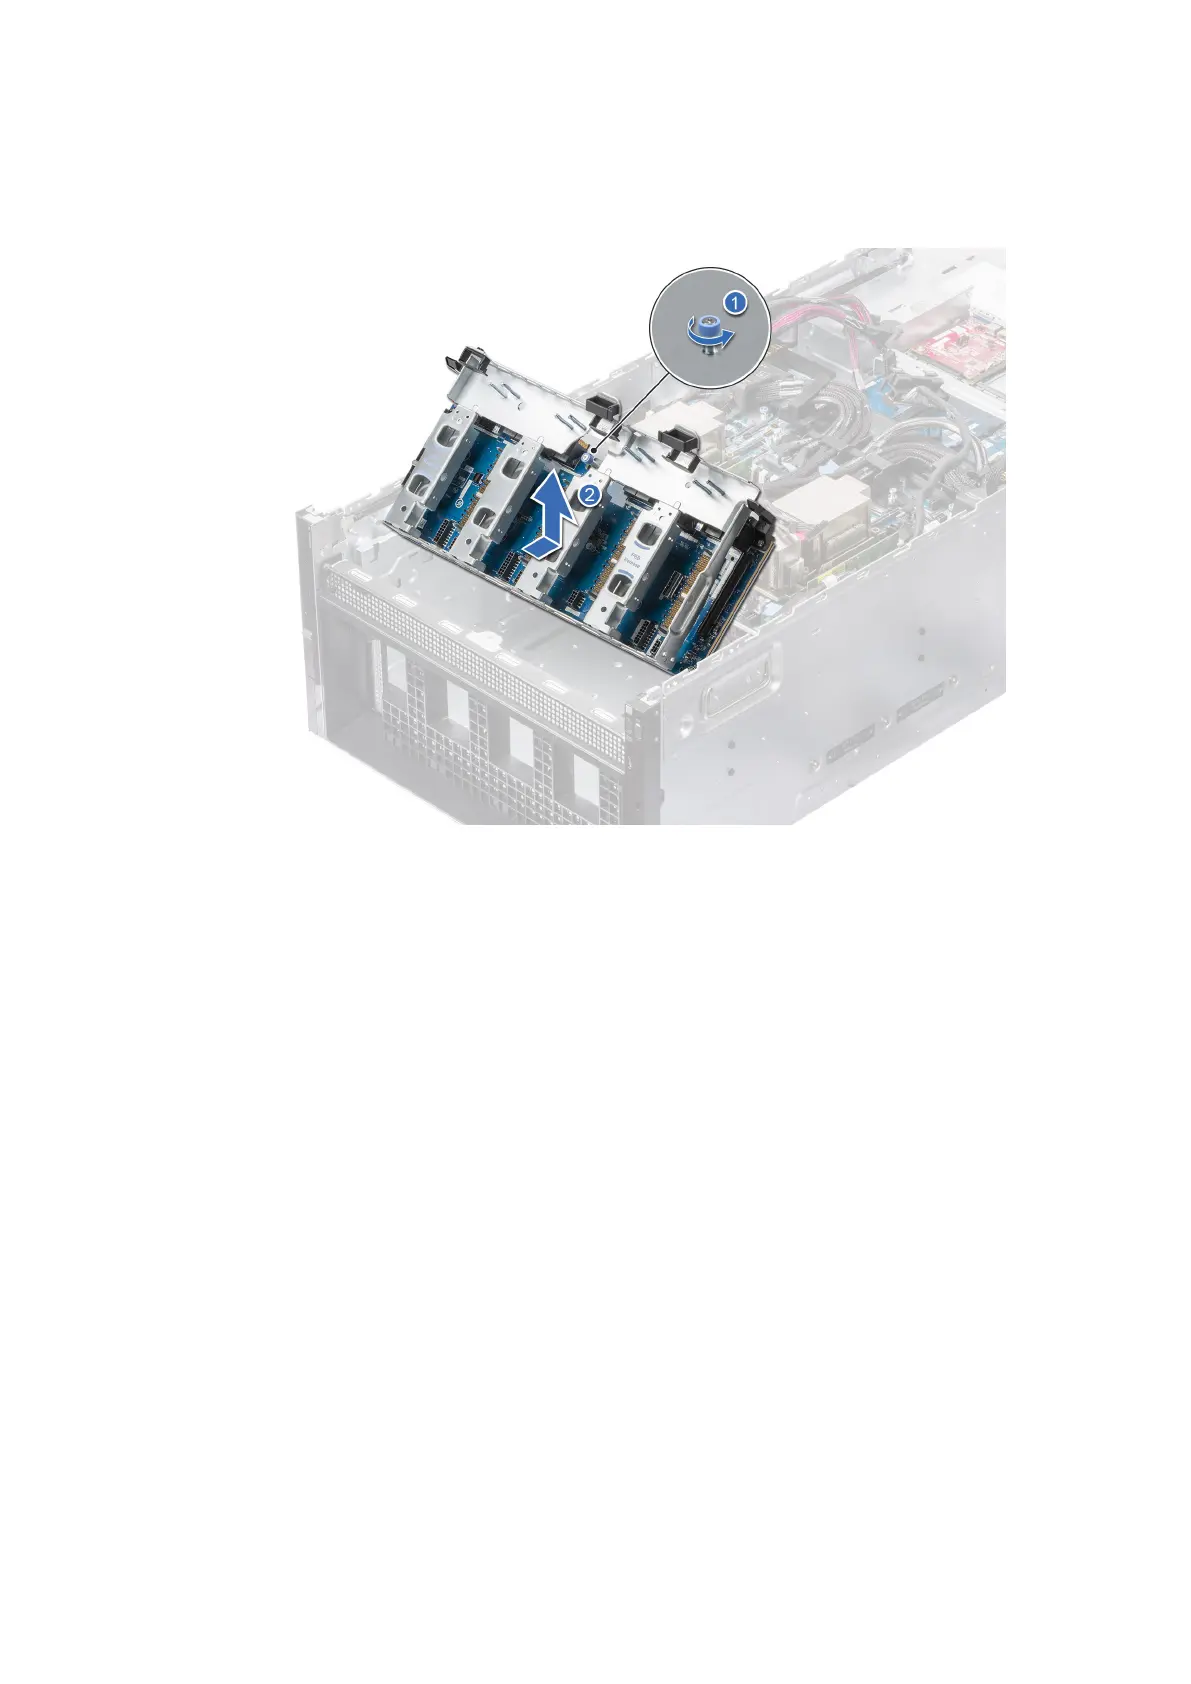
Steps
1. Using Phillips 2 screwdriver, loosen the thumb screw on the PCIe base board.
2. Hold and slide PCIe base board toward rear of the chassis.
3. Lift the PCIe base board from the chassis.
Figure 92. Removing the PCIe base board
Next steps
1. Replace the PCIe Base Board.
Installing the PCIe Base Board
Prerequisites
1. Follow the safety guidelines listed in the Safety instructions.
2. Follow the procedure listed in the Before working inside your system.
3. Remove the front top cover.
4. Remove the cooling fan cage assembly.
5. Remove the air shroud .
6. Remove the drives.
7. Observe and disconnect the drive backplane cables from the connector on the system board and backplane.
8. Slide out the drive cage.
9. If required, remove the front PERC module.
10. Remove the PSB top cover.
11. Observe and disconnect the cables connected to PSB module from system board.
12. Remove the PSB module.
Steps
1. Align and insert the tabs on the PCIe base board with the slots on the system.
2. Slide the PCIe base board forward until it clicks into place.
124
Installing and removing system components
 Loading...


