Table 4. Right control panel(continued)
Item Indicator or button Icon Description
NOTE: Press the power button to gracefully shut
down the ACPI-compliant operating system.
System configurations - Rear view for PowerEdge
XE9680
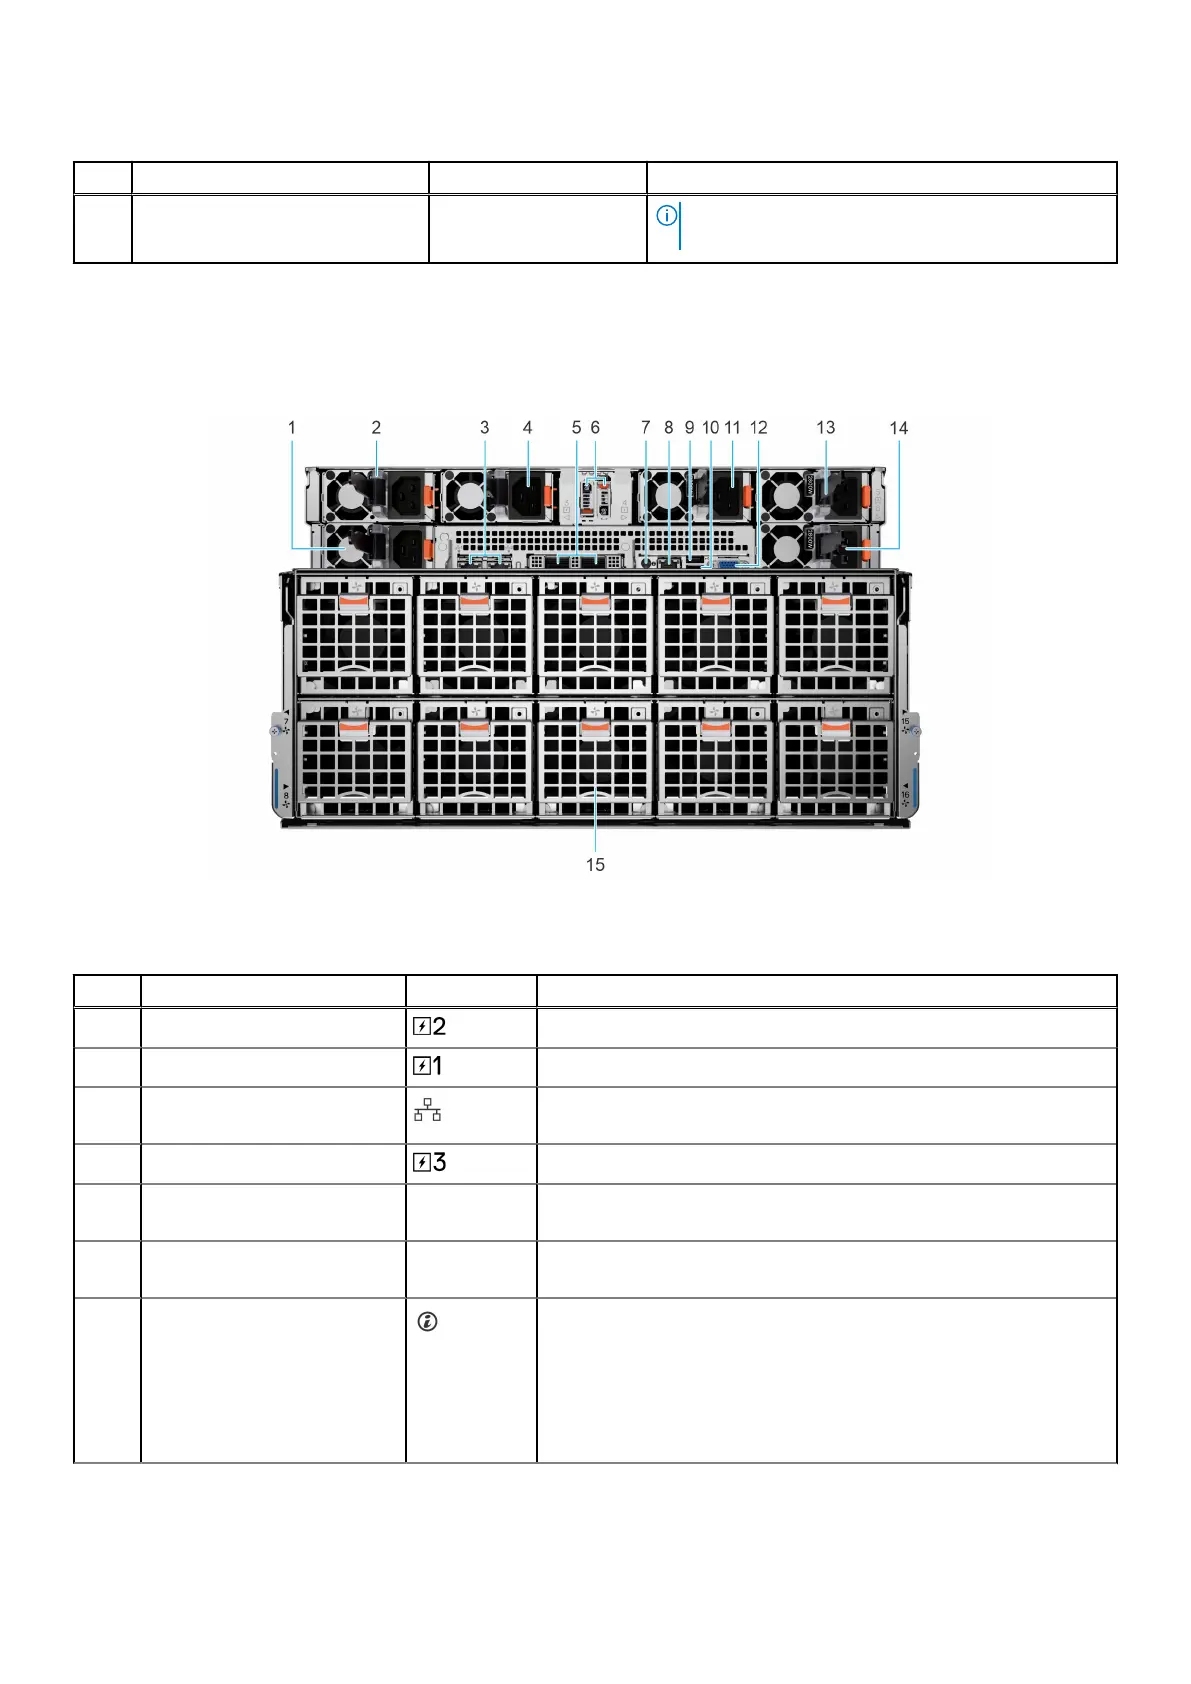
Figure 5. Rear view of the system
Table 5.
Rear view of the system
Item Ports, panels, or slots Icon Description
1 Power supply unit (PSU2) Indicates the PSU2.
2 Power supply unit (PSU1) Indicates the PSU1 or primary PSU.
3 NIC Ports The NIC ports that are integrated on the LOM card provide network
connectivity which is connected to the system board.
4 Power supply unit (PSU3) Indicates the PSU3.
5 OCP NIC card N/A The OCP NIC card supports OCP 3.0. The NIC ports are integrated
on the OCP card which is connected to the system board.
6 BOSS-N1 N/A There are two M.2 connectors populated on the board and support
two NVMe drives for boot.
7 System Identification (ID)
button
The System Identification (ID) button is available on the front and
back of the system. Press the button to identify a system in a rack
by turning on the system ID button. You can also use the system ID
button to reset iDRAC and to access BIOS using the step through
mode. When pressed, the system ID LED in the back panel blinks until
either the front or rear button is pressed again. Press the button to
toggle between on or off mode.
14 Dell PowerEdge XE9680 system configurations and features