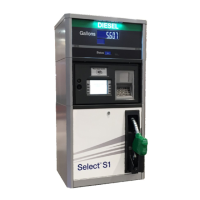
Table 6.1: Displays are the same. Two versions of controller board shown.
Figure 6.42: Sales display assembly, ver1 left, ver2 right
6.14.2 Sales Display Glass Replacement
Replacing the glass panel requires removing the U-frame of the bezel on both sides of the dis-
penser.
1
Raise bezels on both sides of the dispenser.
2
Turn off power at the dispenser power switch.
3
Disconnect all cables from sales display controller and remove remove controller board/display
assembly as explained in Sec 6.14.
4
Re-install the display assembly onto the new replacement panel and set aside.
5
Using a flat blade screwdriver, gently pull up on the latch under the bezel U-frame and then
slightly tap U-frame forward to keep the latch released on this side of frame. Fig . 6.43. Note
that some models also have a screw below the latch that will need removing.
6
Repeat the above step on other side of the U-frame, then remove U-frame as shown in Fig
6.46.
7
Lower bezel.
8
Repeat the steps 5-7 on opposite side of dispenser. The U-frame on both sides must be
removed in order to perform the next step.
9
Remove the small top cover plate on both sides. Fig 6.48.
10
Remove the turn screw and detach the bezel door stop. Fig 6.50.
11
Release the latch under the pivot section on both sides of panel, as shown in Fig 6.51, and
remove the sales display panel.
12
Install new panel.
WM048523 Rev 08 01/2019 115
6 Replacement Procedures
 Loading...