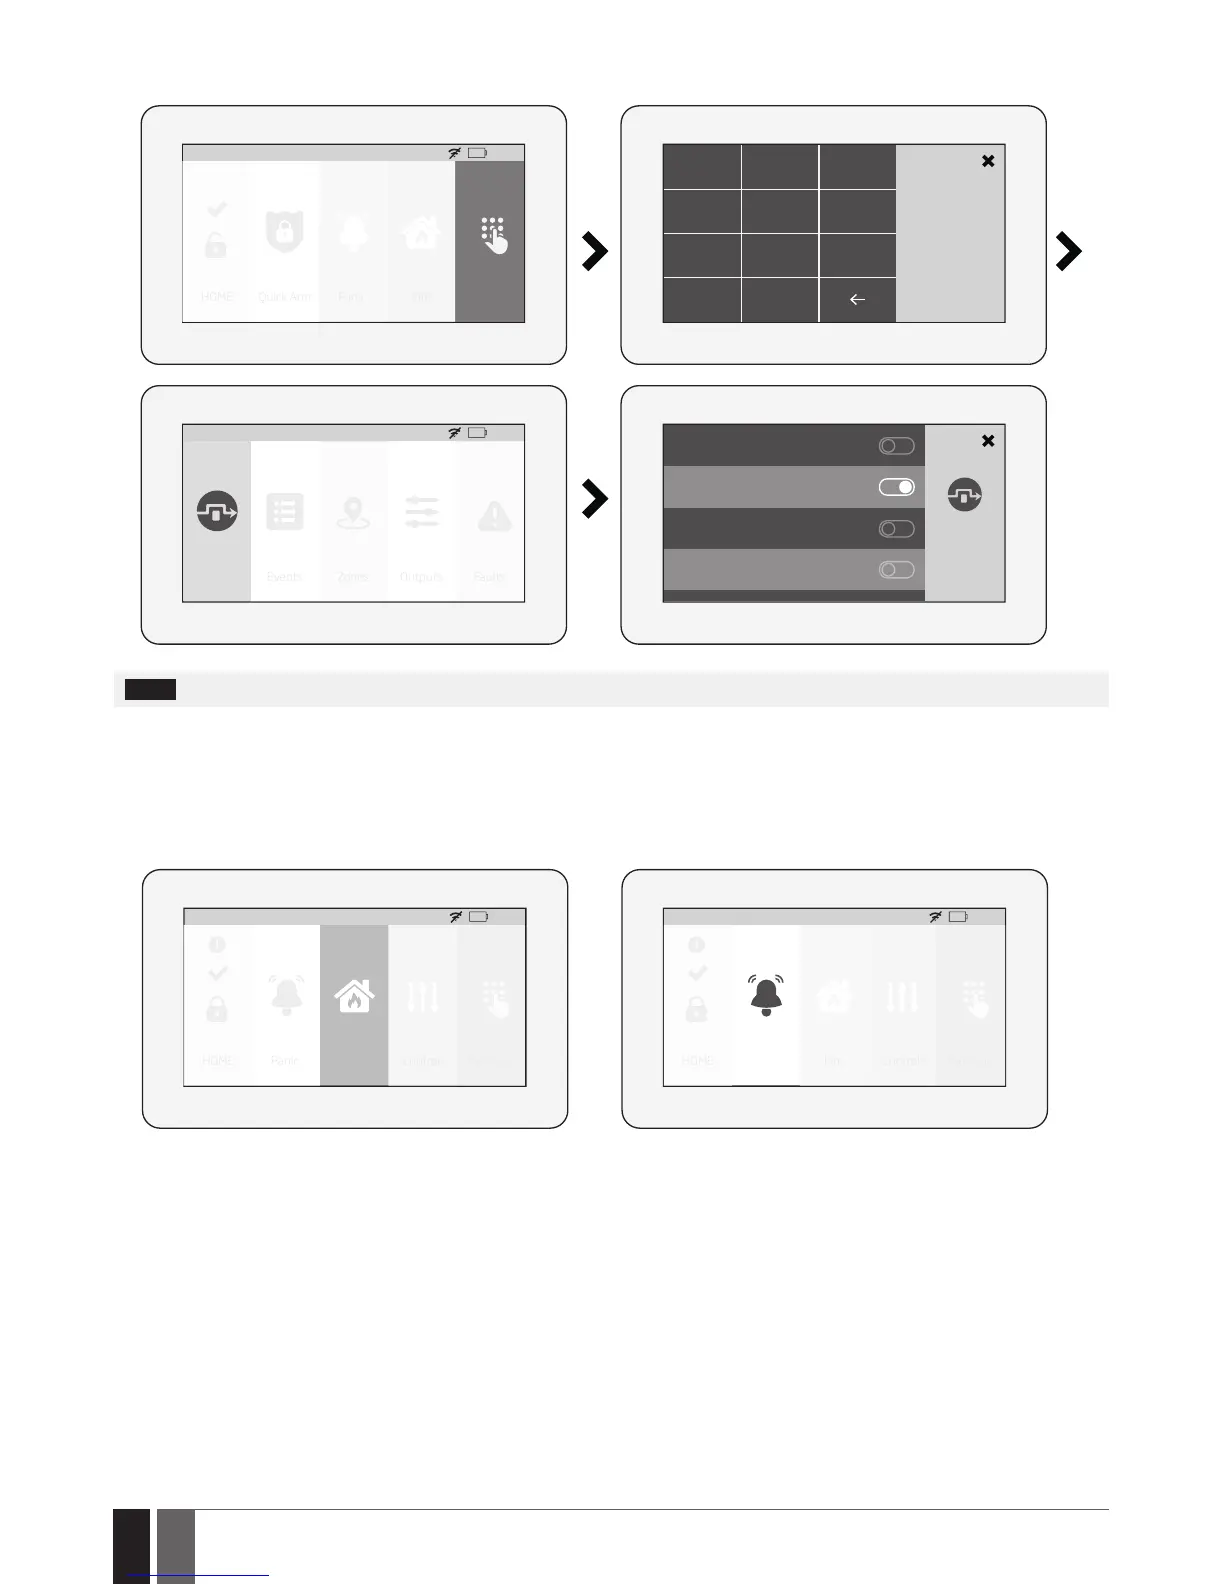
1. To bypass a certain zone and the tamper associated with the zone, please slide the appropriate switch to the right.
2. To activate a bypassed zone, navigate through the aforementioned menu path and slide the bypassed zone’s switch to the left.
HOME: 27
o
C
HOME Quick Arm Fire Settings
01:19
Panic
1 2 3
Master PIN
4
5 6
7
8
C
0
9
Alarm Zone1
HOME
Alarm Zone2
HOME
HOME: 27
o
C
Bypass Events Outputs Faults
01:19
Zones
Alarm Zone4
HOME
EKB5W Police zone
HOME
NOTE: Zones can only be bypassed when the system is not armed.
The Conguration mode must be deactivated, while bypassing and activating a bypassed zone.
19.10.8. How to manually trigger panic or re alarm by EWKB5
In the event of emergency, the user might be able to manually trigger the re and panic alarm using EWKB5. By default the Fire and Panic
buttons are disabled, therefore they must be enabled under the Settings section beforehand.
To trigger re or panic alarm, please touch and hold the Fire or Panic button respectively. This action will be followed by a voice message
“Fire signal has been sent” and “Alarm signal has been sent” respectively. Also, panic or re button trigger silent or re virtual zone. No user/
master code is required for this action.
HOME: 27
o
C
HOME Panic Fire Controls Settings
01:19
!
HOME: 27
o
C
HOME Panic Fire Controls Settings
01:19
!
19.10.9. How to control PGM outputs by EWKB5
Using EWKB5 , user can remotely control the electric appliances linked to the PGM outputs of the associated wireless devices. The available
PGM outputs are listed under the Controls button menu. By default the Controls button is disabled, therefore it must be enabled under the
Advanced section beforehand. Alternatively, the user can enable an individual button for each available PGM output in order to control it
directly from the main menu. The button title reects the PGM output name that can be changed using ELDES Conguration software.
A. To turn a PGM output ON, touch the Controls button (path: Master menu -> Advanced ->Quick menu) in order to access the list of avail-
able PGM outputs and slide the switch of a certain PGM output to the right. Sliding the switch to the left will turn OFF the PGM output. No
code is required for these actions.