EasyManuals Logo

Epson RC700 Series User Manual

Epson RC700 Series
316 pages
To Next Page IconTo Next Page
To Previous Page IconTo Previous Page
Page #161 background imageLoading...
Page #161 background image
Maintenance 7. Maintenance Parts Replacement Procedures
RC700 / RC700-A Rev.23 149
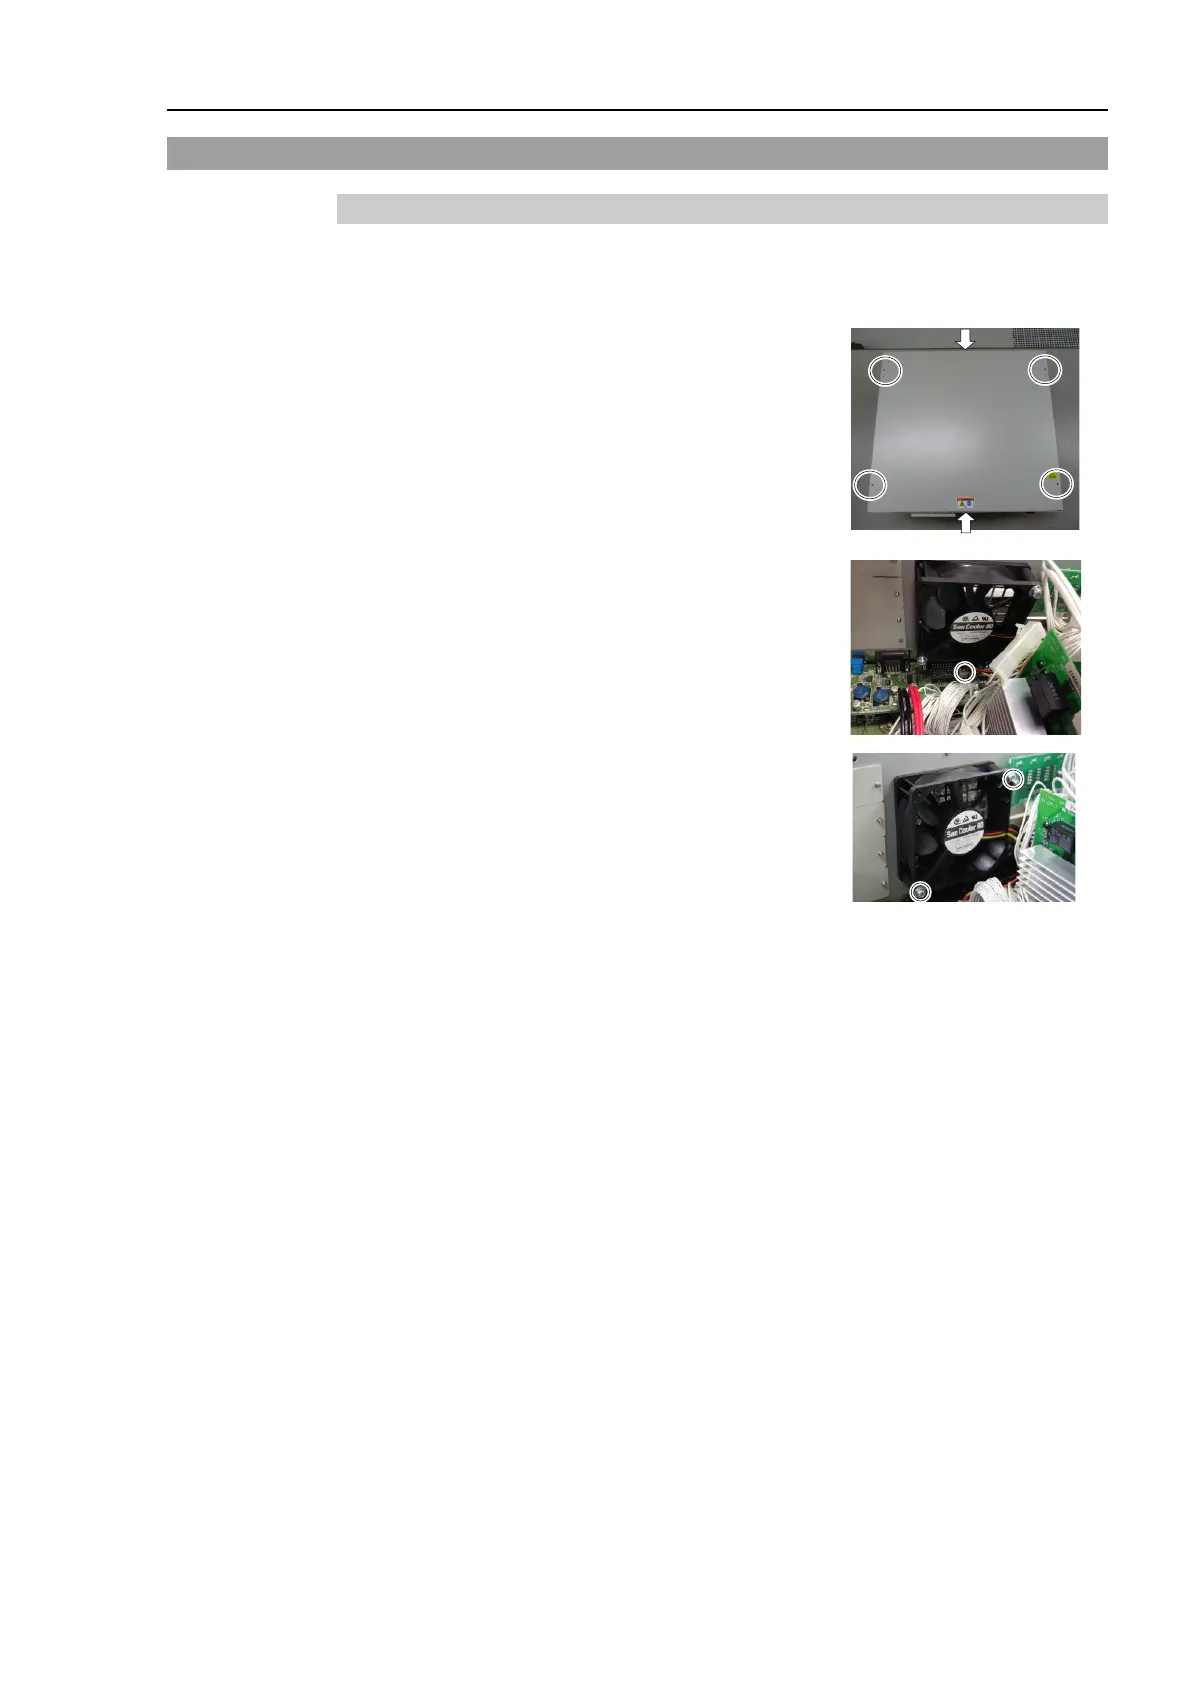
7.2 Fan
7.2.1 Front Fan
Front Fan
Removal
(1)
Turn OFF the Controller.
(2)
Disconnect the power plug.
(3)
Remove the Top Cover. (Mounting screw
×6)
(4)
Remove the fan cable from the DMB
-SUB.
Connector: CN22
(5)
Remove the screws of the fan (
×2).
(6)
Remove the fan.
Front
Fan
Installation
(1)
Mount a new fan with two screws.
At
this point, tighten the screws diagonally. Be careful of the mounting direction.
(2)
Connect the fan cables to the DMB
-SUB.
Connector: CN22
(3)
Mount
the Top Panel. (Mounting screw ×6)
(4)
Connect the power plug
. Turn ON the Controller and make sure that the
Controller
starts properly without any vibration or abnormal noise.
* Pay attention to the right and wrong sides of the fan when installing it.

Table of Contents

Other manuals for Epson RC700 Series

Questions and Answers:

Question and Answer IconNeed help?

Do you have a question about the Epson RC700 Series and is the answer not in the manual?

Epson RC700 Series Specifications

General IconGeneral
ModelRC700 series
CategoryController
Programming LanguageSPEL+
Safety StandardISO 10218-1
TypeRobot Controller
Communication InterfaceEthernet, RS-232, USB
Operating Temperature0°C to 45°C (32°F to 113°F)
Humidity20% to 80% (non-condensing)
Number of controllable robots4

Related product manuals