Setup & Operation 5. Development PC Connection USB Port
RC700 / RC700-A Rev.23 41
- When the development PC and the Controller are connected, do not insert or remove
other USB devices from the development PC. Connection with the Controller may
be lost.
5.3 PC and Controller Connection Using
Development PC Connection USB Port
Connection of the development PC and the Controller is indicated.
(1) Make sure that software EPSON RC+ 7.0 is installed to the Controller connected to
the development PC.
(Install the software when it is not installed.)
(2) Connect the development PC and the Controller using a USB cable.
(3) Turn ON the Controller.
(4) Start EPSON RC+ 7.0.
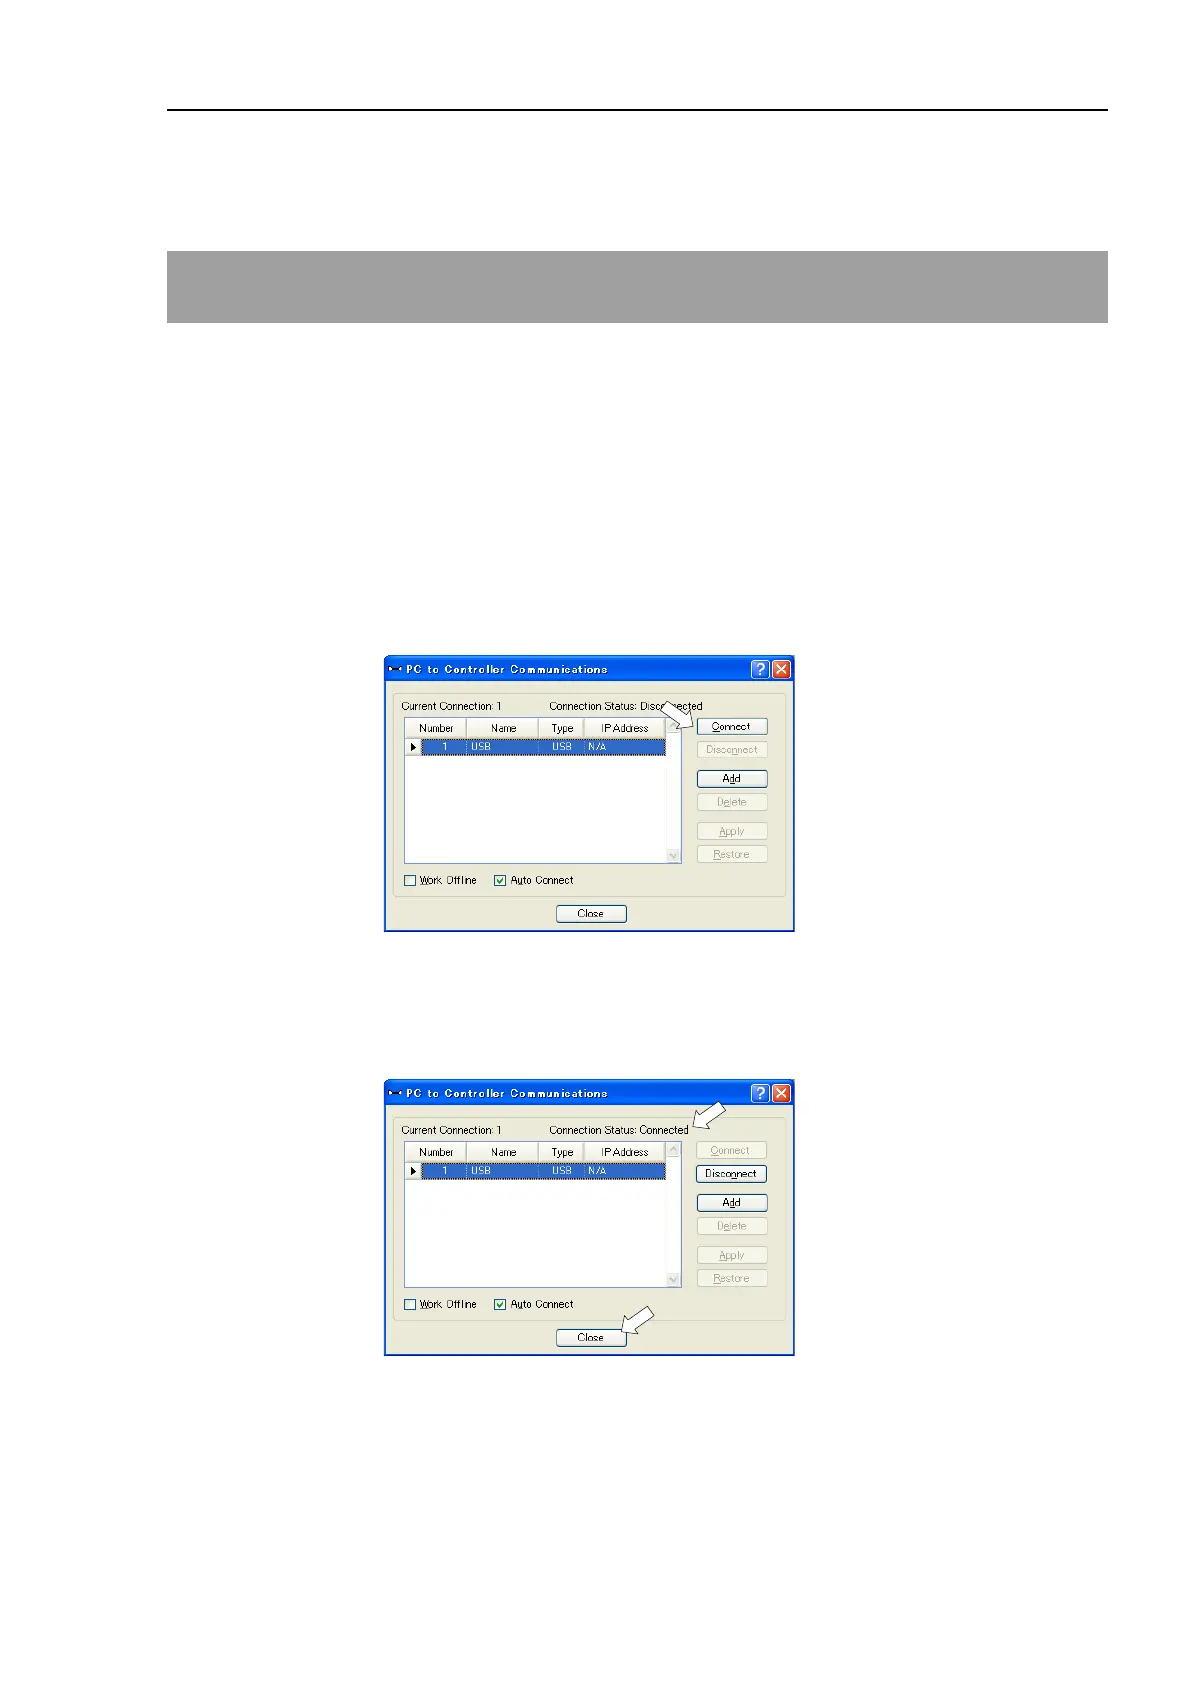
(5) Select the EPSON RC+ 7.0 menu-[Setup]-[PC to Controller Communications] to
display the [PC to Controller Communications] dialog.
(6) Select “No.1 USB” and click the <Connect> button.
(7) After the development PC and the Controller connection has completed, “Connected”
is displayed at [Connection status]. Make sure that “Connected” is displayed and
click the <Close> button to close the [PC to Controller Communications] dialog.
The connection between the development PC and the Controller is completed. Now the
robot system can be used from EPSON RC+ 7.0.

 Loading...


