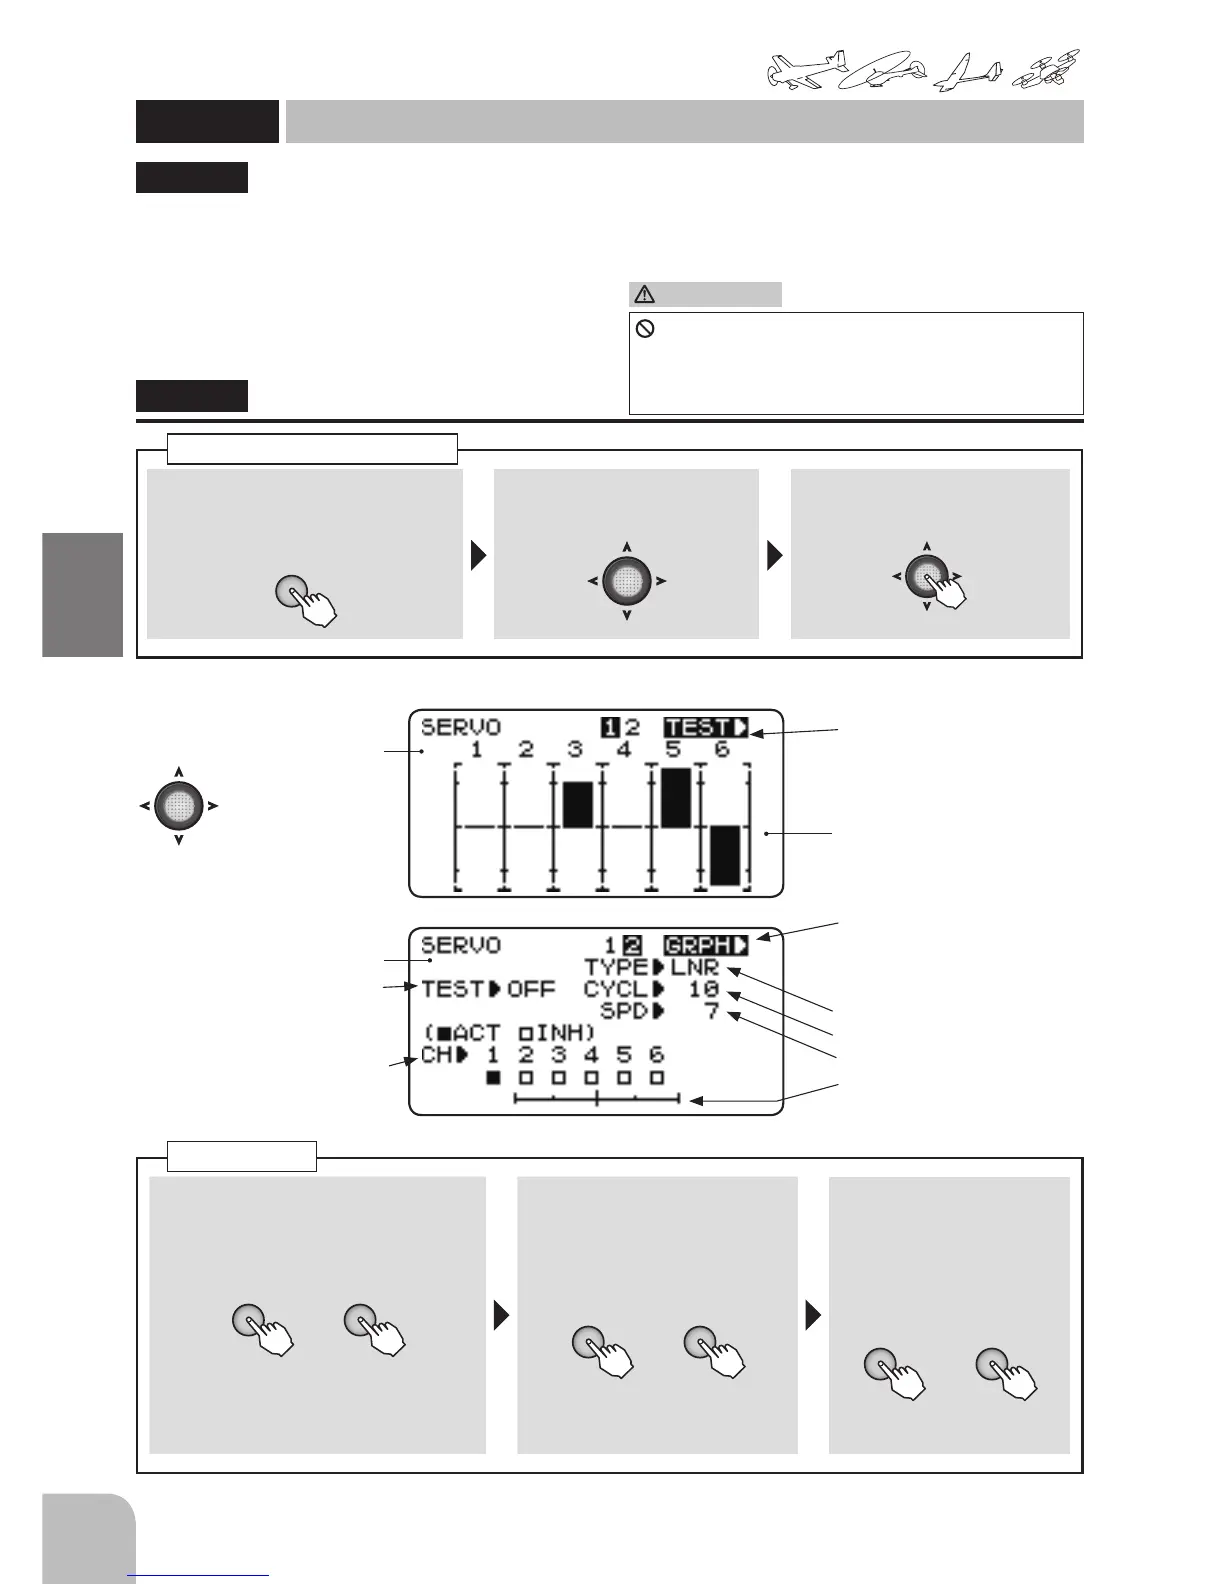
① Call the menu screen from the
home screen by pressing the + key
for 1 second.
+
② Select
from the menu with the Jog
key.
③ Open the setting screen by
pressing the Jog key.
(1 second)
Calling the setting screen
The servo display/servo test function displays the
CH1 to CH6 servo output bar graph and tests servo
operation.
●The servo display function can be used for a simple
operation check of such functions as the mixing
function.
●When the servo test function is turned on, the servo
moves to the left and right at the set period. A
variable speed LNR (linear) mode or xed speed
JMP (jump) mode can be selected. This can be
used to check the servo, etc. Operation ON/OFF
can also be selected for each channel.
"SERVO"
SERVO
Servo monitor / Servo test
(Common)
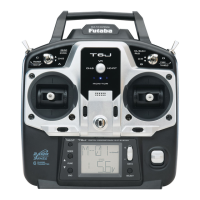
(Servo Monitor)
● Select the setting item
with the Jog key.
Switching to the servo test
screen
● Switch the screen by selecting
TEST and operating the jog
key to the left and right.
● The servo operating position
of each channel is displayed
on a bar graph.
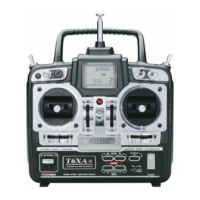
(Servo Test)
Servo test ON/OFF
Channel Select
Screen change
● Where "GRPH" is chosen, a
Jog key is pressed in right or
left.
Type Select
Cycle Select
Speed setting
● Operation of a servo test
■
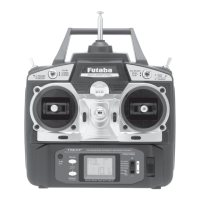
Type/cycle/speed setting
① Select the setting item (TYPE, CYCL,
SPD) with the Jog key and set the item
by pressing the + key or – key.
+ -
or
(Range / Default)
TYPE:LNR, JMP / LNR
CYCL:1 ~ 100 / 10(full speed at 1)
SPD:1 ~ 100 / 7(full speed at 100)
■ Channel selection
② Select the channel you want to
test with the Jog key and select
ACT/INH by pressing the + key
or – key.
+ -
or
Selection range:ACT, INH
Default:INH(only CH1 is ACT)
■ Servo test start/stop
③ Select the "TEST" item
with the Jog key and
start/stop the servo test
by pressing the + key or –
key.
+ -
or
Selection range:ON, OFF
Default:OFF
Servo test
Using the servo test will move the servos to
their full throw. Do not use this with linkages
installed. Using it may damage the servo and
linkage.