NetworX Version 3 Installation Manual
175
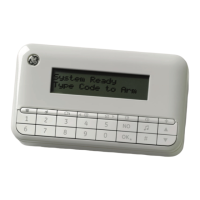
4. Insert the batteries into the new wireless keypad. It starts the keypad initialization
process.
Note: If the wireless keypad is not brand new (i.e. it was already used with another system), it must be re-
programmed (flashed) first to erase any previous keypad settings, otherwise it will not initialize the learning
mode (see Chapter B11 Updating firmware on page
255).
5. On the new keypad, select a language from the list with the ½¾ keys and press OK.
6. Select default settings from the Load Country Defaults list with the ½¾ keys and press
OK.
7. At the Partition Number prompt, type the partition number and press OK.
8. At the Keypad Number prompt, type the keypad number and press OK.
9. At the SysID-KID1-KID2 prompt, 3 values need to be entered:
• SysID: this value represents the System ID or a 3 digit code which should be unique
for this panel.
• KID1: this value represents Keypad ID 1 and contains the first 3 digits of the code
which should be unique for this wireless keypad.
• KID2: this value represents Keypad ID 2 and contains the last 3 digits of the code
which should be unique for this wireless keypad. Each of these three values must
range from 001 to 255. If any typed value is incorrect, the keypad displays the blank
SysID-KID1-KID2 prompt again. The combination of unique panel and wireless
keypad identifiers is required in order a wireless keypad is to communicate with the
appropriate panel only. In case multiple wireless keypads are used on the same panel,
each wireless keypad should have different KID1 and KID2 values.
10. At the EncKey prompt, enter a 24-digit encryption key and press OK. This encryption key
is to secure the wireless communication link between the panel and wireless keypad(s)
and is unique for each panel. Any 24-digit value can be entered. The same encryption key
must be entered when successive wireless keypads are enrolled.
11. The new keypad communicates with the panel and sends data entered in steps 5 to 10.
The Learn-in Mode message displays briefly.
12. The new keypad is learned-in and displays the Programming in Progress message. To
clear this message you have to exit programming mode on the first keypad.
Important: You should not program zero-only strings (for example, "000") as values for SysID, KID1, KID2 nor
Encryption Key, as it will make the keypad non-operational.
Note: If the learned-in keypad's configuration stored in the RF receiver, differs from the actual keypad's configuration,
the RF receiver will start the configuration copying process. It takes a couple of seconds, and during this
process the keypad displays the "Copying" message. During this operation, due to an intensive radio
communication, you should not perform any additional actions on other wireless keypads.
Deleting wireless keypads
You can delete wireless keypads from the system. The following example deletes the wireless
keypad number 2.
1. Using the other keypad, enter the programming mode, navigate with the ½¾ keys to RF
Receivers and press OK.
2. Select the RF Receiver 32 and press OK.

 Loading...