GE RAFT VOLUSON™ P8/VOLUSON™P6
DIRECTION 5775469, R
EVISION 3 DRAFT (JULY 19, 2018) BASIC SERVICE MANUAL
3-48 Section 3-7 - Printer Installation
3-7-6 Printer Installation manually
1.) Press the UTILITIES key on the control console.
2.) In the “Utilities” menu select SETUP
button to invoke the setup desktop on the screen.
3.) On the right side of the screen select CONNECTIVITY
and then click on the PERIPHERALS tab.
4.) Click the ADD PRINTER
button.
Please read the displayed message carefully and click YES
if you have skills to do this.
5.) Click the NEXT
button to start the Add Printer Wizard.
6.) After installation, close all open windows, select Save & Exit and restart the system(turn off and on
the system).
7.) Verify correct printer settings; see
8.) Assign the printer to the remote keys P1,P2 and/or P3; see Section 3-7-8-1 on page 3-54.
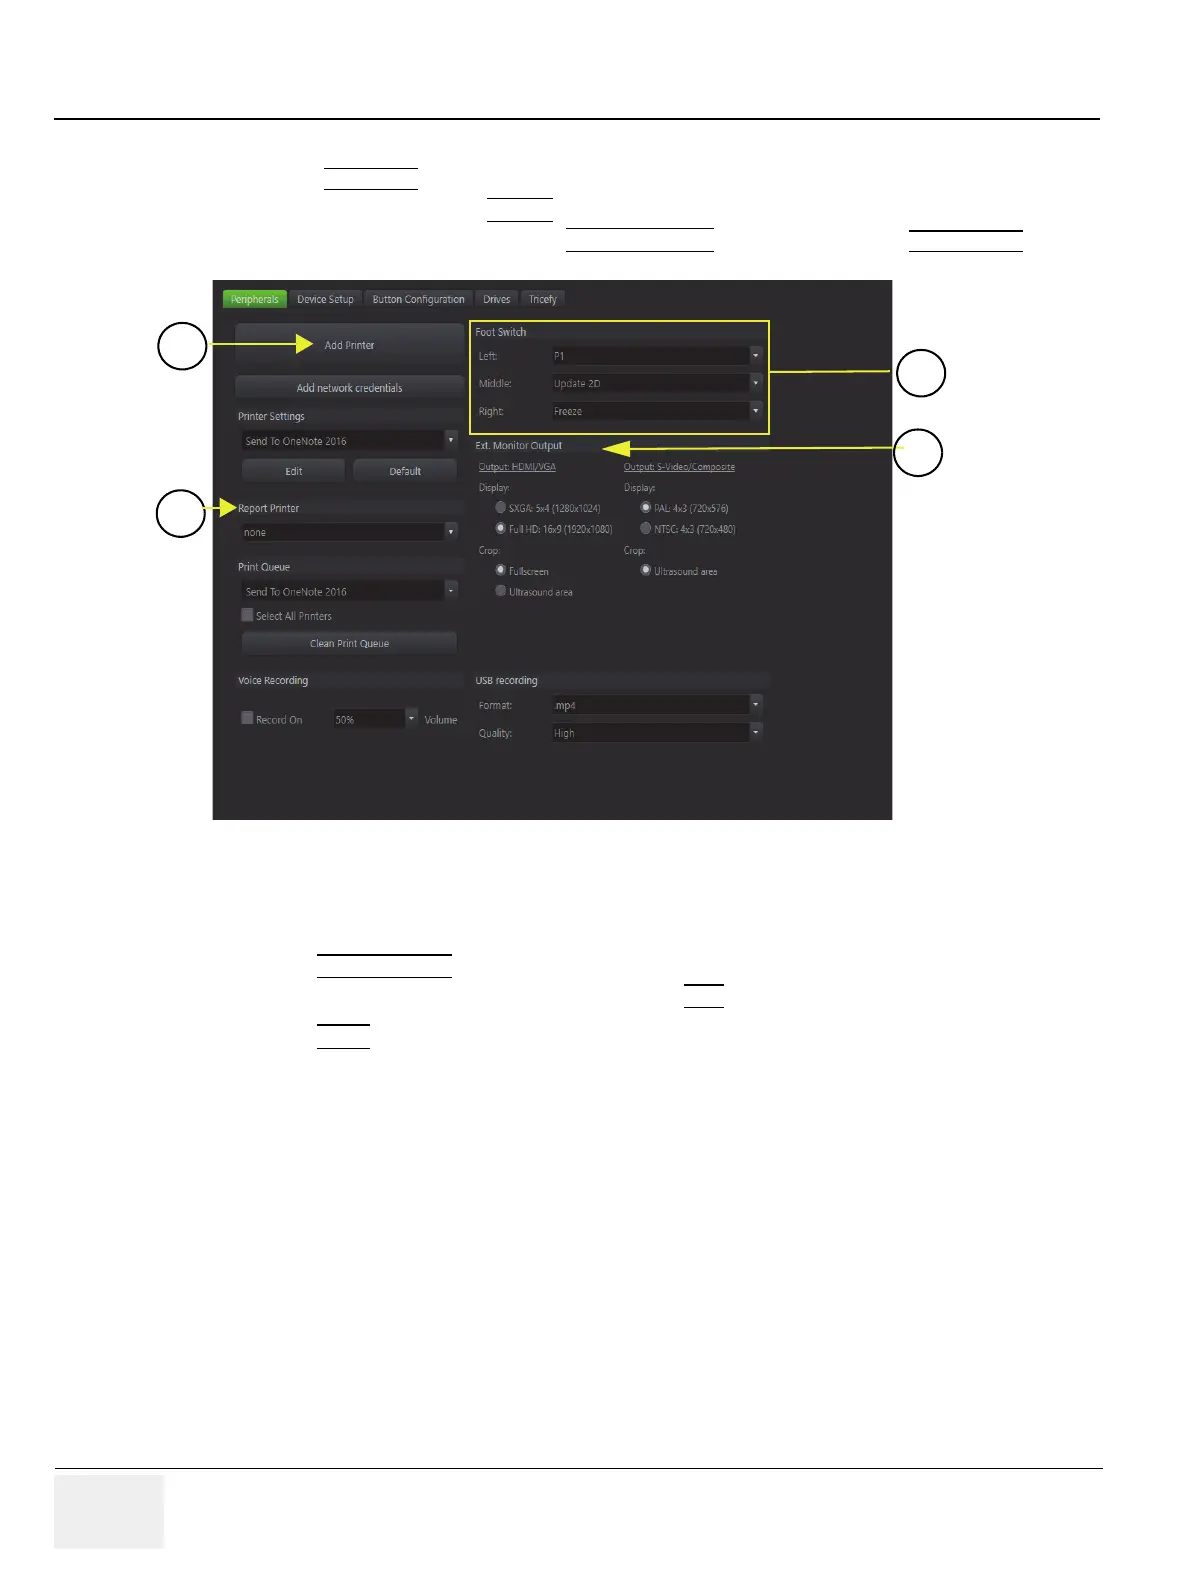
Figure 3-48 System Setup - Connectivity - PERIPHERALS page
1. Add Printer button 3. External Monitor Output selection
2. Footswitch Remote Control 4. Report Printer selection