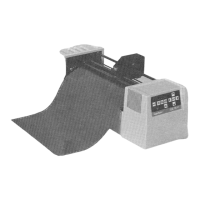
16 Chapter 1, Installation
rollers, you will feel and hear it click into place. The right pressure
roller's movement is limited so that it can never be positioned
incorrectly. Always make sure that both pressure rollers are at least
0.2" (5 mm) inside the edge of the material. Do not let the rollers run on
the very edge of the material.
Do not use the marker lines to align a roll of material! They are for use with cut-
sheets only! Rolls can only be correctly installed using the EQUAL TENSION
METHOD!
If you are using a FasTrack 1000 or larger, you can use either two or three
pressure rollers, depending on the width of the material used. When not using
the left pressure roller (i.e. when loading material of a small width), the left
pressure roller should be placed at the extreme left of the cutter (not on top of a
drive roller).
The middle pressure roller should always be placed on top of a drive roller.
6. Hold the front edge of the material in the middle with one hand and
with the other hand, the roll itself. As you are holding the roll firmly in
position, pull the front edge of the material forward so that there is an
even tension across the whole width of the roll (= Equal Tension
method.)
The material must be rolled tightly and not telescoped.
7. Adjust the position of the guiding flanges so that they are just
alongside the roll of material, but not directly against it.
8. Close the protective cover.
9. This action starts the material loading sequence, during which the
cutter shuffles a pre-set length of material. The material will be shuffled
back and forth allowing you to make sure the material moves easily
through the cutter. The shuffle length is factory-set to 40" (1 m), but
you can adjust the setting if desired. (See
Page Length,
page 27, in
Chapter 2).
10. After the material loading sequence, the tool head is parked at the
origin position and the cutter is
online
, ready to receive data from the
host computer.