50 Chapter 4, Fine Tuning the Cutter
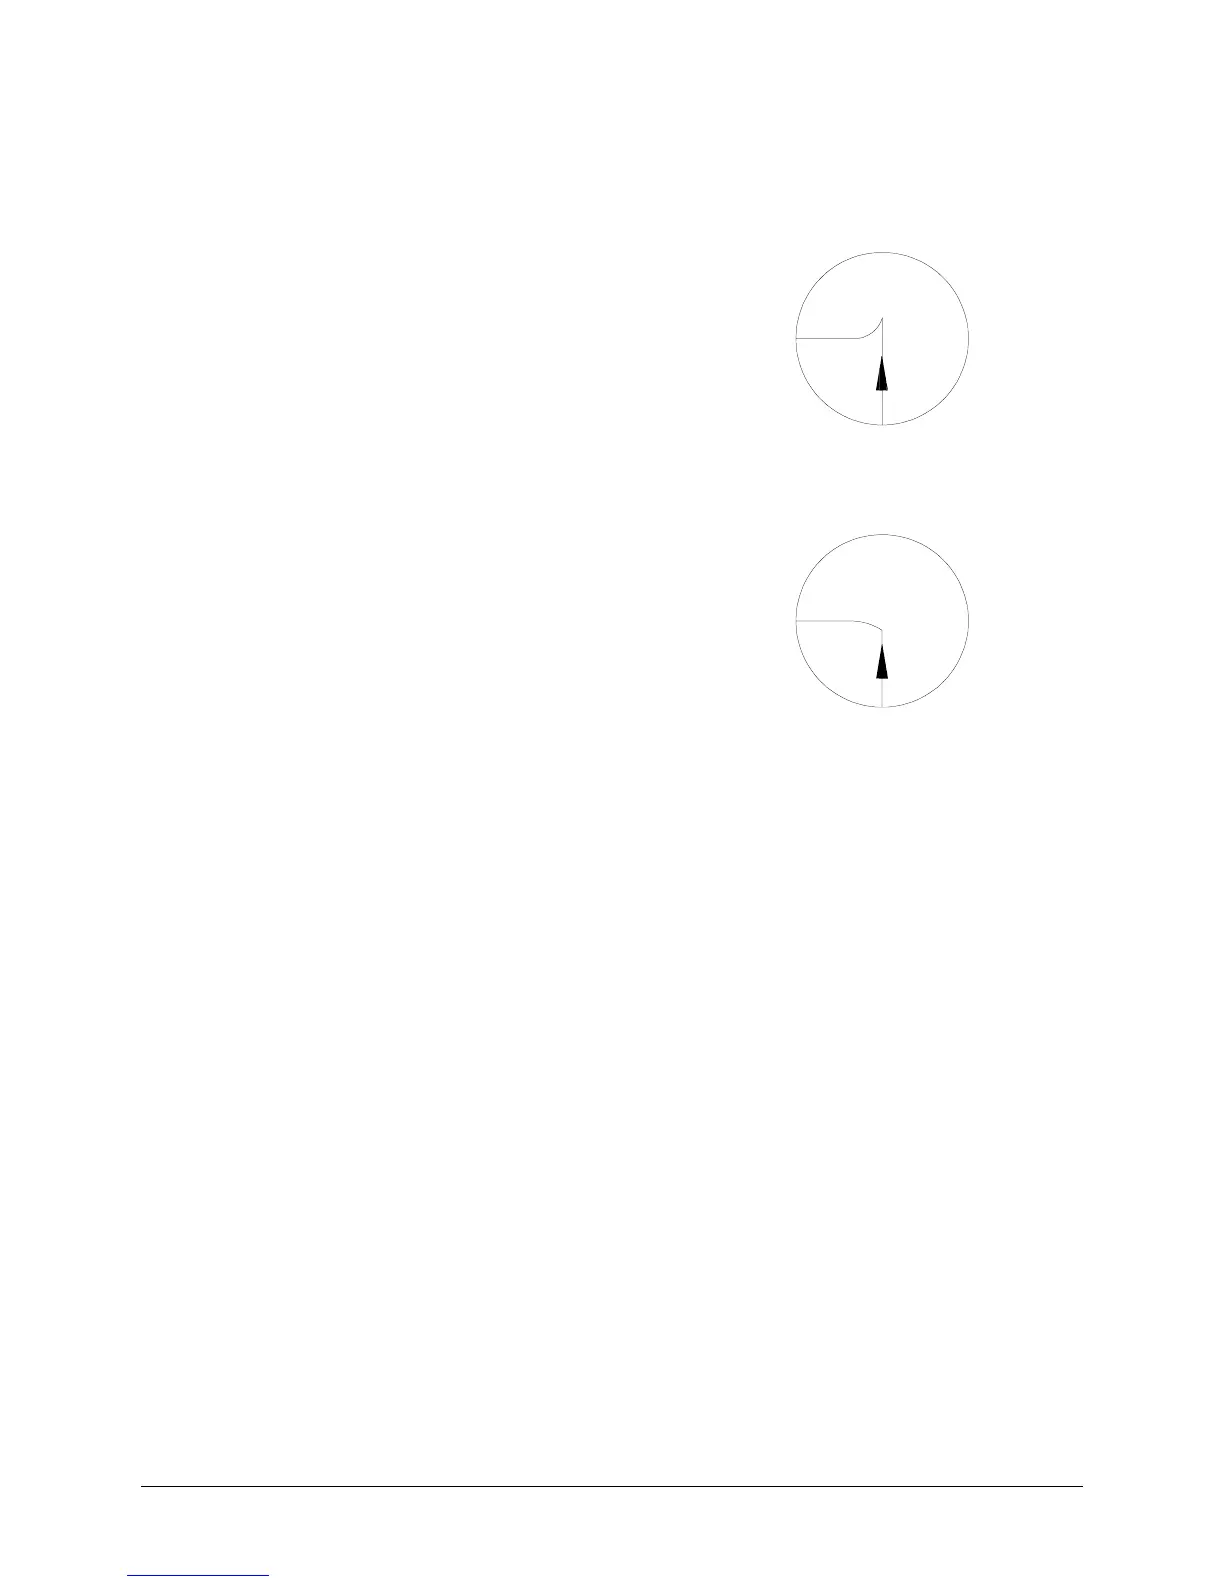
The diagrams below illustrate the results of incorrectly measured offsets.
Pointed corners: The offset is larger
than the actual knife offset.
In this case, a square corner will look like
the example to the right.
The cutting direction is indicated by the
arrow. The corners are not well formed
because the cutter cuts too far beyond the
corner.
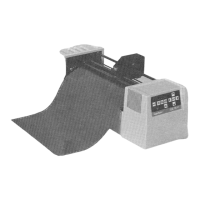
Rounded corners: The Offset is smaller
than the actual knife offset.
In this case, a square corner will look like
the example to the right.
The cutting direction is indicated by the
arrow. The corners are not well formed
because the cutter did not cut far enough
before turning the corner.
ADJUSTING THE OFFSET
To obtain good quality, you should perform this routine each time you
change cutting blades or switch to another type of material.
1. Make sure the cutter is switched on.
2. Load a sheet of material about 10" (25 cm) wide.
3. Select a tool that is defined as a KNIFE (factory default: TOOL 1 is
Knife 1, TOOL 2 is Knife 2).
If you select a TOOL that is defined as a PEN (factory default: TOOL 3
is Pen 1, TOOL 4 is Pen 2), the cutter will not react, as this function is
only active for knife settings.
4. Switch the cutter
offline
by pressing the ONLINE key. The ONLINE
LED indicator should then go off.
5. Press the ENTER and OFFSET (
➢
) keys simultaneously. This will put
the cutter into the OFFSET test mode.