6 – 2
6.2 Specifying the Effective Cutting/Plotting AREA
The AREA function enables you to define the effective area within which cutting or plotting will be per-
formed by specifying the L.L. (Lower Left) and U.R. (Upper Right) corners of the desired area. Cutting or
plotting will not be performed outside of the specified AREA.
CAUTION
As soon as you display this function’s menu (shown in Step (4), the pen carriage immediately moves
the current position of the origin point.
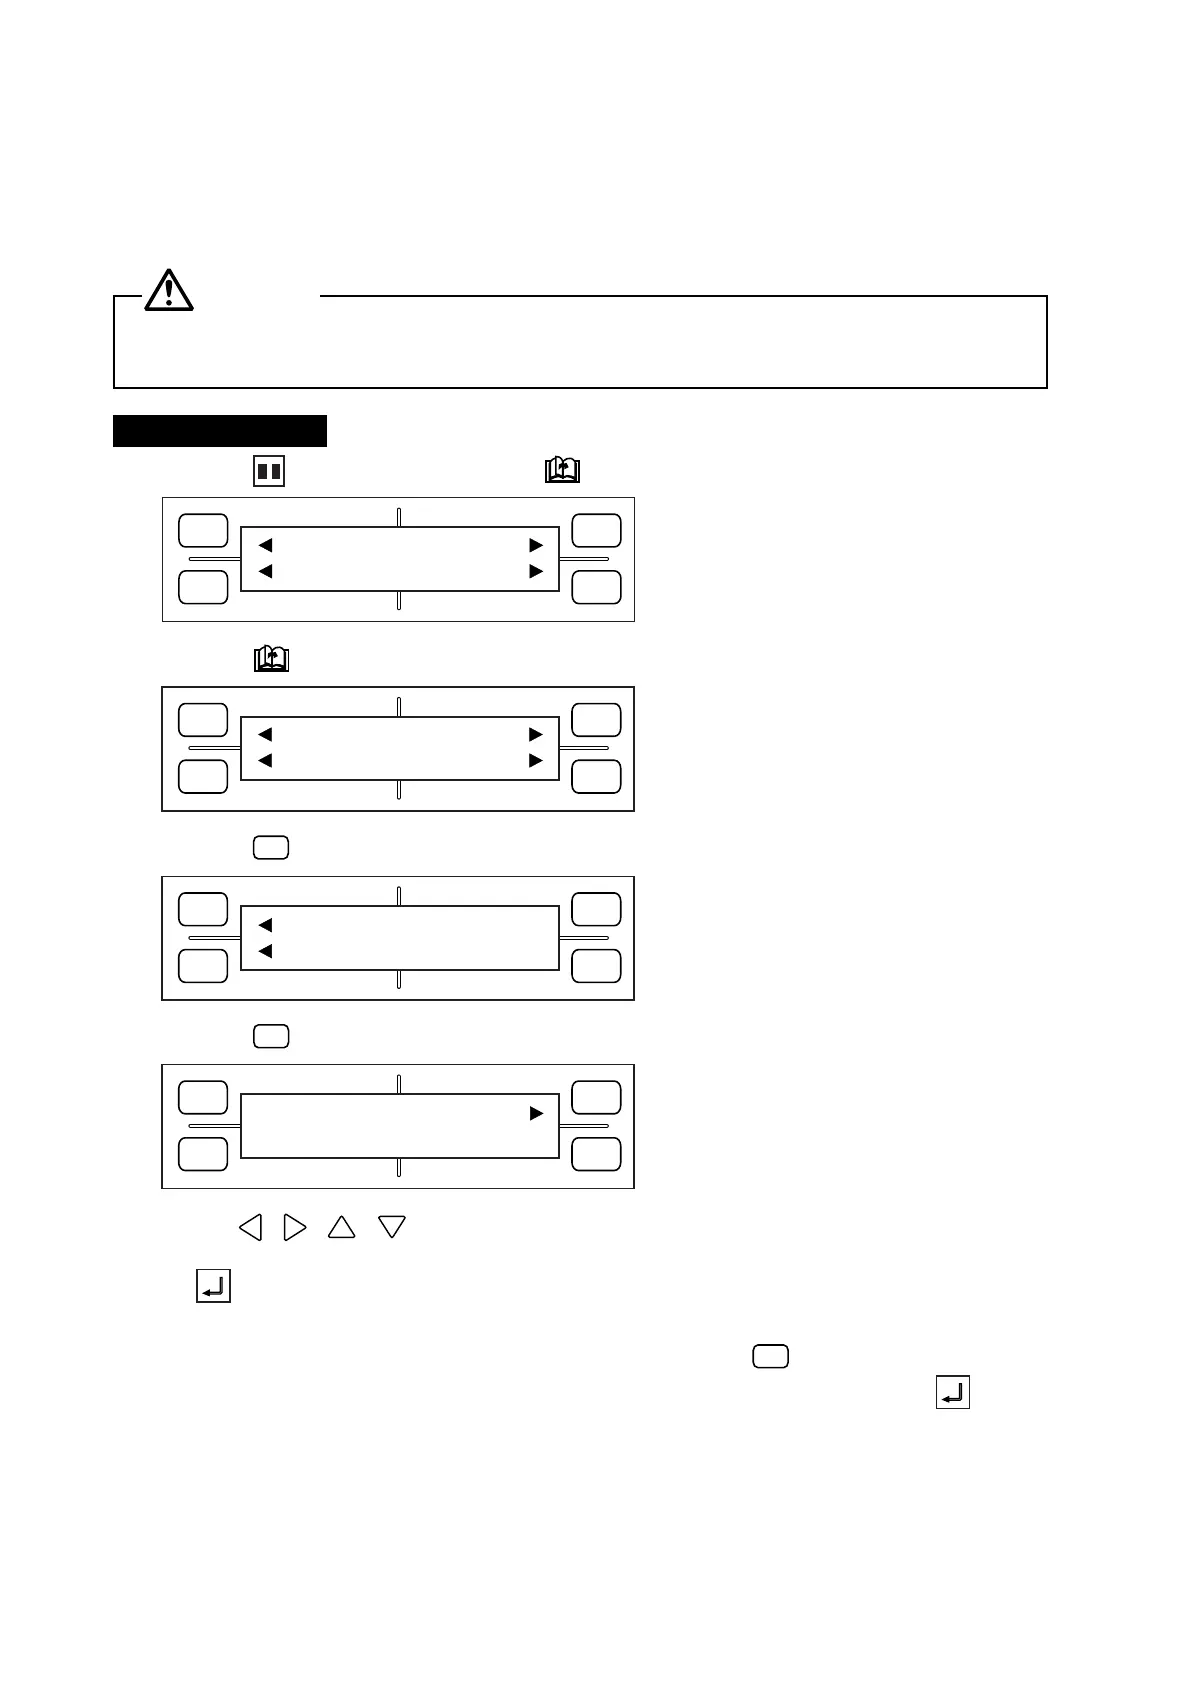
Setting Procedure
(1) Press the PAUSE key, then press the NEXT PAGE key until the menu below appears.
(2) Press the NEXT PAGE key until the menu below appears.
(3) Press the
F2
(FILM) key to display the menu below.
(4) Press the
F2
(AREA) key to display the menu below.
(5) Use the , , , POSITION keys to move the pen carriage to the lower left corner of the
desired area with respect to the current origin position. When you are satisfied with the position, press
the ENTER key to register your L.L. setting. At such time, the coordinate values shown represent
the distance from the current origin position to the current position of the pen carriage.
If the current L.L. position does not need to be changed, press the
F3
(DEFAULT) key to make the
pen carriage’s current position the default L.L. point. In this case, you need not press the ENTER
key.
FORCE
SPEED
OFFSET
QUALITY
F1 F3
F4
F2
MARK PEN U/D
CLEAR SELECT PEN
FORCE
SPEED
OFFSET
QUALITY
F1 F3
F4
F2
INTERFACE FUNCTION
FILM PEN WIDTH
FORCE
SPEED
OFFSET
QUALITY
F1 F3
F4
F2
ORIGIN POINT
AREA
FORCE
SPEED
OFFSET
QUALITY
F1 F3
F4
F2
SET L.L. DEFAULT
X= 0 Y= 0