WR1000-UM-251–01–9380 3 – 33
3. DISASSEMBLY AND REASSEMBLY
3.6 Replacing the Main Control Board
The procedure for replacing the main control board varies slightly with the WR1000’s channel configuration (8
or 16 channels).
16-Channel Model
The 16-channel model is equipped with the two main control boards listed below.
• A main control board for controlling Channels 1 through 8 and various functions.
• A main control board for controlling Channels 9 through 16.
8-Channel Model
The 8-channel model is equipped with the single main control board listed below.
• A main control board for controlling Channels 1 through 8 and various functions.
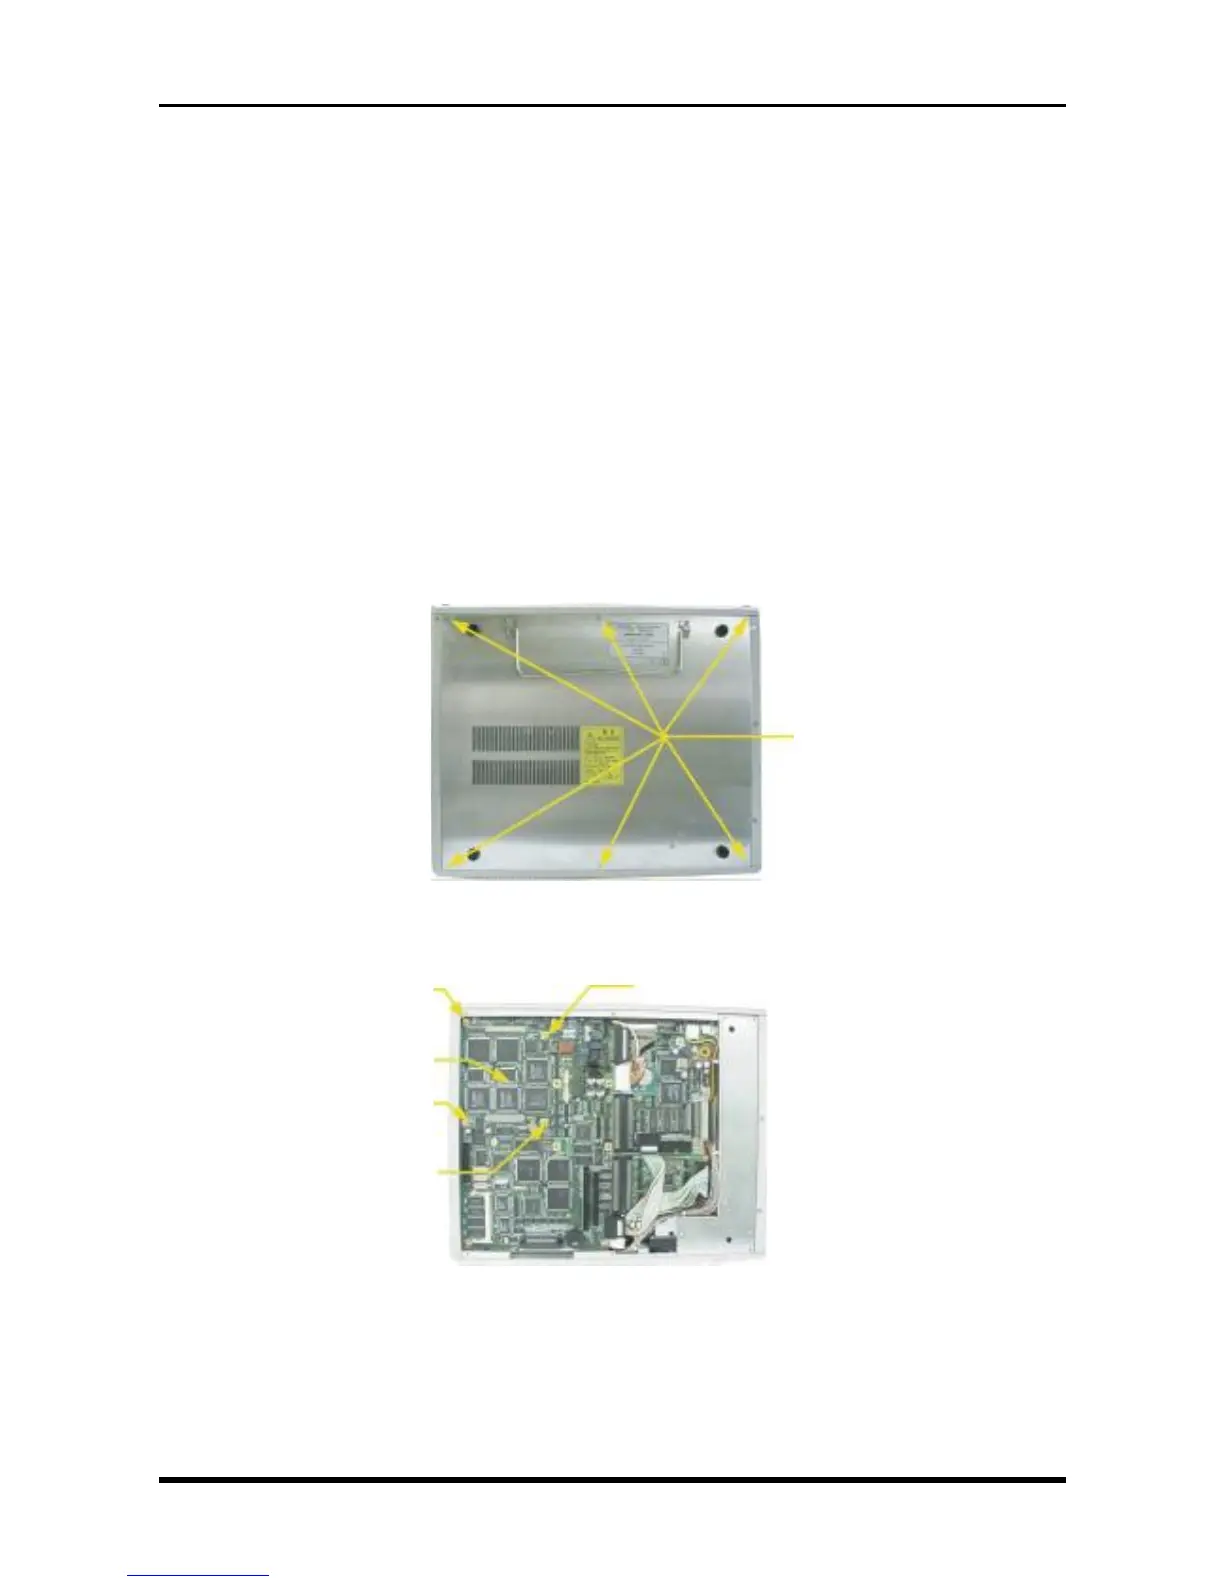
3.6.1 Replacing the 16-CH Control Board (16-Channel Model only)
(1) Unfasten the six screws, then remove the bottom plate.
Fig. 3-6-1
(2) Unfasten the four screws, then replace the 16-channel control board.
Fig. 3-6-2
M3L5 countersunk-head
screws
M3L4 binding-head screw
16-CH control board
M3L4 binding-head screw
M3L4 binding-head screw
M3L4 binding-head screw