32 PC45 Series Printer User Guide
Run the RFID Calibration Wizard
Run the RFID calibration wizard to determine the best Tag Position and Output
Power (UHF inlays only) for RFID media.
Note: After you determine the correct RFID media settings, you can save these settings to a
printer profile and load the profile when you need to print on the specific RFID media.
1. Make sure the media type and media length are properly configured.
2. From the Main Menu, select Wizards > Calibration > RFID.
3. To enable the RFID module, select Enable.
4. Load the RFID media and tap OK.
When the calibration is complete, the printer displays the RFID Tag Position and
Output Power (UHF inlays only).
Calculate the RFID Tag Position
You can perform a manual calculation to come up with an estimate of the RFID Tag
Position. Because this value is an estimate, you may need to slightly adjust the
calculated value to achieve the best results.
1. Make sure Label Top and Label Rest are set to 0.
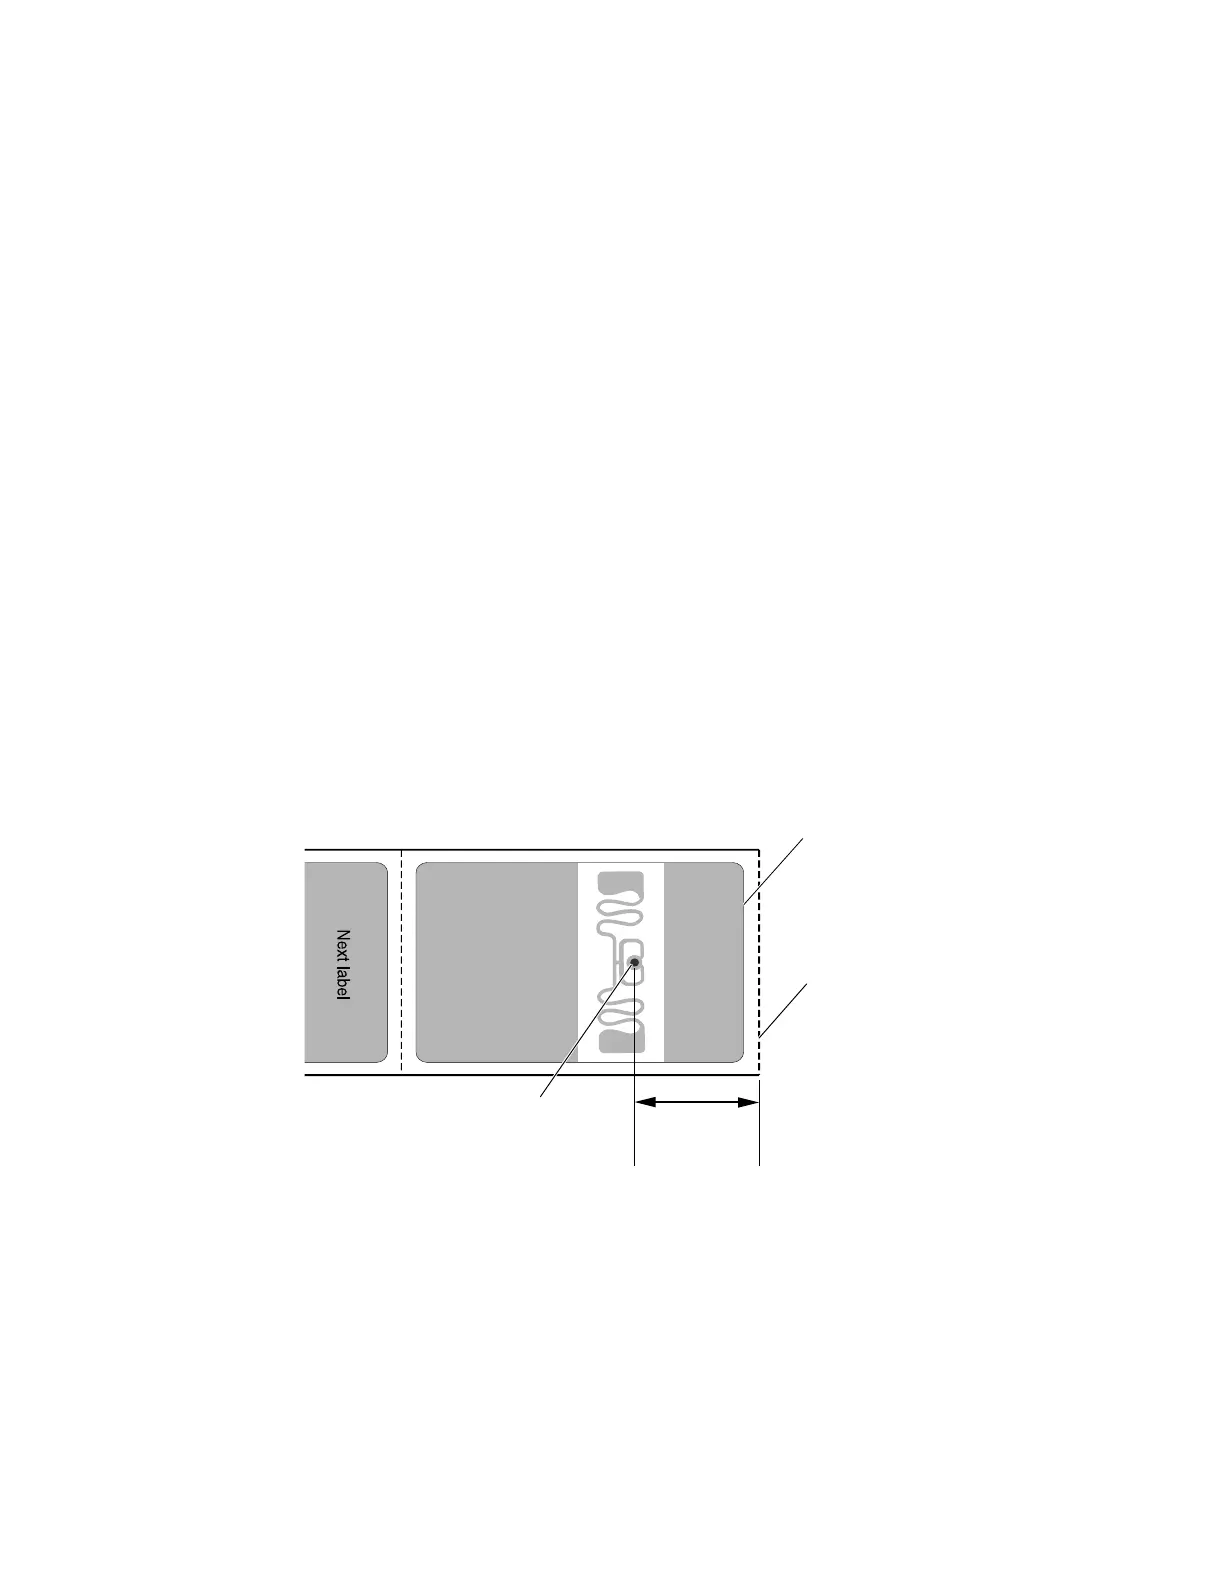
2. Measure the yChip value, which is the distance between the RFID chip and the
media edge aligned with the tear bar.
3. The yAntDist for the printers are:
a. 244 dots, 30.5mm, 1.20in for PC45d.
b. 542 dots, 31.5mm, 1.24in for PC45t.
4. Use this formula to calculate the estimated Tag Position:
Rear antenna: TagPosition=yChip - yAntDist
Label top
of form
Media edge
(aligned with
tear bar)
yChip
RFID chip

 Loading...