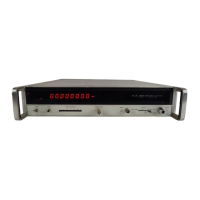
Model 5340A
Maintenance and Service
SECTION V
MAINTENANCE AND SERVICE
5
-
1.
INTRODUCTION
5
-
2. This section contains maintenance and service information including
a
table of assemblies,
recommended test equipment, in
-
cabinet performance check, troubleshooting, and adjustment
procedures.
5
-
3. ASSEMBLY DESIGNATIONS
5
-
4. Table 5
-
1 lists the designation, nomenclature, and Hewlett
-
Packard part number of
assemblies used in the
5340A.
5
-
5.
TEST EQUIPMENT
5
-
6. Table 5
-
2 lists test equipment recommended for maintaining and checking the performance
of the counter. Test equipment having equivalent characteristics may be substituted for the
equipment listed.
5
-
7.
POZlDRlV SCREWDRIVERS
5
-
8. Pozidriv screws are used in
this
instrument.
To
avoid damage to the screw slots,
a
pozidriv
screwdriver (HP Part Number 8710
-
0900) should be used.
5
-
9..
ADJUSTMENTS AND IN-CABINET PERFORMANCE CHECK
5
-
10.
Figure 5
-
2 contains adjustment procedures for the 5340A. Adjustments should be made
when the necessity
is
established by the performance test or when components are replaced that
affect an adjustment. If all adjustments are to be performed, they should be performed in the
order listed. Table 5
-
3 contains the in
-
cabinet performance check.
5
-
11.
BLOWER FAN CONFIGURATION
5
-
12. The cooling fan in the 5340A
is
an exhaust fan, not an intake type. The fan discharges
air
out
of
the rear of the instrument. If the flow of
air
was reversed, the heat generated by the fan
would preheat the intake air and tend to raise the internal temperature of the instrument.
5
-
13.
K05-5340A DESCRIPTION
5
-
14. The K05-5340A Feed Forward Simulator or equivalent
is
required to adjust A8 and A9.
During the adjustment procedure, A7 is removed and the K05-5340A
is
installed in XA7. The
K05-5340A provides
a
variable simulated feed
-
forward signal to A10 and A12. The K05-5340A
Feed
-
Forward Simulator can be purchased through your local Hewlett
-
Packard Sales and
Service Office. An equivalent of the
K05-5340A can be fabricated with the following parts and
schematic diagram (see Fi
uke 5
-
1).
5
-
15.
pin
5.
F
An alternate m'ethod
is
to connect
a
0
-
15V dc power supply from XA7 pin 10 to XA7
-
j
5-
1

 Loading...